Manage the files using File Explorer
CHAI™ maintains the list of files required for the process/application generated from the discovery. users can view/update this list of required files.
Notes: Original data of discovery process is immutable, Create a Copy, using the Create Copy option for customization work.
-
Click on
Transformin the menu on the left side .- Page is displayed in the image below.
- Page is displayed in the image below.
-
Select the profile you want to view/update the list of files. Click on
Containerizebutton as shown in the image below.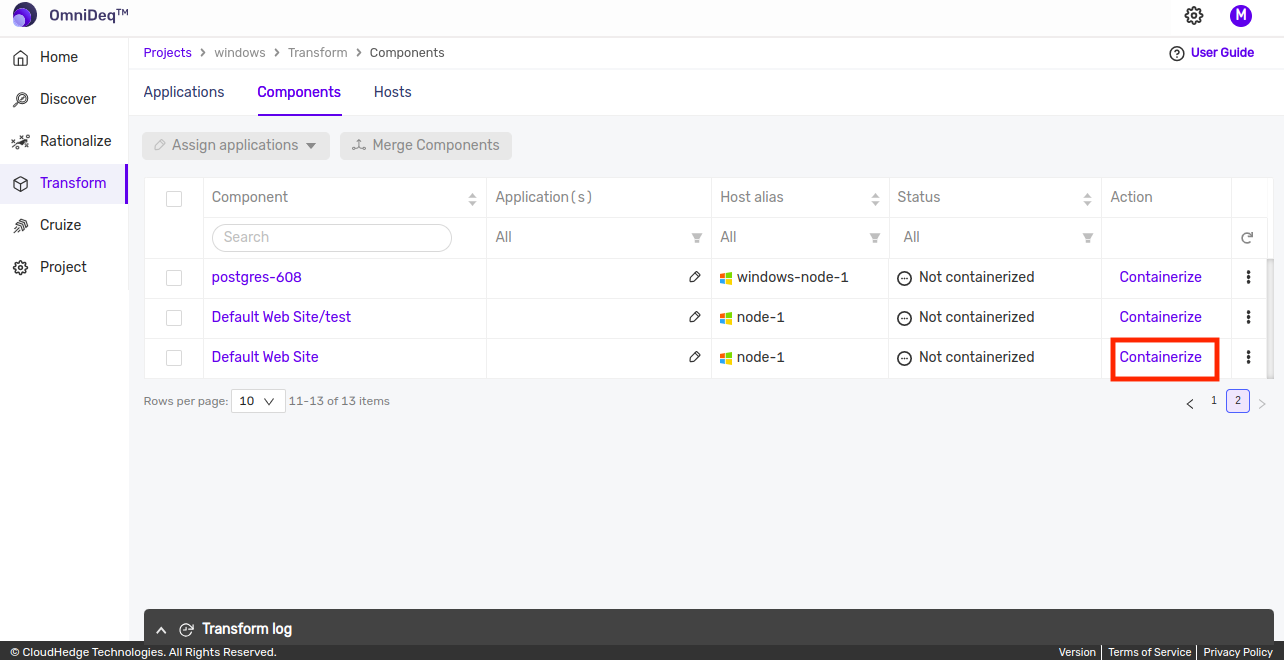
-
Clicking on
Containerizebutton will open up following page which will have multiple options like Create Copy, edit docker file, file explorer and validate and build button.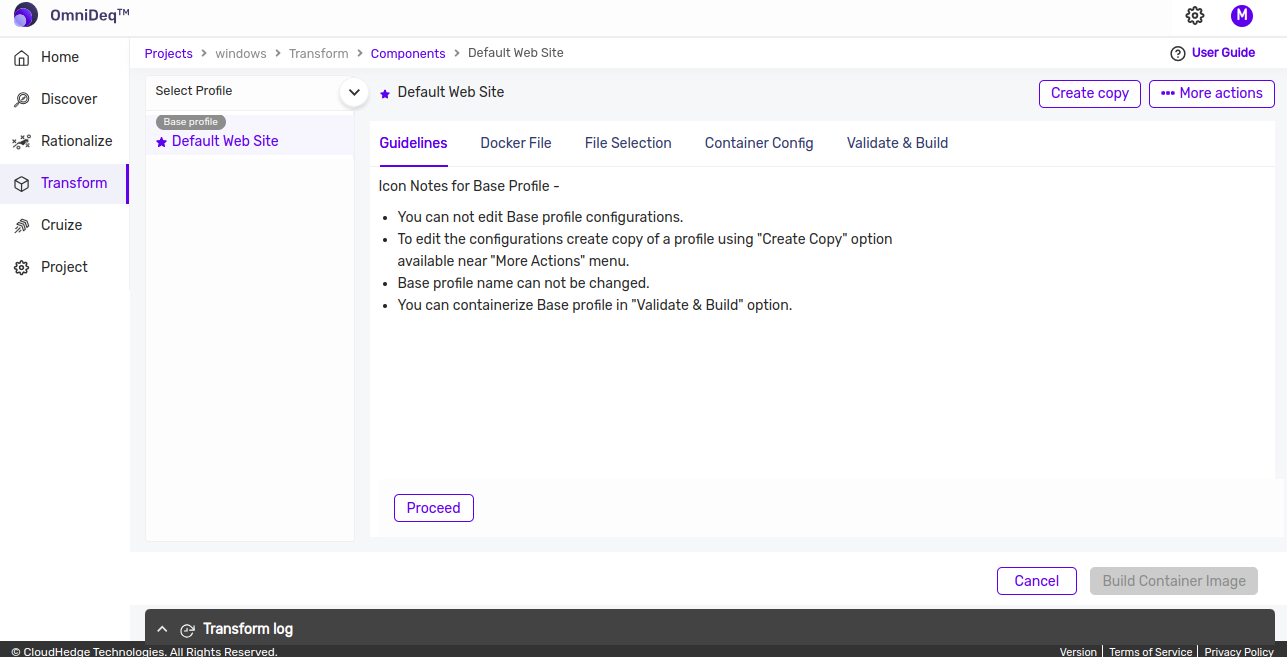
-
Click on
Create Copybutton from top right corner to create a copy of base profile as original data of discovery process is immutable. Newly created profile will be listed as on following page.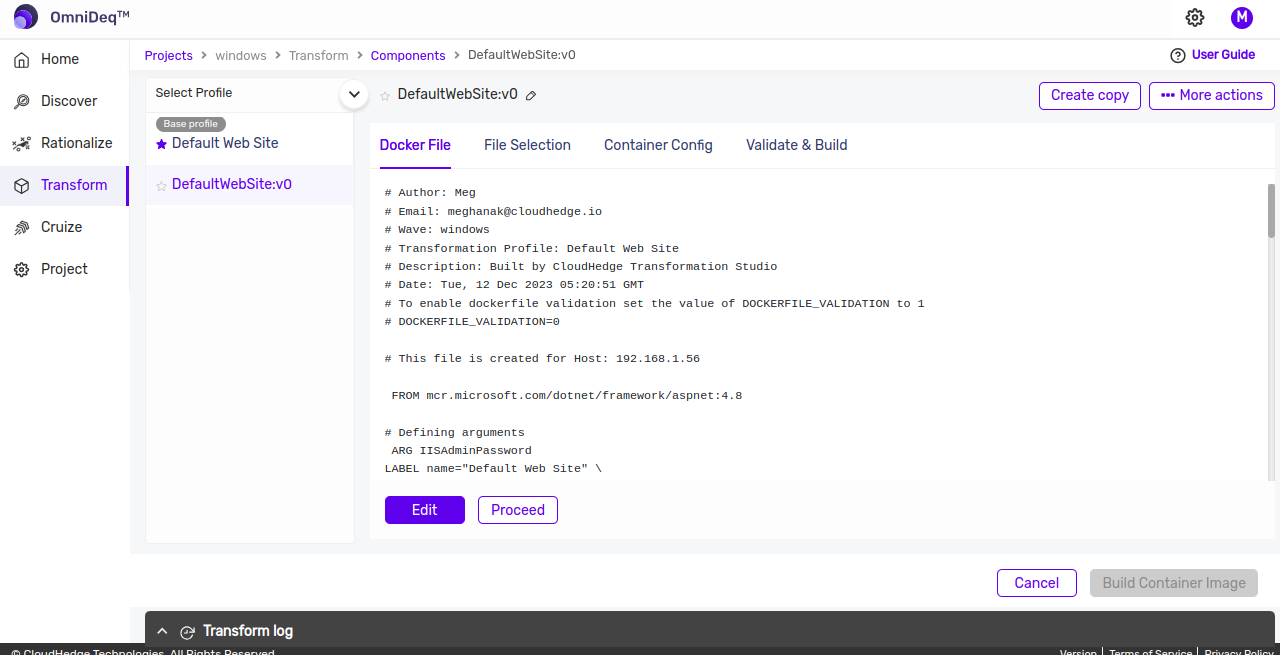 5. Click on the File Explorer button to edit the View/Manage the files for containerization process.
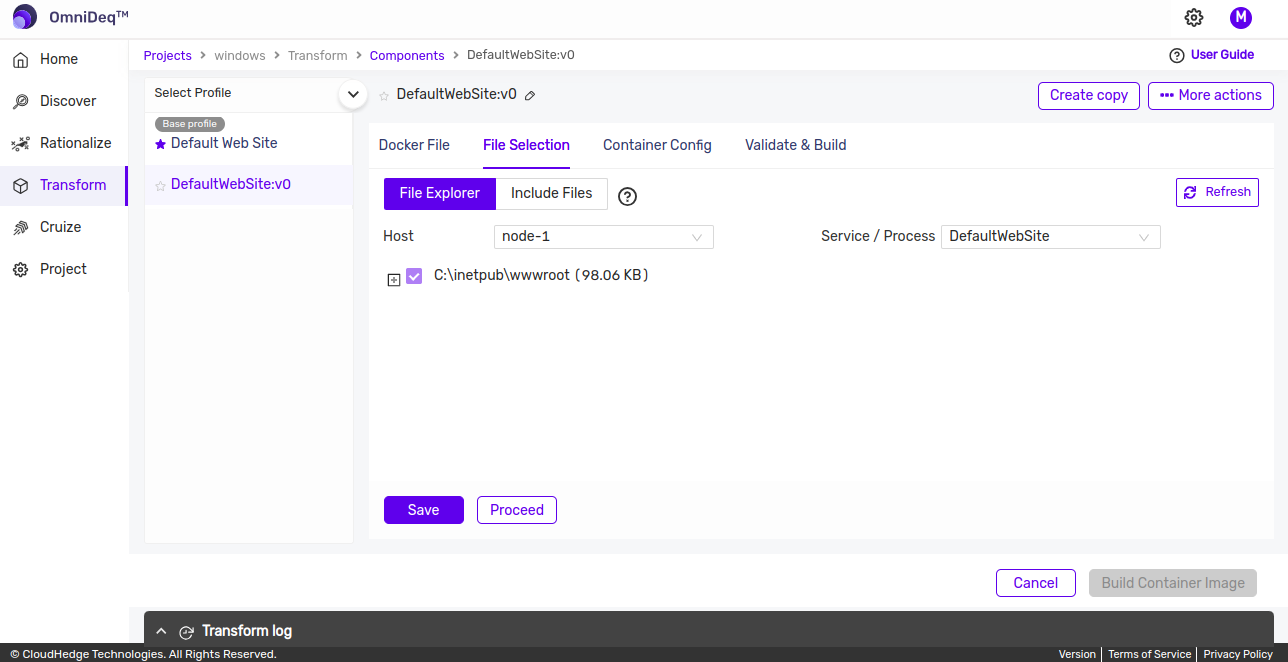
- Newly opened screen will have host and process/service selected by default.
- In case of merged profile i.e for IIS, users can select appropriate website/app from process/service dropdown to view/manage the files.
-
This will open a screen as shown below which will contain two options to manage files
- File Explorer
- Include Files
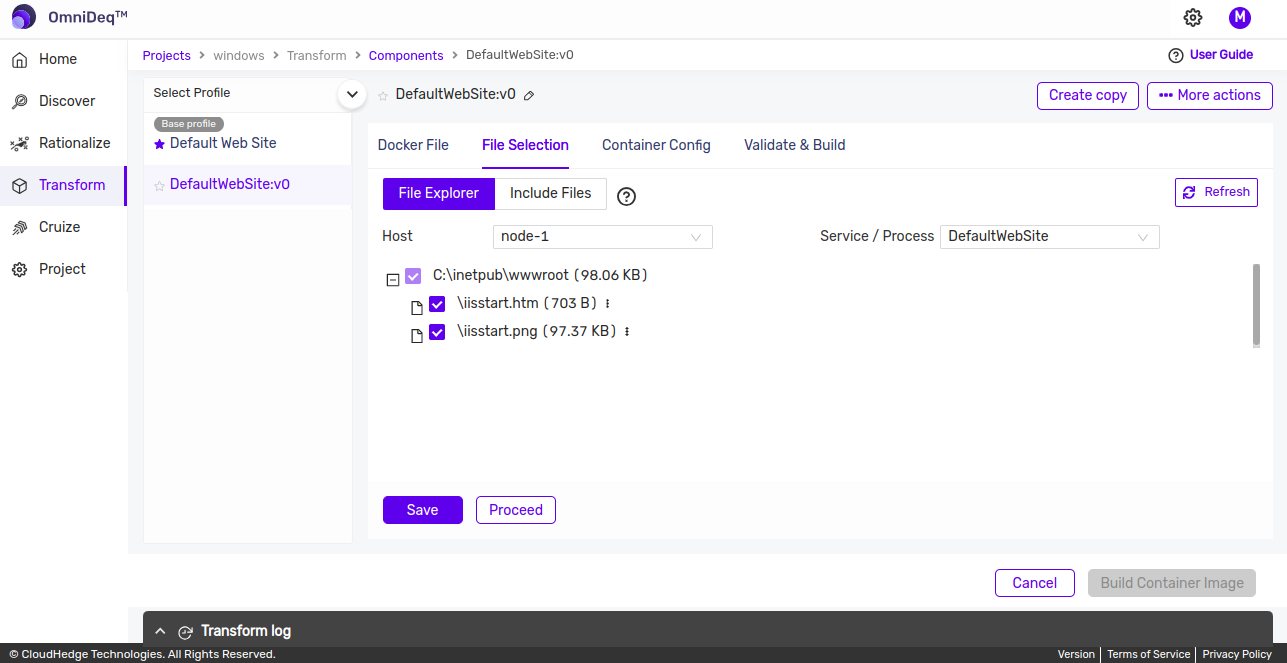
File Explorer
-
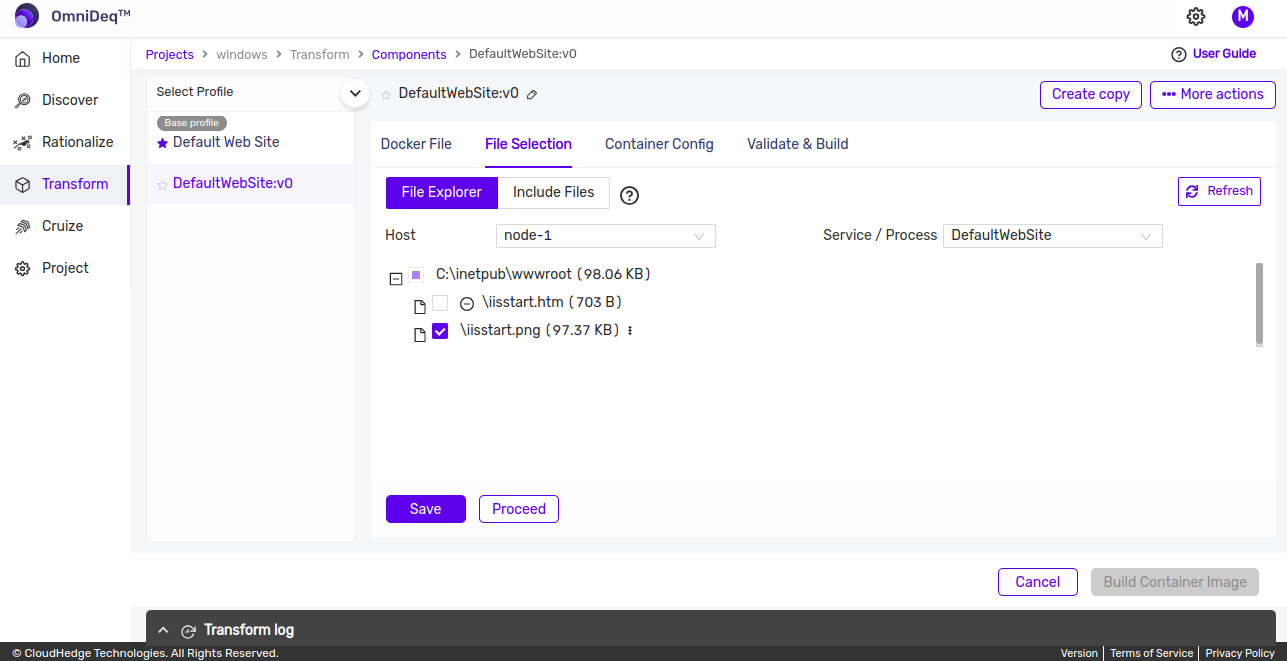
Remove a file from the list:
-
De-select the file to be removed and click on the save button. If nothing is to be changed click on the cancel button.
-
-
Relocate a File:
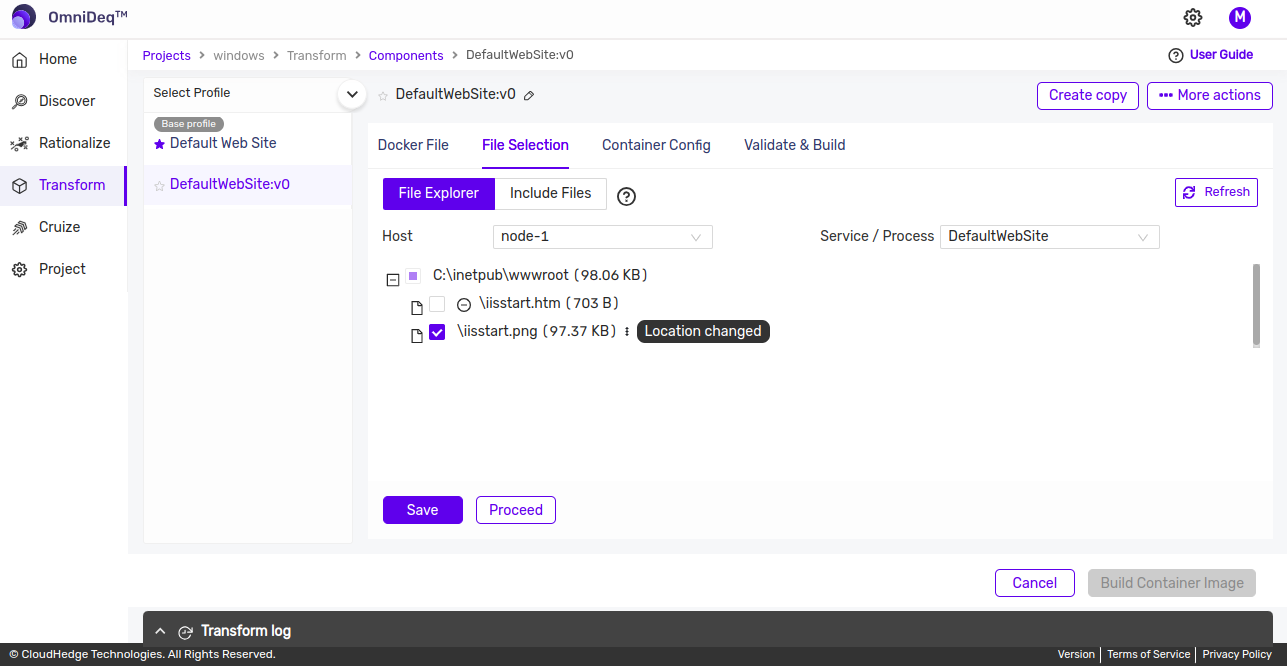
- Once you are on the File explorer view, Expand and find the file from explorer which you want to relocate in the container.
-
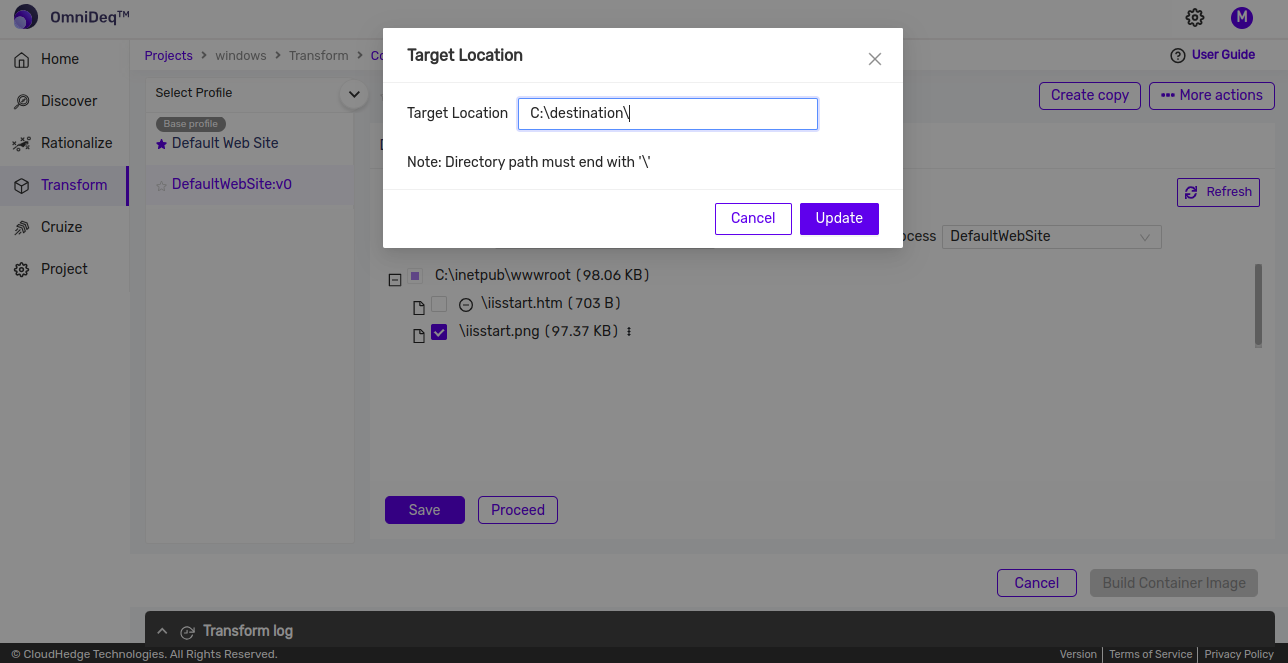
Click on the three dots next to the desired file and click on "Target Location"
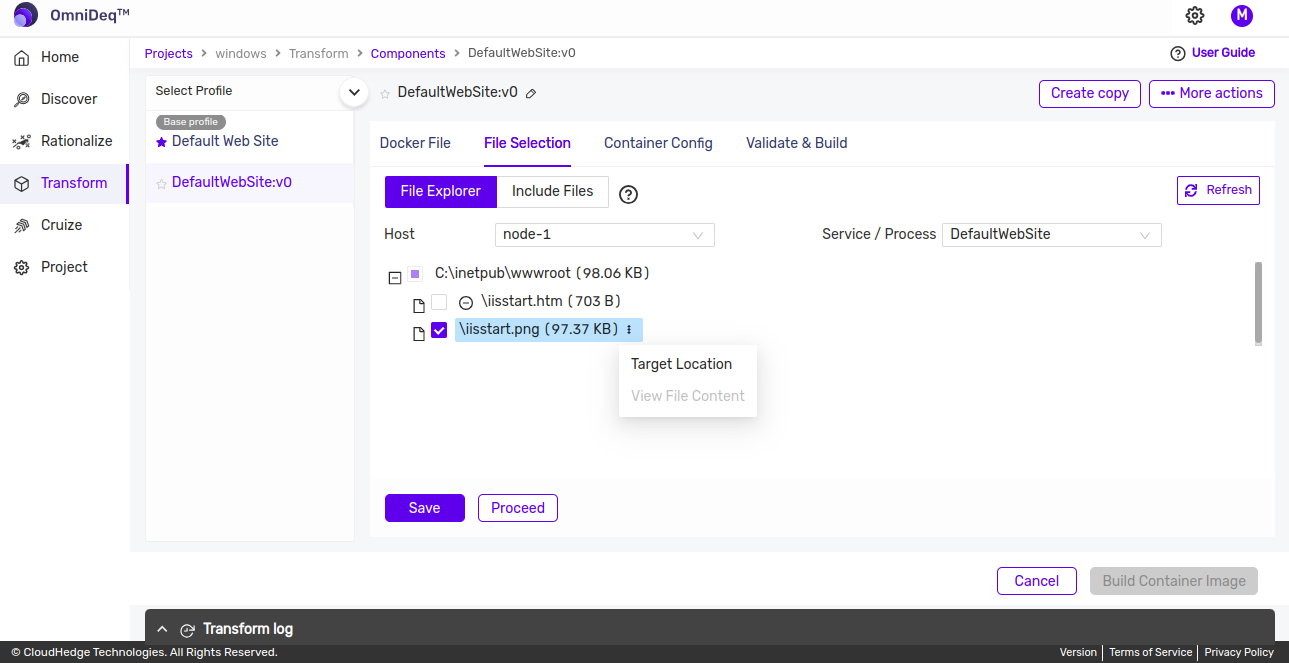
-
In the Target Location, add the desired absolute destination path for the file in container and click on "Update".
-
Note:
- Symbolic links with absolute link destination is supported to relocate.
- Provide the absolute destination file path, like:
- C:\destination\file\path\destinationFileName
-
If file needs to be relocated under different directory, append path separator ("\") at the end of the target directory path:
- C:\destination\file\path\
- If destination path is not present, it will be created. Destination path should be from C: drive and if different drive needs to be provided then commands to create the required drive should be added in docker file.
-
Once the required files are added click on the "Save" button. If nothing is to be changed click on the "Cancel" button.

-
File list relocation will also be populated in "Include Files" section to view/modify/delete the entry.
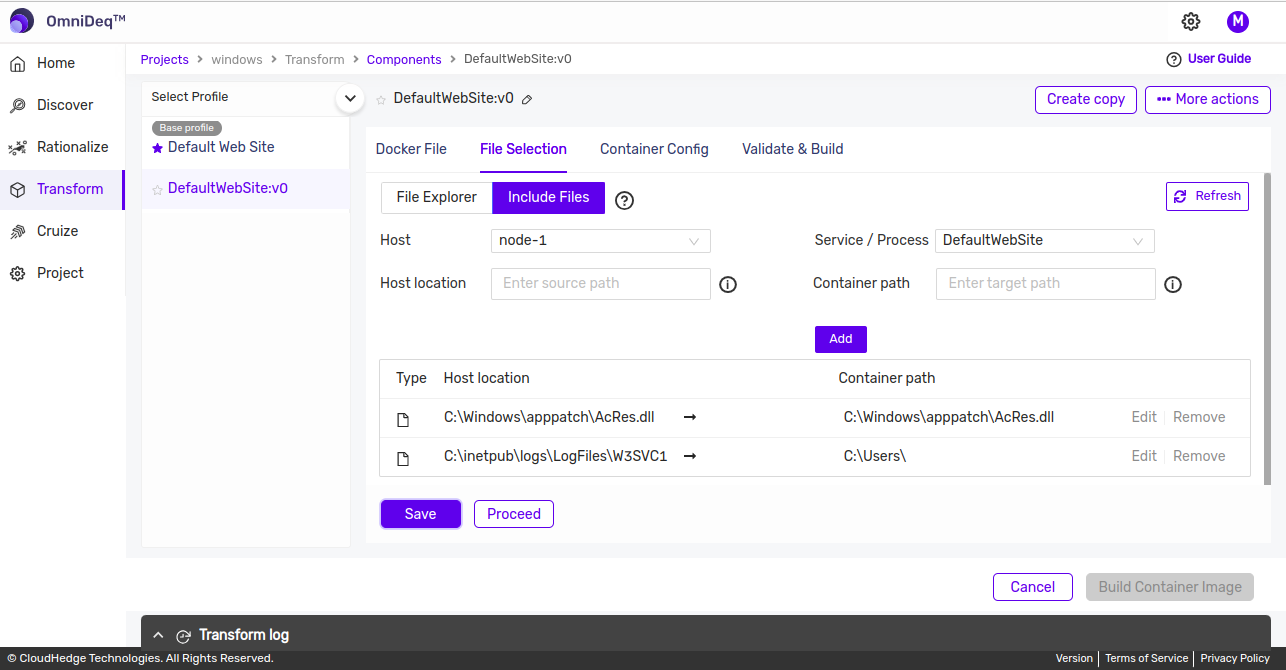
Include Files
-
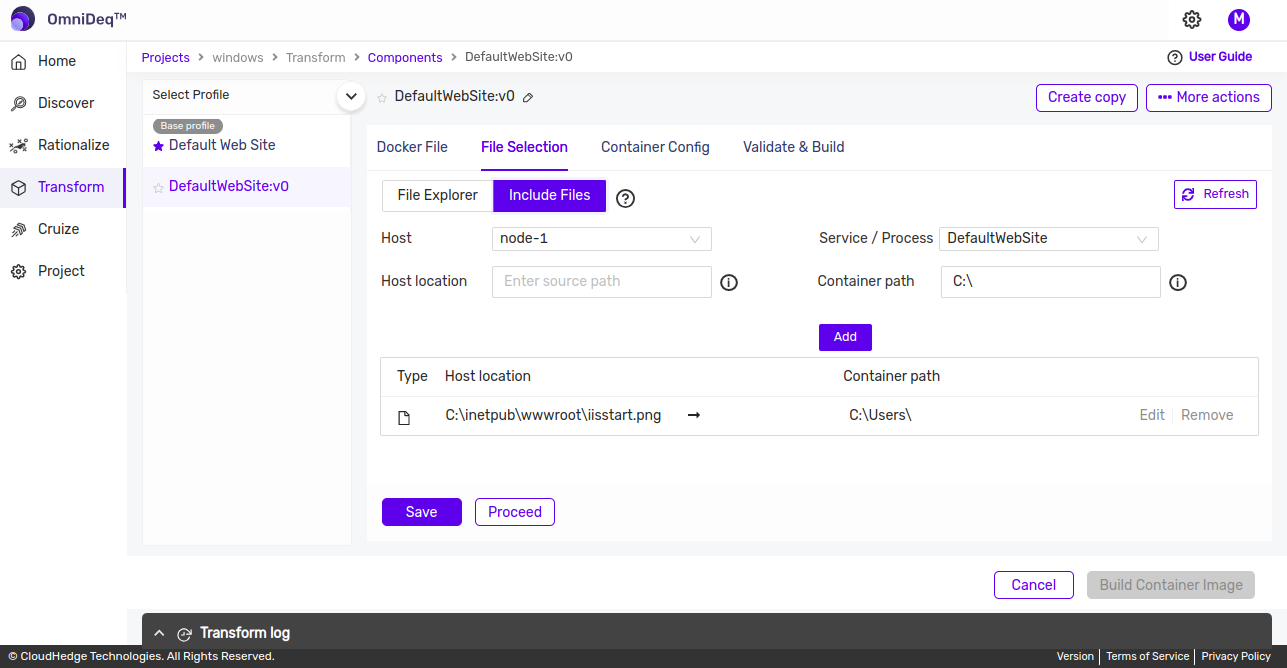
Once you are on the File explorer view, click on the Include Files options.
-
This will open a sceen as shown below

-
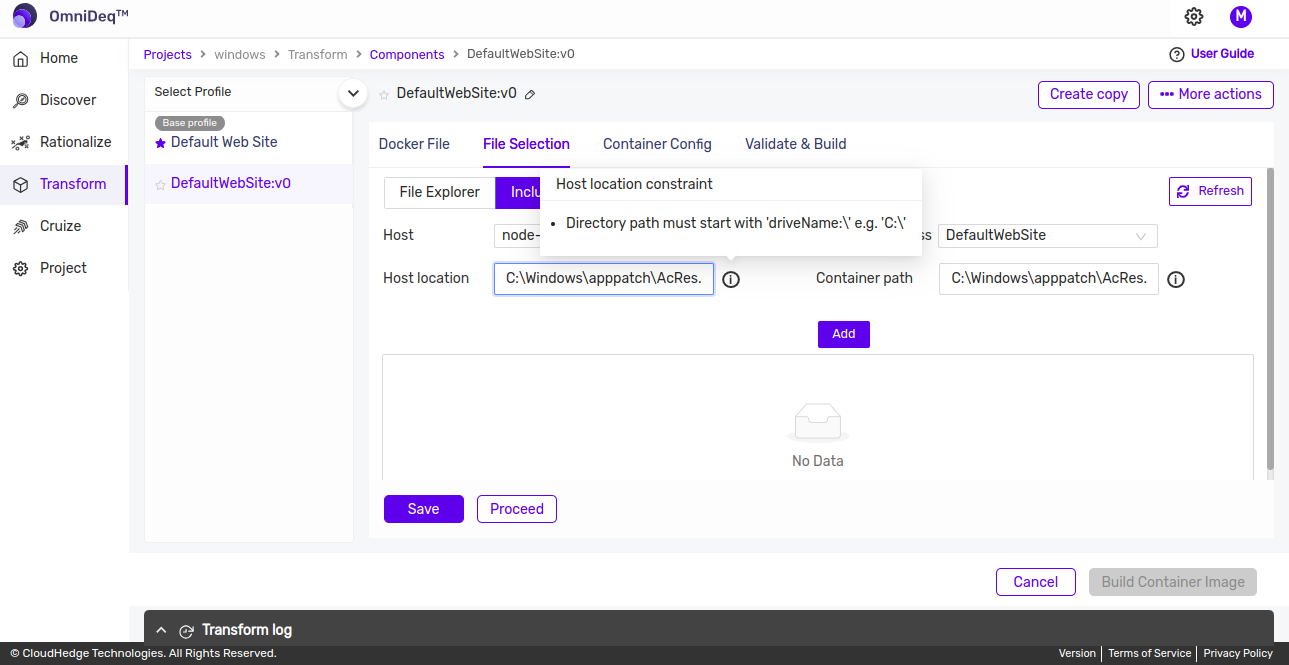
In the Host Location text box add the path of the file from the discovered node and click on Add button.
-
Note:
- If the file needs to be included only, do not modify the "Container path", it will be auto populated.
- Container path will be point to C: drive even if source files are from other drive. If file needs to be copied in other drive then commands to create the new drive should be added in docker file before processing file explorer data.
- If selected profile is for merged IIS websites and apps the appropriate website/app needs to be selected from process/service dropdown.
-
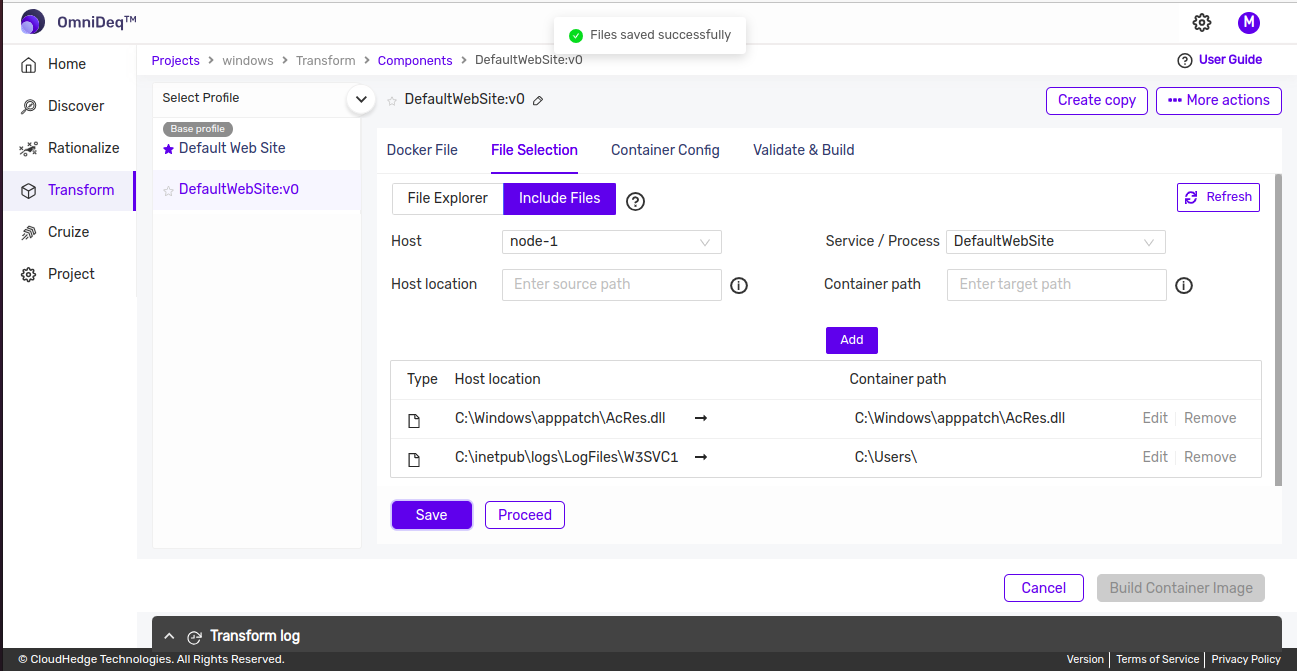
File will be added to collection after clicking the Add button.

-
To save the details of included file, click on save button or click on cancel button to discard the changes. If file with provided path is present then only it will be saved for further processing.
-
File which needs to be included can be renamed and file with updated name will be saved inside container.
-
Include and Relocate Files/Folders:
- The File/Folder which is not found on file explorer, that can be included and relocated in the container.
- On the File explorer view, click on the Include Files options.
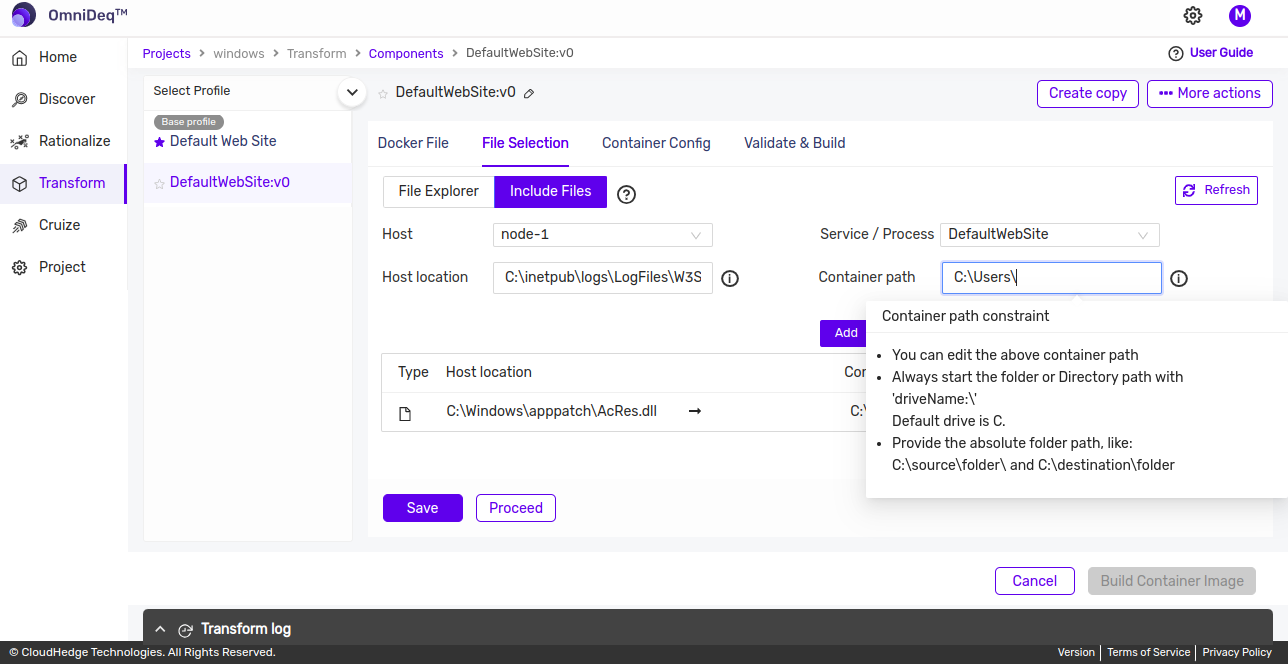
- In the Host Location text box add the path of the file from the discovered node and in the Container path, add the desired absolute destination path for the file in container and click on "Add".
-
Note:
- Provide the absolute destination file/folder path, like:
- C:\source\file\path\sourceFileName --> C:\destination\file\path\destinationFileName
- D:\source\file\path\sourceFileName --> C:\destination\file\path\destinationFileName
- C:\source\file\path\sourceDirName\ --> C:\destination\file\path\destinationDirName\
- If destination directory is already present, the source directory will be copied under "C:\destination\file\path\destinationDirName\" path.
-
If file needs to be relocated under different directory, append path separator ("\") at the end of the target directory path:
- C:\source\file\path\sourceFileName --> C:\destination\file\path\
- (If path is not present, it will be created.)

- Provide the absolute destination file/folder path, like:
-
Once the required files are added click on the Save button. If nothing is to be changed click on the cancel button.
-
Note:
- Always terminate the folder path with '\'.
- If destination folder is not present, it will be created.
- If the destination folder is present, the source folder will be copied under destination folder.
- Provide the absolute folder path, like:
- C:\source\folder\ and C:\destination\folder\
-
Remove an included file/folder.
-
On the File explorer view, click on the Include Files options
-
To Remove an already included file/folder, click on "remove" button and then click on "Save" button to save changes. If nothing is to be changed click on the "Cancel" button.