Build Linux Container Image
CHAI™ transforms the processes into container images using Build box.
Build box
It is an intermediate build system which is used to build the container image and upload them on the respective docker registry.
In order to find out about Linux Build Box Prerequisites, please click here
Containerizing Linux process
-
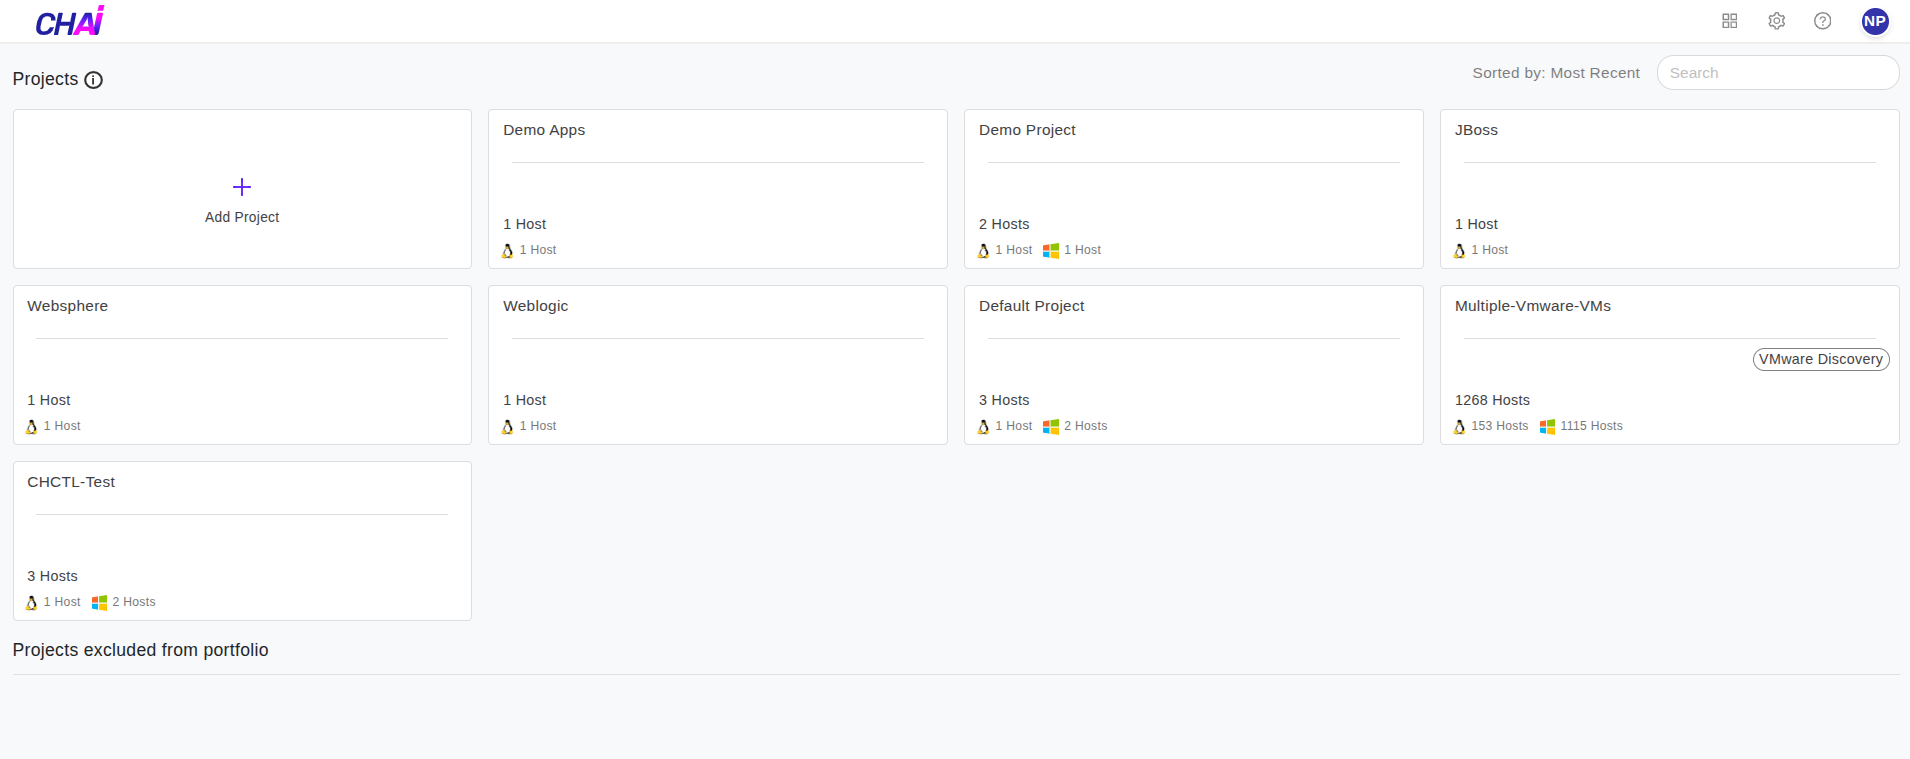
Click on the Project you want to transform process , example: we can click on Demo Apps.
-
Once you click on the Project, click on
Transformin the menu on the left side, as shown in the image below.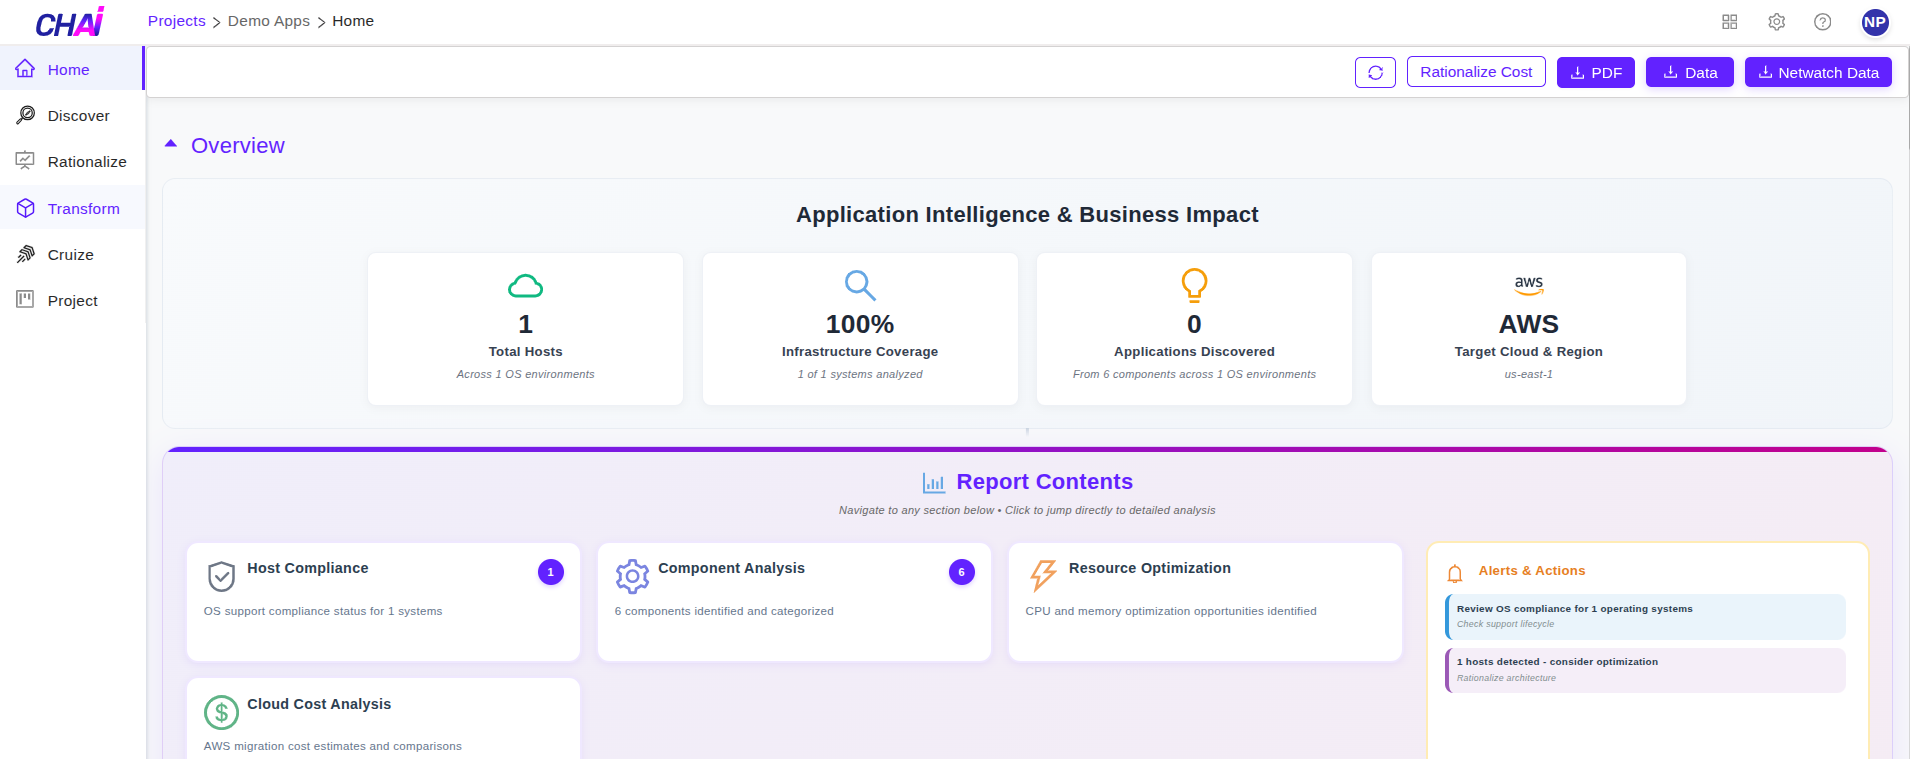
- This will open the list of processes to be transformed in the Project.
-
Click on
Containerizein front of the process you want to transform.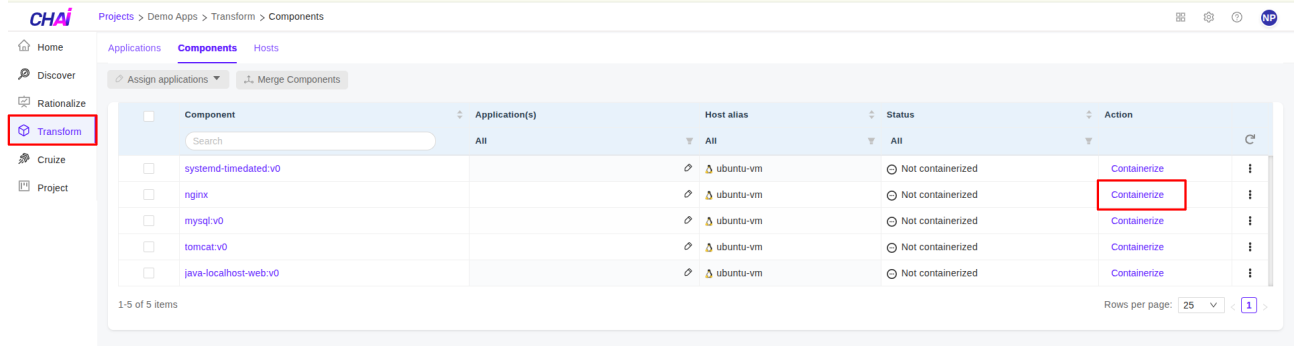
-
Select the linux profile you want to transform and click on the
Validate & Buildbutton as shown in the image below.
-
Once users clicks on Validate & Build button, it will open a page as shown in the image below.
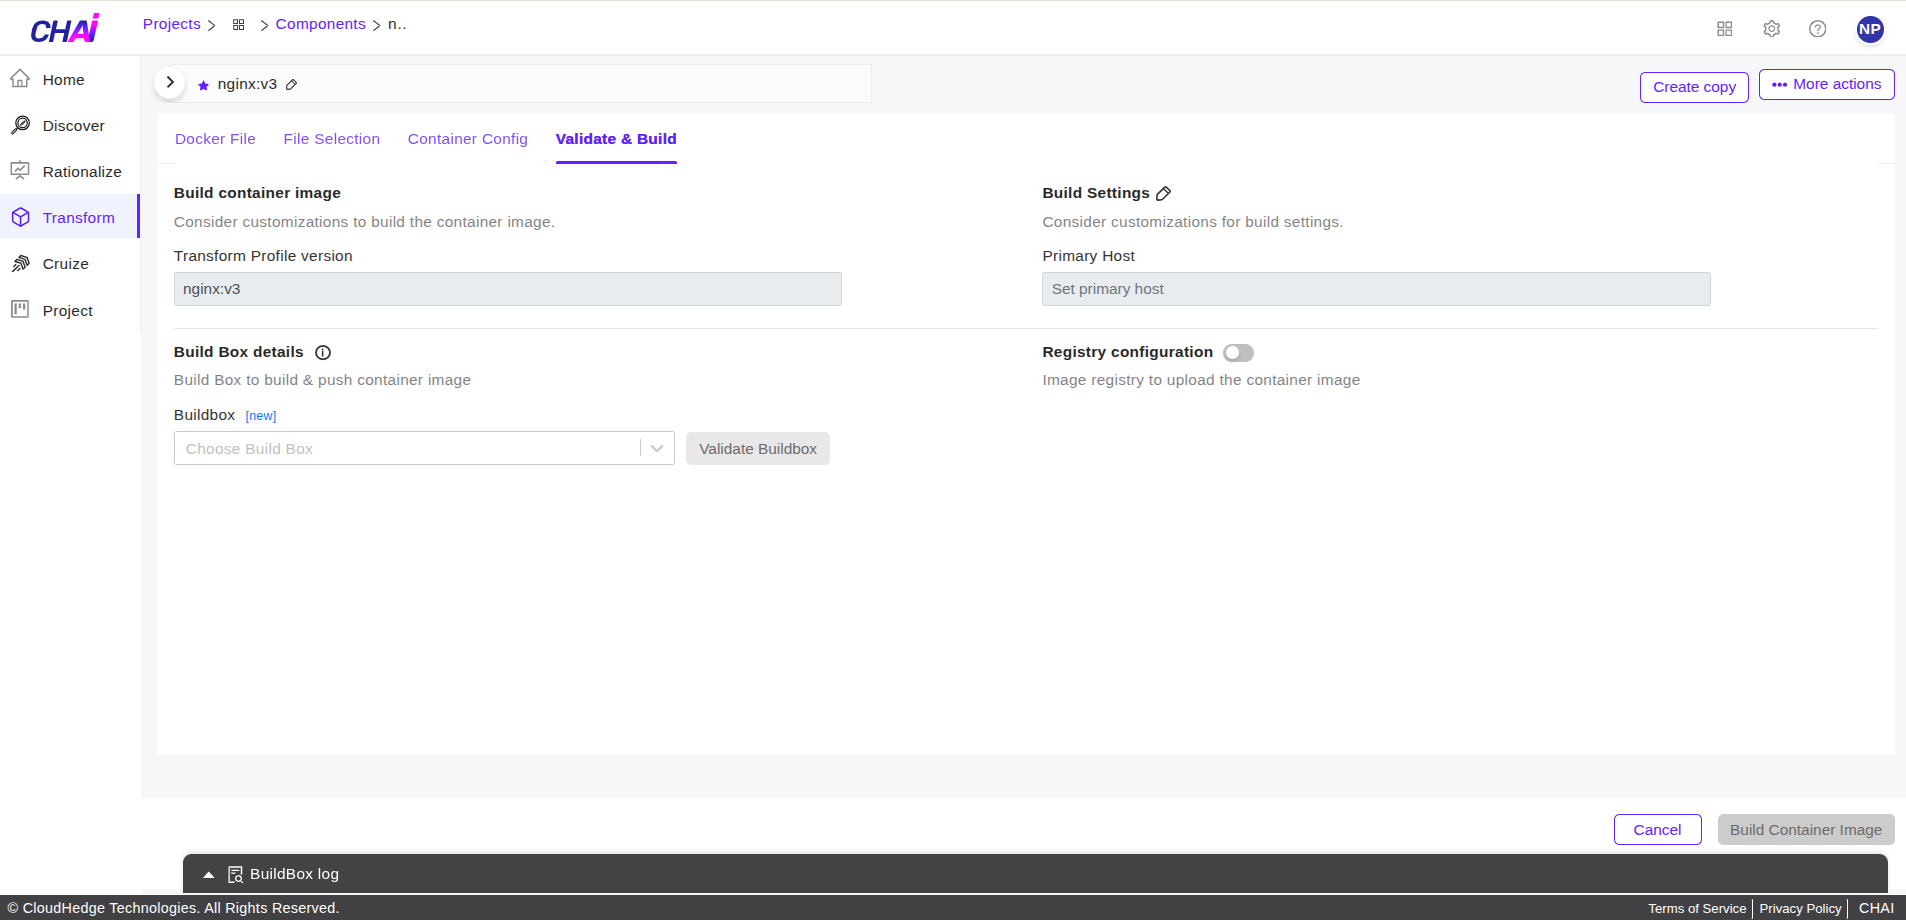
- Select the build box from the list
-
Selecting the build box will populate the below fields :
User Name Type Username here Host Type Fully Qualified Host Name” OR “IP Address” here Port Default Port “22” Connection Type “SSH” or "Basic" Build Box Credentials Credentials - Username : Username which will be used to connect to the build box.
- Host Name or IP : It is the Host Name or IP address of the build box.
- Port : It is the port number which will be used for data transmission. By default port will be 22 for linux.
- Connection type : It is the protocol to connect to node. SSH or Basic connection type will be used for linux.
- Build Box Credentials : It is a drop down which will display the vault names. users can only choose the credentials which is added in CHAI™ vault.
-
Add registry details :
- This is to be used if you want to push the created image to a repository. If you do not want to push to a repository, you can disable the push by toggling the "Registry configuration" toggle
Registry Type Choose Registry Type - Registry Type : It is the type of registry where the container image will be pushed to.
Notes:
-
CHAI™ supports multiple type of registries such as:
-
Docker Hub
- ECR
- QUAY
- Custom
- ACR
- Harbor
- If a user wants to push the container image in
Docker Hubthen user will have to add the following details when adding a build box:
| Repository | Enter Repository Name |
| Image Tag | Enter Image Tag which will be visible on the registry. |
| Vault | Choose Credentials for the Docker Hub registry. |
- If a user wants to push the container image in
ECRthen user will have to add the following details when adding a build box:
| Server | Enter Repository URI |
| Repository | Enter Repository Name |
| Image Tag | Enter Image Tag which will be visible on the registry. |
| Vault | Choose Credentials for the ECR registry. |
- If a user wants to push the container image in
QUAYthen user will have to add the following details when adding a build box:
| Server | Enter 'quay.io' |
| Repository | Enter Repository Name |
| Image Tag | Enter Image Tag which will be visible on the registry. |
| Vault | Choose Credentials for the QUAY registry. |
- If a user wants to push the container image in
Custom Registrythen user will have to add the following details when adding a build box:
| Server | Enter the Custom Registry Address |
| Repository | Enter Repository Name |
| Image Tag | Enter Image Tag which will be visible on the registry. |
| Vault | Choose Credentials for the Custom registry. |
-
Once users enters all the above details, Click on
Build Container Imagebutton as shown in the image below: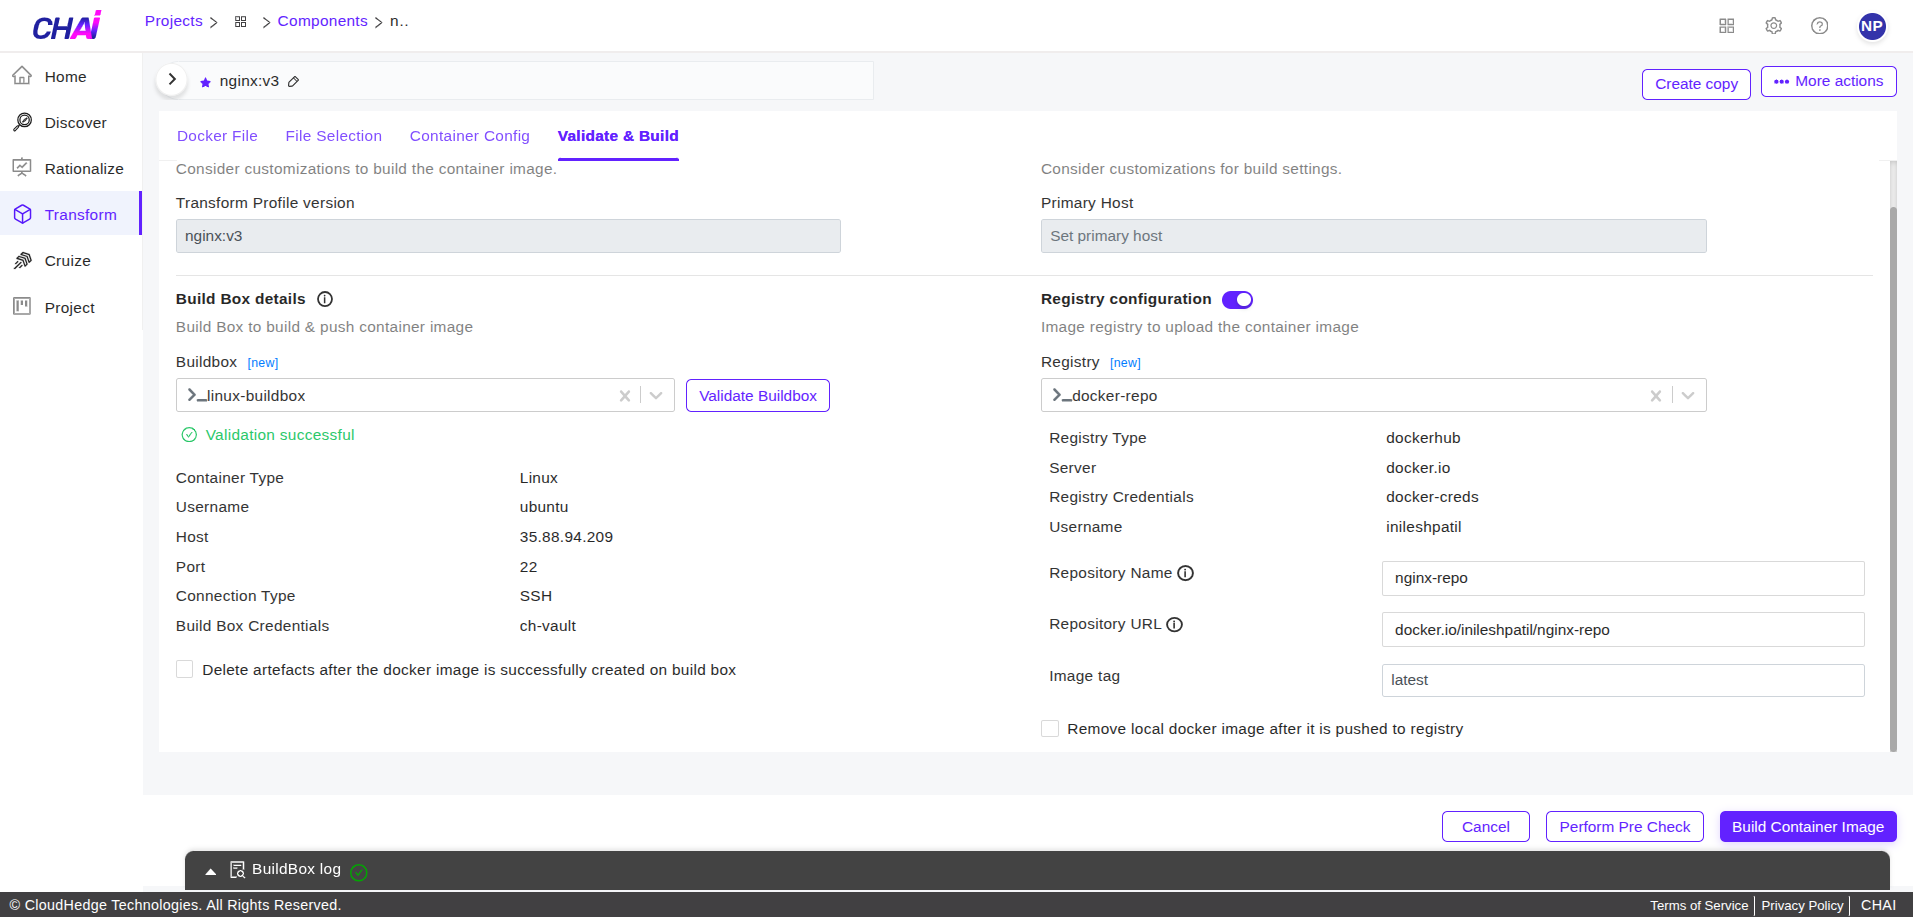
- users will get a success message "Auto Containerization started for ProcessName successfully"
-
While the transform process is running in the background, users can also see the Logs for transformation by selecting the process and clicking on the Logs tab in the bottom as shown in the image below:
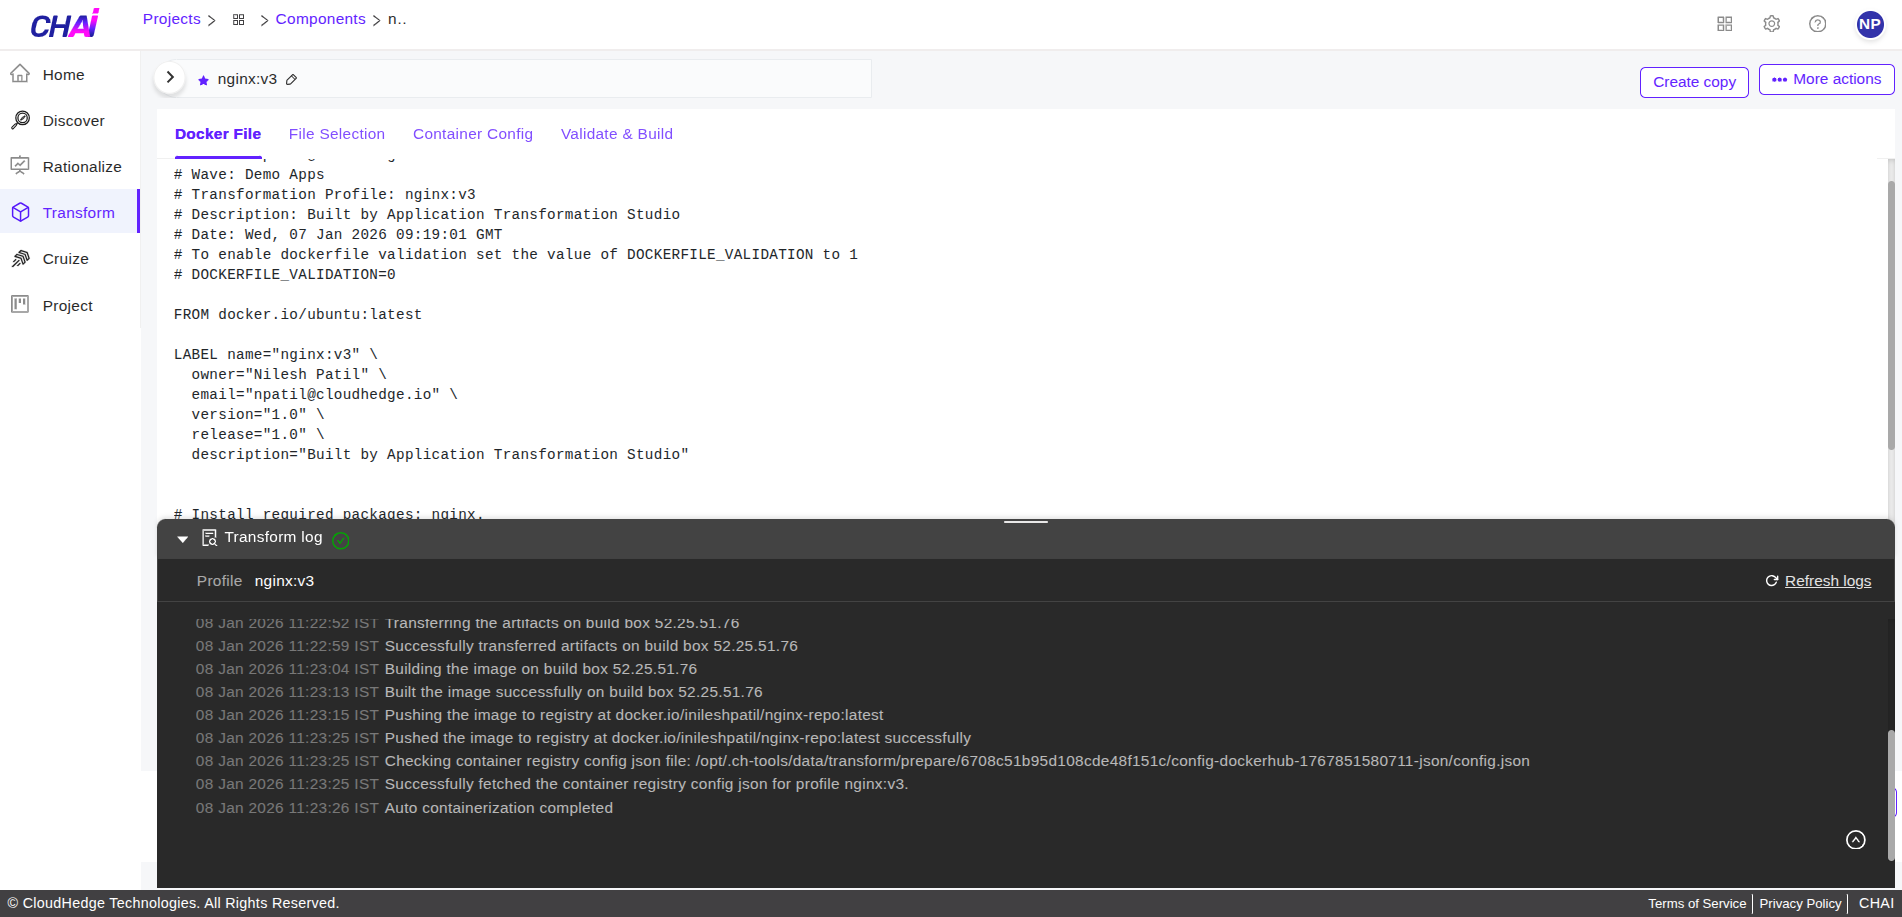
-
User will get a success message after few minutes and the process transformation will be completed.
-
User can verify the Image on the registry which was pushed while adding the Build box.