Build Windows Container Image
CHAI™ transforms the processes into container images using Build box.
Build box
It is an intermediate build system which is used to build the container image and upload them on the respective docker registry.
In order to find out about Windows Build Box Prerequisites, please click here
CHAI™ supports following type of applications to create windows container images
- IIS websites and applications
- Also supports mergeing of multiple websites and applications
- Console based applications (Beta)
- Service based applications (Beta)
Let's take a look into them one by one
Adding a Build box for Windows and creating container image for selected profile
-
Click on the Project you want to transform process , example: we can click on Windows VM.
-
Once you click on the Project, click on
Transformin the menu on the left side, as shown in the image below.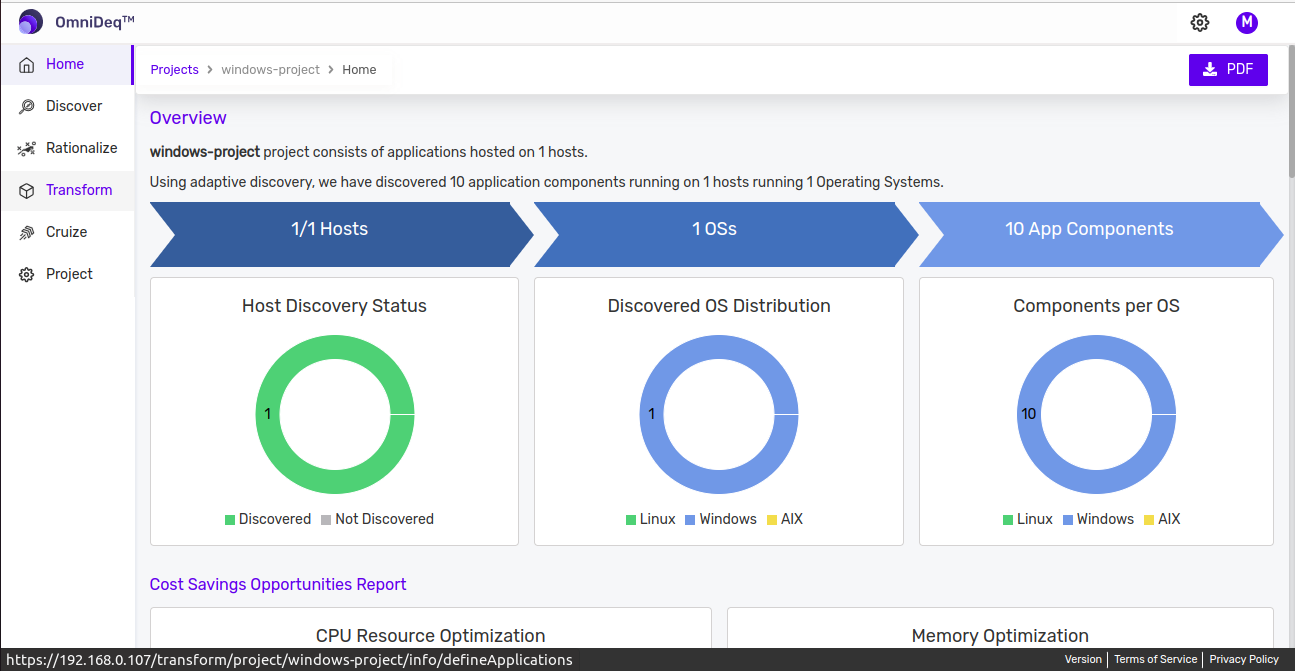
-
Click on
Containerizein front of the process you want to tarnsform.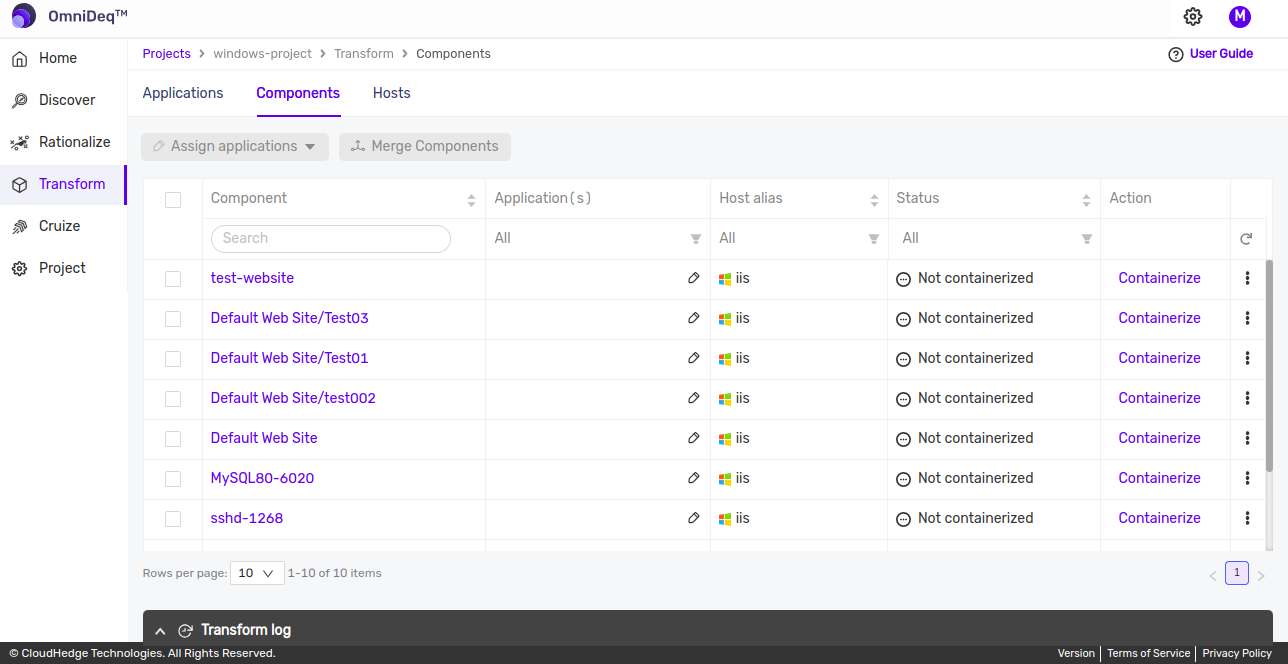
-
Clicking on
Containerizebutton will open up following page which will have multiple options like Create Copy, edit docker file, file explorer and validate and build button.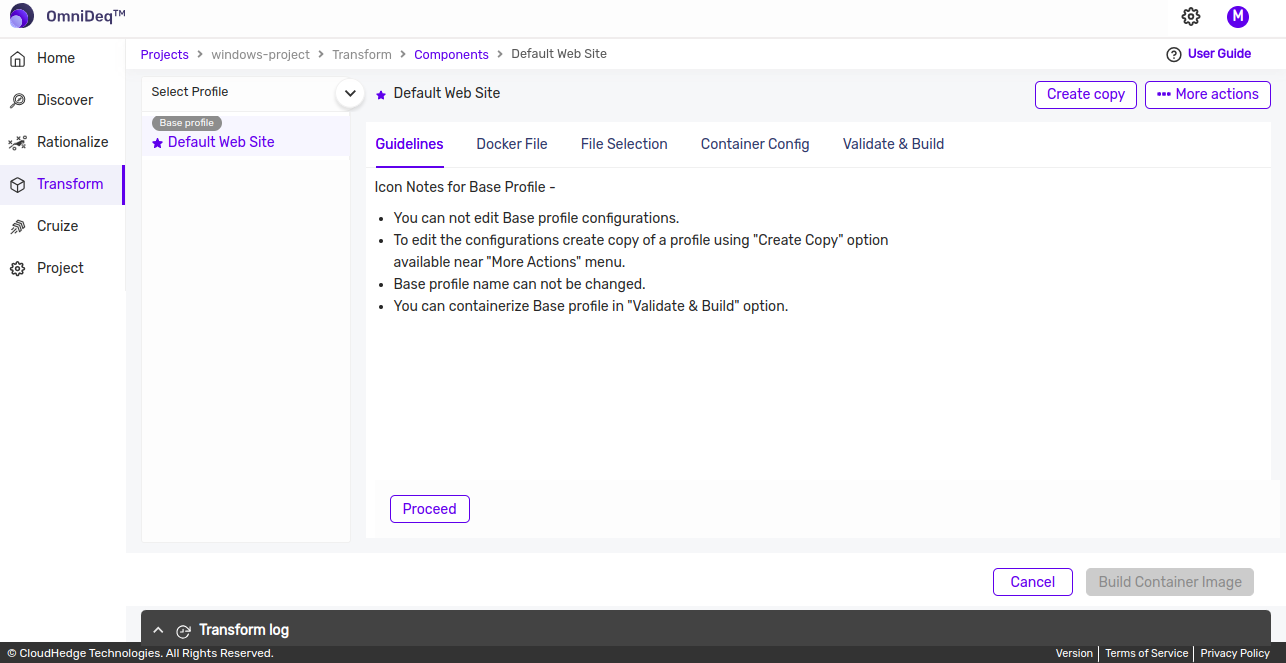
-
Click on
Create Copybutton from top right corner to create a copy of base profile, newly created profile will be listed as on following page.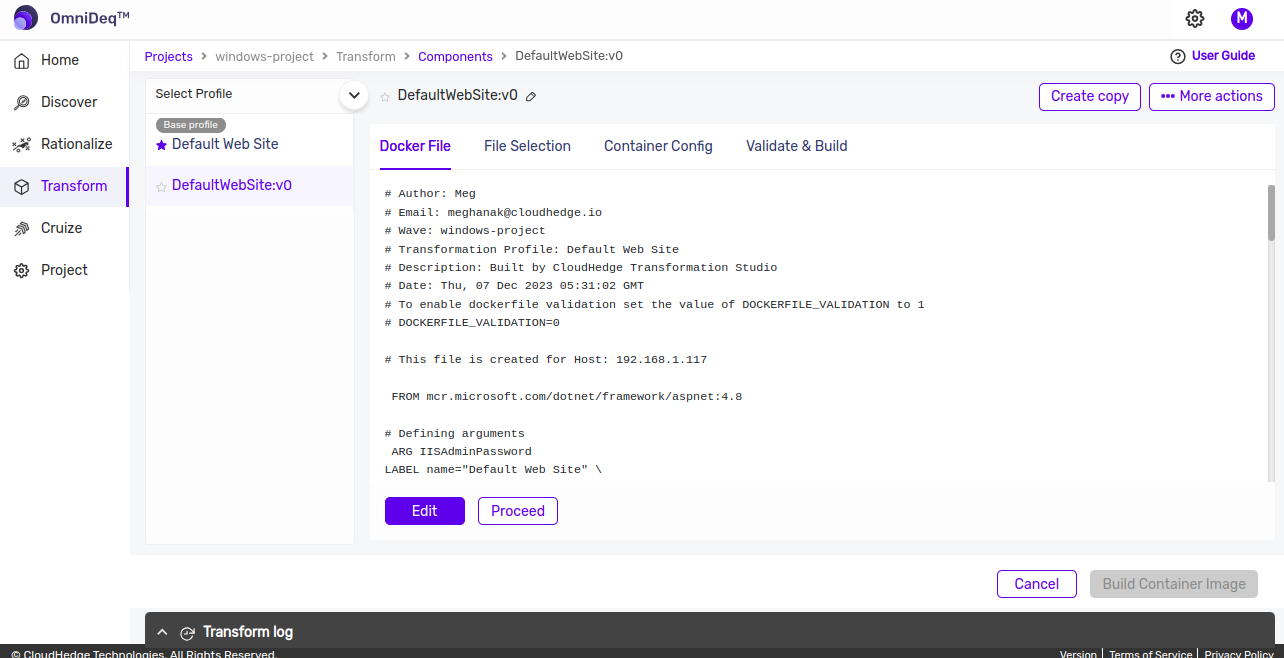
Following options are listed for profile:
- Docker File: Docker file generated using transformation studio can be viewed as well as updated using edit option provided at bottom of the screen.
Note: More Details related with edit docker file are listed here
- File Selection: Files and folders associated with the application can be viewed using file selection option.
Note: More Details related with File selection are mentioned here
- Validate & build: Using Validate and build option we can containerize the profile by selecting buildbox as well as appropriate registry config
-
Once users clicks on
Validate & Buildoption, it will open a page as shown in the image below.
-
Buildbox can added by clicking
newlink in front of buildbox label which will open following screen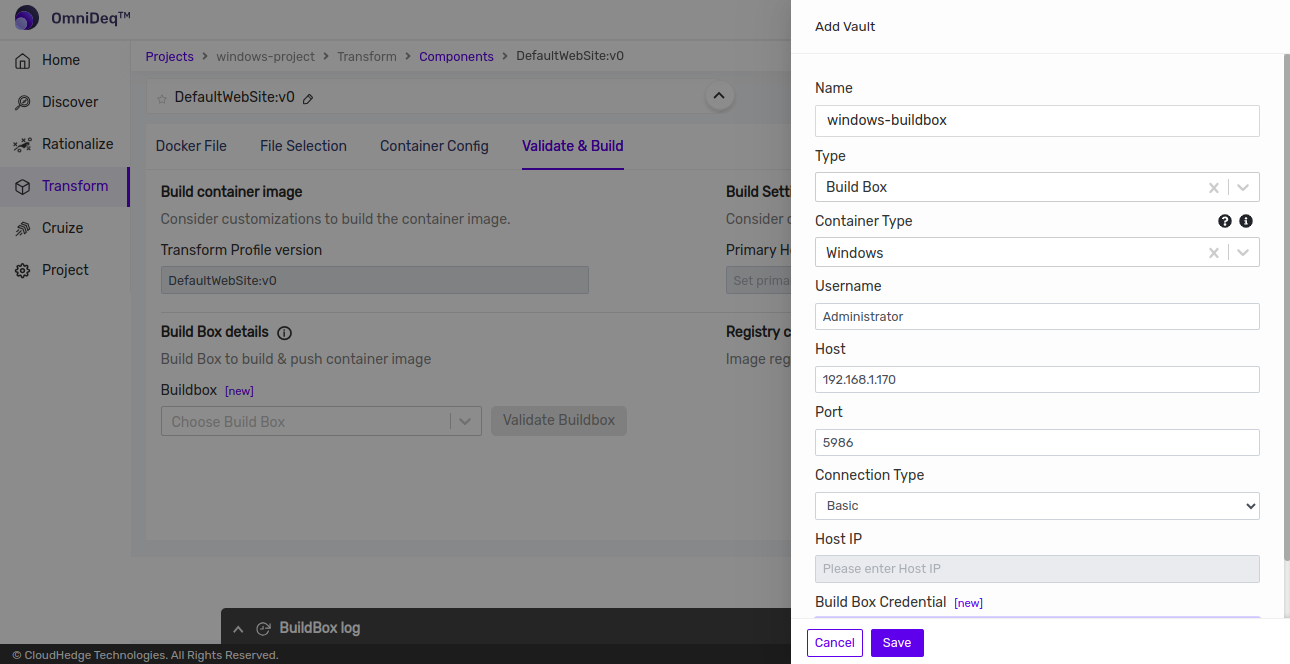
-
Selecting the build box will populate the below fields :
User Name Type Username here Host Type Fully Qualified Host Name” OR “IP Address” here Port Default Port “5986”, change as applicable Build Box Credentials Choose credentials - Username : username which will be used to connect to the build box.
- Host Name or IP : It is the Host Name or IP address of the build box.
- Port : It is the port number which will be used for data transmission. By default port will be 5986 for windows.
- Build Box Credentials : It is a drop down which will display the Password vault names. users can only choose the credentials which is added in CHAI™ vault.
-
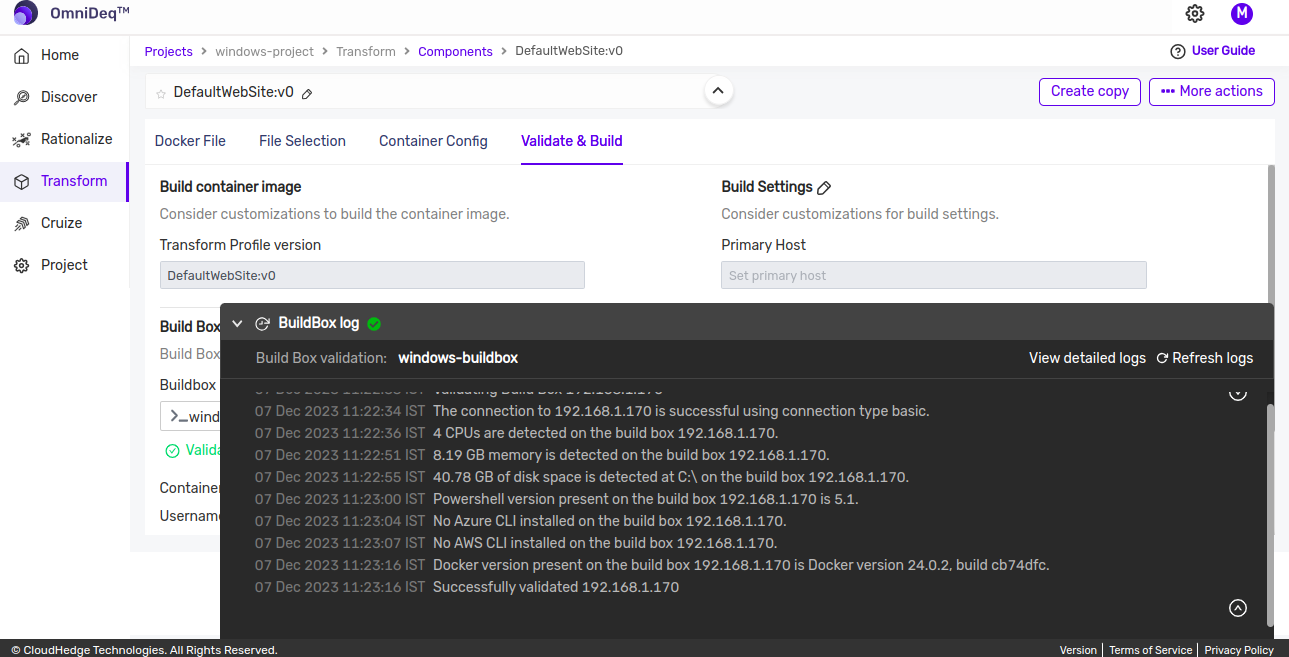
Click on
Validate Buildboxbutton which is next to selected buildbox to validate the buildbox. Logs for validating buildbox will be shown as on following screen :
-
Following registries are supported which could be used to push container image :
-
Registry Type : It is the type of registry where the container image will be pushed.
- Docker Hub
- ECR
- QUAY
- Custom
- ACR
- Harbor
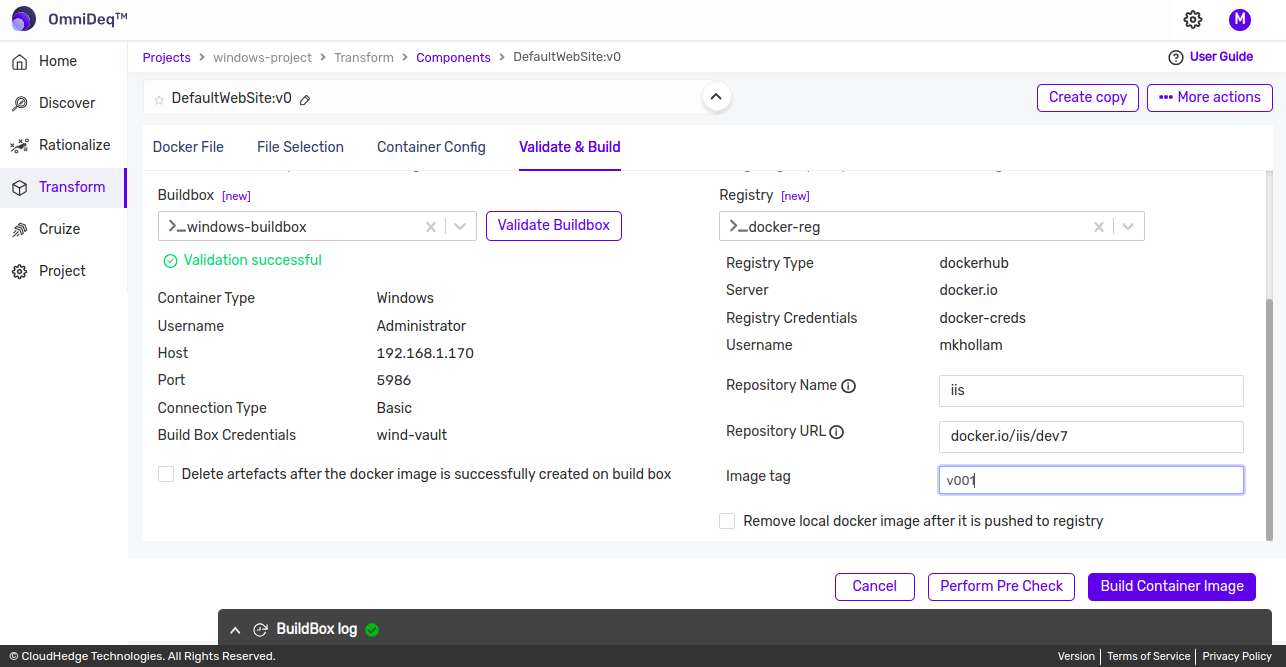
If a user wants to push the container image in
Docker Hubthen user will have to add the following details when adding a build box :Repository Name Name of the repository Repository URL Repository URL will be populated based on server URL and name of the repository, if required it can be edited Image Tag Enter Image Tag which will be visible on the registry. Vault Choose Credentials for the Docker Hub registry. If a user wants to push the container image in
ECRthen user will have to add the following details when adding a build box :Server Enter Repository URI Repository Enter Repository Name Image Tag Enter Image Tag which will be visible on the registry. Vault Choose Credentials for the ECR registry. If a user wants to push the container image in
QUAYthen user will have to add the following details when adding a build box :Server Enter 'quay.io' Repository Enter Repository Name Image Tag Enter Image Tag which will be visible on the registry. Vault Choose Credentials for the QUAY registry. If a user wants to push the container image in
Custom Registrythen user will have to add the following details when adding a build box :Server Enter the Custom Registry Address Repository Enter Repository Name Image Tag Enter Image Tag which will be visible on the registry. Vault Choose Credentials for the Custom registry. If a user wants to push the container image in
ACRthen user will have to add the following details when adding a build box :Server Enter Repository URI Repository Enter Repository Name Image Tag Enter Image Tag which will be visible on the registry. Vault Choose Credentials for the ACR registry. If a user wants to push the container image in
Harborthen user will have to add the following details when adding a build box :Server Enter Repository URI Repository Enter Repository Name Image Tag Enter Image Tag which will be visible on the registry. Vault Choose Credentials for the Harbor registry. -
-
Once users enters all the above details, following screen will be shown
-
Click on
Perform pre checkbutton which will show details as shown in the image below.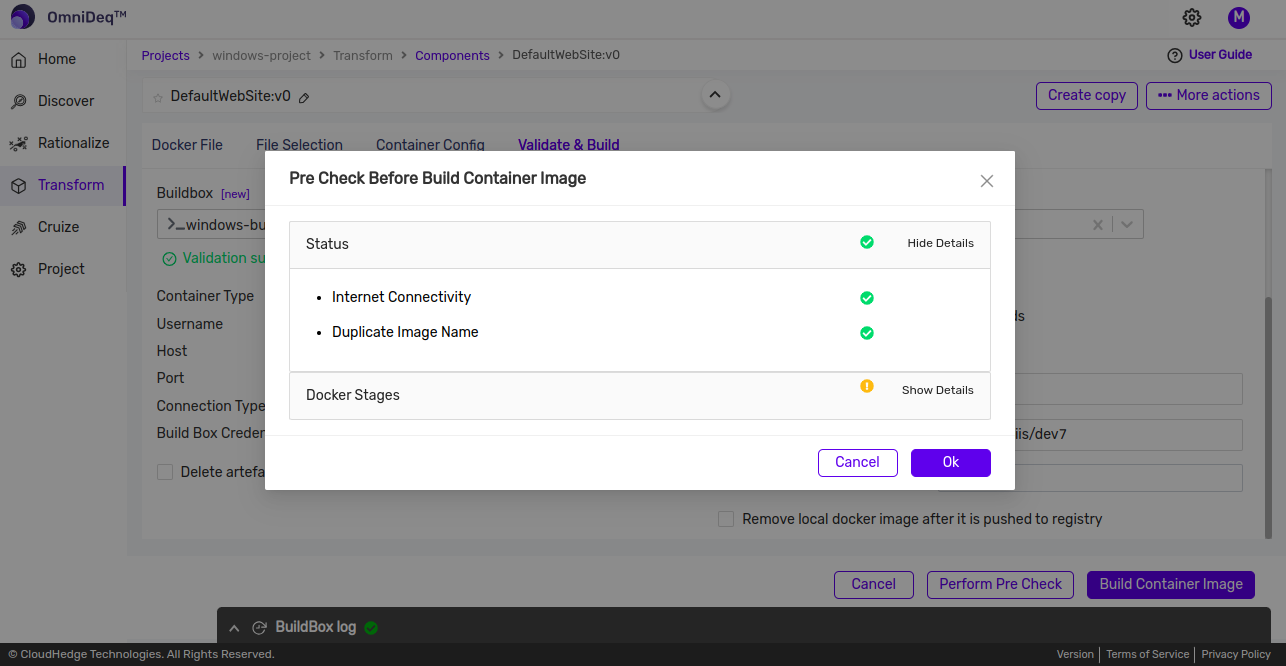
Note: This is optional step which will help to detect missing prerequisites which could affect transform process.
-
Click on
Build Container Imagebutton which will start containerization process and logs will be shown as in the image below.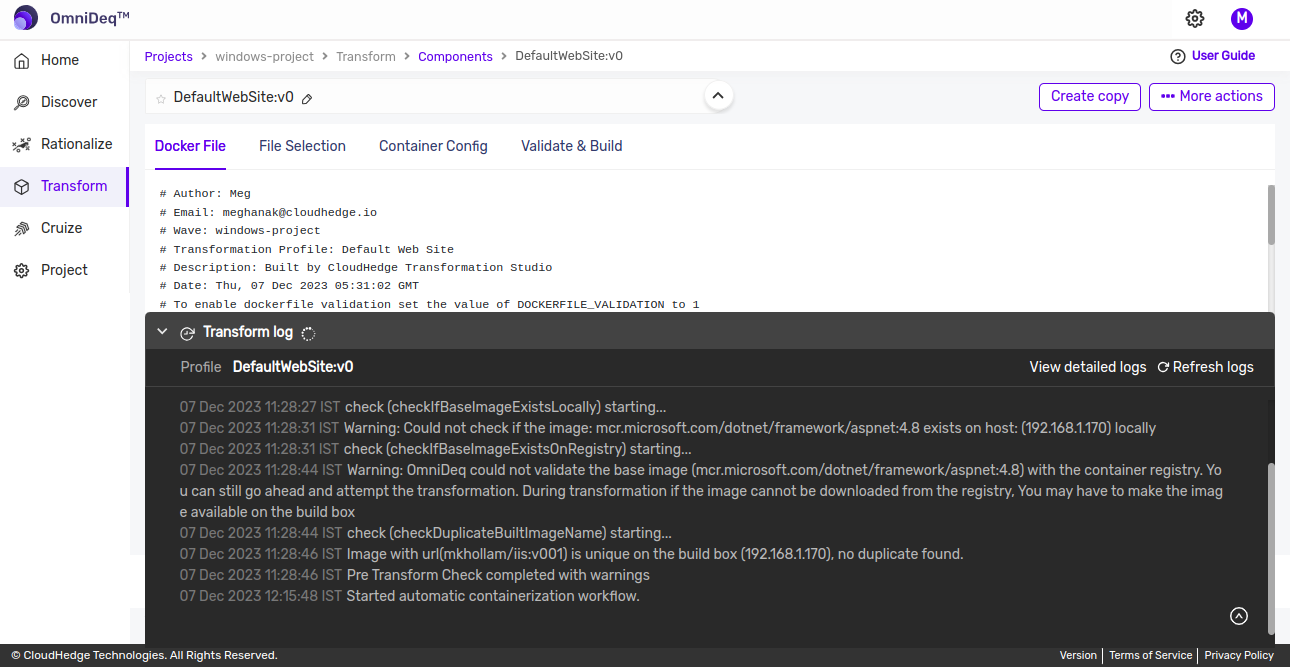
- Log panel will have details of each step performed while contenarization of selected profile like connectivity check to discovery host, connectivity check to buildbox, connectivity between discovery host and buildbox, check for available disk space on discovery host as well as on builbox
- Status of contenarization will be shown in log panel
-
User will get a success message after a few minutes and the process transformation will be completed.
-
User can verify the Image on the registry which was pushed while adding the Build box.
Build Windows Container Image by merging IIS website/applications
-
CHAI™ follows flat structure for IIS websites i.e it treats each website and its application as a separate entity. Windows container image can be build for single application or by merging multiple website/applications.
-
Merge IIS website application feature is useful when we know that multiple IIS websites/applications needs to be part of single windows container or one or more applications of IIS website needs to be part of the container
-
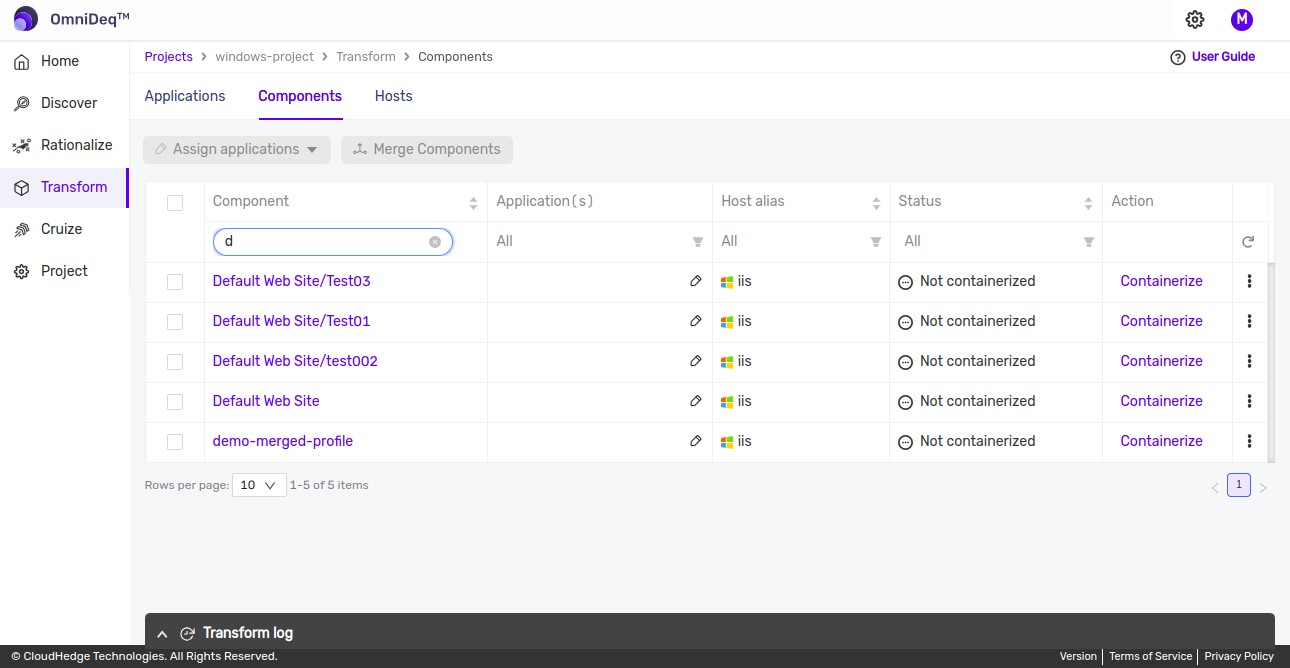
To merge two or more profiles of IIS websites, select profiles as shown in image below
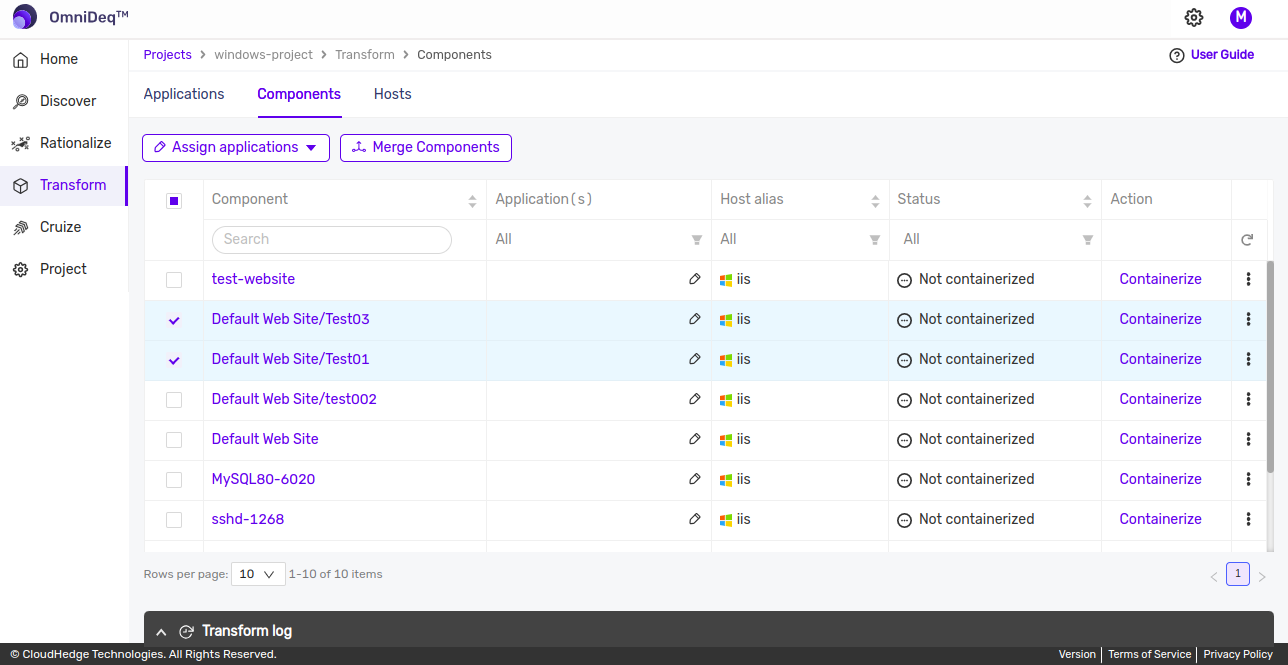
- Click on Merge Components button which will open dialog as shown in image below
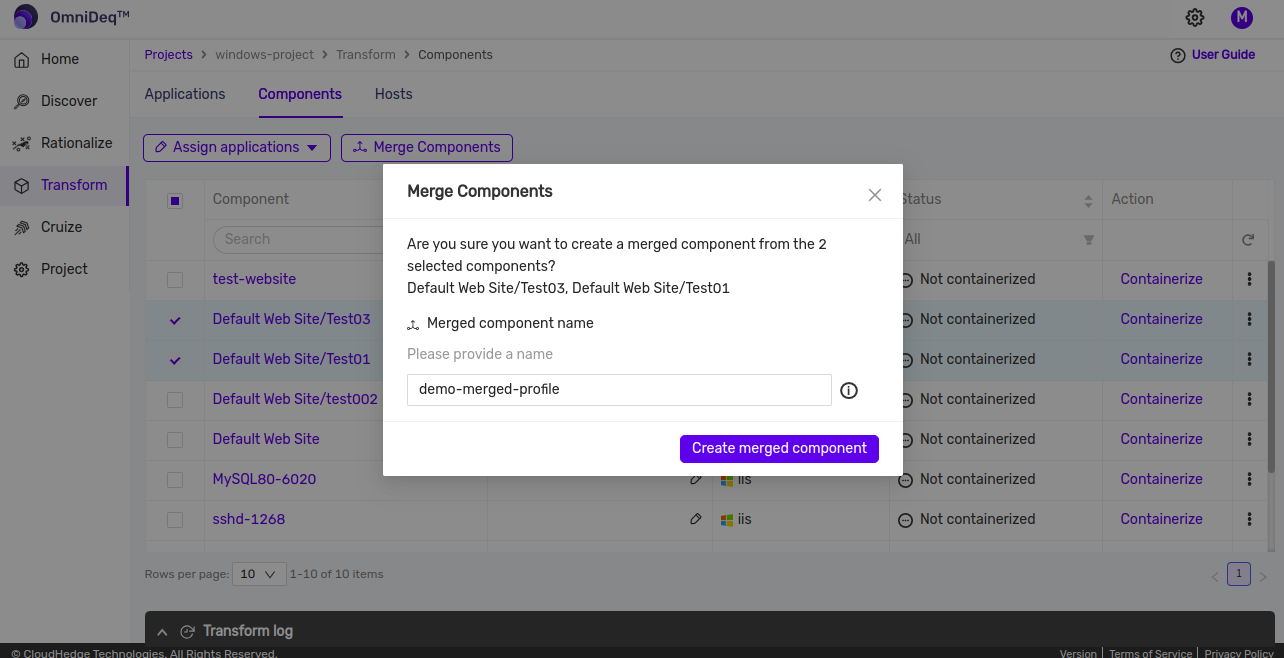
- After clicking on
Create merged componentbutton from dialog, profile for selected websites/applications will be created as shown in image below
Note: Once merged profile for two or more IIS websites/applications is created, we can follow the steps of building windows container image as described here
Build Windows Container Image for console based applications (Beta)/Service based applications (Beta)
-
CHAI™ currently supports creation of container image for console based applications and service based applications which is dependent on console based application
-
If windows container image for console based application is created then the console based application will be started inside the container and will be accessible using terminal
-
If windows container image for service based application is created which is based on console application then application will be started as service within container and status of service will be shown on terminal
Notes: - We are capturing current working directory of console application if it is from "Program Files" or "Program Files (x86)" folder. If console application is running from any other place then path of executable will be captured. - Files which are not captured or need to be part of container can be included from include files option provided for file explorer while transform as described here - Files which are not required as part of container can be excluded using exclude files option provided for file explorer while transform as described here
-
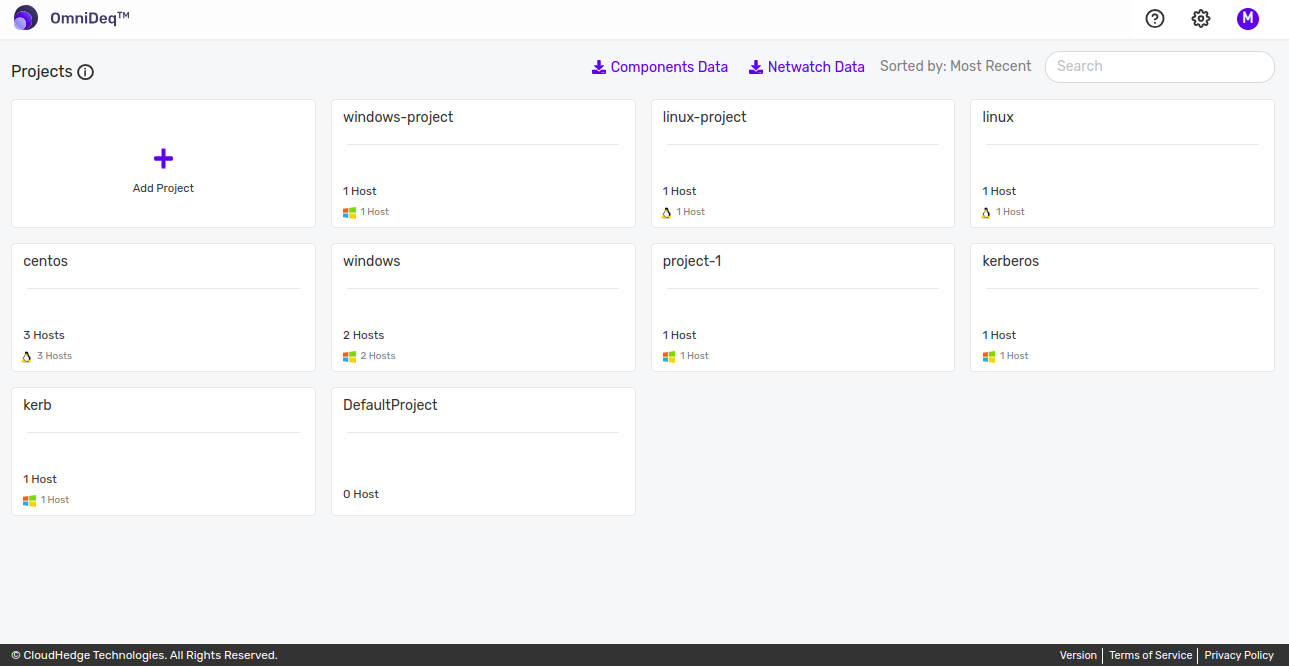
Navgate to the landing page.
- This page shows all the waves whose Discovery process was completed earlier.
-
Now click on the Project for which you want to transform the processes. The page opens as shown in the image below.
-
Click on Transform. Profile for console based application or service based application will be displayed. Click on
Containerizebutton to Containerize the console or service application
Note: Please follow the steps of building windows container image as described here