Create EKS Clusters
Create Development (dev) EKS Cluster using EKS Blueprints
To create an EKS cluster, you only need to define a few parameters such as cluster name and select the components you need to be enabled in the EKS cluster. You can also define the environment the EKS cluster will be part of (dev/qa/stg/prd).
Step 1: Download Sample Payload File
Download the sample payload file which defines the EKS Blueprint parameters in JSON format for creating the EKS cluster.
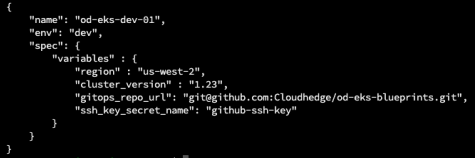
Click here to download the sample file, or create a new JSON file with the same content. The sample looks like the screenshot below.
Step 2: Configure Blueprint File
-
Open your GitHub dev repository URL and click on "creating a new file".
-
Add the file updated with the required settings:
- Add environment as 'dev'
- Add unique name
- Add gitops_repo_url
-
Add ssh_key_secret_name values
-
Save this file to the dev repository with the name
dev-eks-blueprint.json.
Step 3: Create the Cluster
Execute the following commands to start creating the cluster:
# Login to the CHAI™ portal
Syntax: chctl login --username <user_email_address> --secret <chai_login_password> --server <chai_portal_url>

# Create EKS cluster
Syntax: chctl eks create --awsVaultName <aws_vaultname_created_in_chai> --sshVaultName <ssh_vaultname_created_in_chai> --eksGitRepositoryUrl "<ssh_url_of_github_repository>" --blueprint <json_path_in_github>

Example: chctl eks create --awsVaultName aws-proserv --sshVaultName ssh-key-proserv --eksGitRepositoryUrl "git@github.com:Cloudhedge/eksblueprint-demo-dev.git" --blueprint dev-eks-blueprint.json
You will see output similar to the image below. The initial status of the blueprint will be 'isCreating'.

Note: This is a long-running operation and may take 15-30 minutes for the EKS cluster to be created. You can keep querying CHAI™ with the chctl eks get command. Once the EKS cluster is created, the status will change to 'isDeployed'.
Create Staging/Production (stg/prd) EKS Cluster using EKS Blueprints
Step 1: Download Sample Payload File
Use the same example payload file as mentioned in the previous step.
Click here to download the sample file.
Step 2: Configure Blueprint File
-
Open your GitHub stage repository URL and click on "creating a new file".
-
Add the file updated with the required settings:
- Add environment as 'stg'
- Add unique name
- Add gitops_repo_url
-
Add ssh_key_secret_name values
-
Save this file to the stage repository with the name
stg-eks-blueprint.json.
Step 3: Create the Cluster
Execute the following command to start creating the cluster:
# Create EKS cluster
Syntax: chctl eks create --awsVaultName <aws_vaultname_created_in_chai> --sshVaultName <ssh_vaultname_created_in_chai> --eksGitRepositoryUrl "<ssh_url_of_github_repository>" --blueprint <json_path_in_github>

Example: chctl eks create --awsVaultName aws-proserv --sshVaultName ssh-key-proserv --eksGitRepositoryUrl "git@github.com:Cloudhedge/eksblueprint-demo-stage.git" --blueprint stage-eks-blueprint.json
The initial status of the blueprint will be 'isCreating'.
Note: This is a long-running operation and may take 15-30 minutes for the EKS cluster to be created. You can keep querying CHAI™ with the chctl eks get command. Once the EKS cluster is created, the status will change to 'isDeployed'.
Accessing the EKS Clusters
Download the Kubeconfig File
Download the kubeconfig file using AWS CLI with the following command:
Access ArgoCD via Port-Forward
The ArgoCD server service is configured with ClusterIP and is not directly accessible outside the cluster. To access ArgoCD, you need to port-forward:
Important Note:
Ensure there is no space at the end of "443" while running the command. You need to download the kubeconfig file and get the ArgoCD password separately for dev and stg clusters respectively.
Accessing ArgoCD
Fetch Admin Password
ArgoCD is currently configured with an auto-generated admin password. To fetch the admin password, execute the following command:
Port-Forward to Access ArgoCD
The ArgoCD server service is configured with ClusterIP and is not directly accessible outside the cluster. To access ArgoCD, you need to port-forward:
Important Note:
Ensure there is no space at the end of "443" while running the command.
Launch ArgoCD in Browser
Launch your web browser and access ArgoCD using the URL: https://localhost:8443
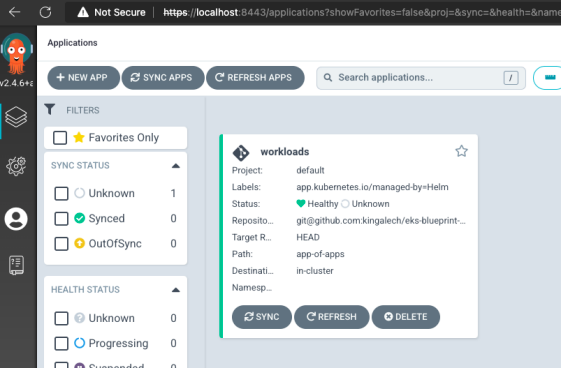
You will see that there are no applications which ArgoCD is managing currently.