Create Workload
A workload is an application running on Kubernetes. Whether a workload is a single component or several that work together, on Kubernetes you run it inside a set of pods.
Accessing Workload Creation
-
After logging into CHAI™, click on the project that contains the blueprint you want to deploy.
-
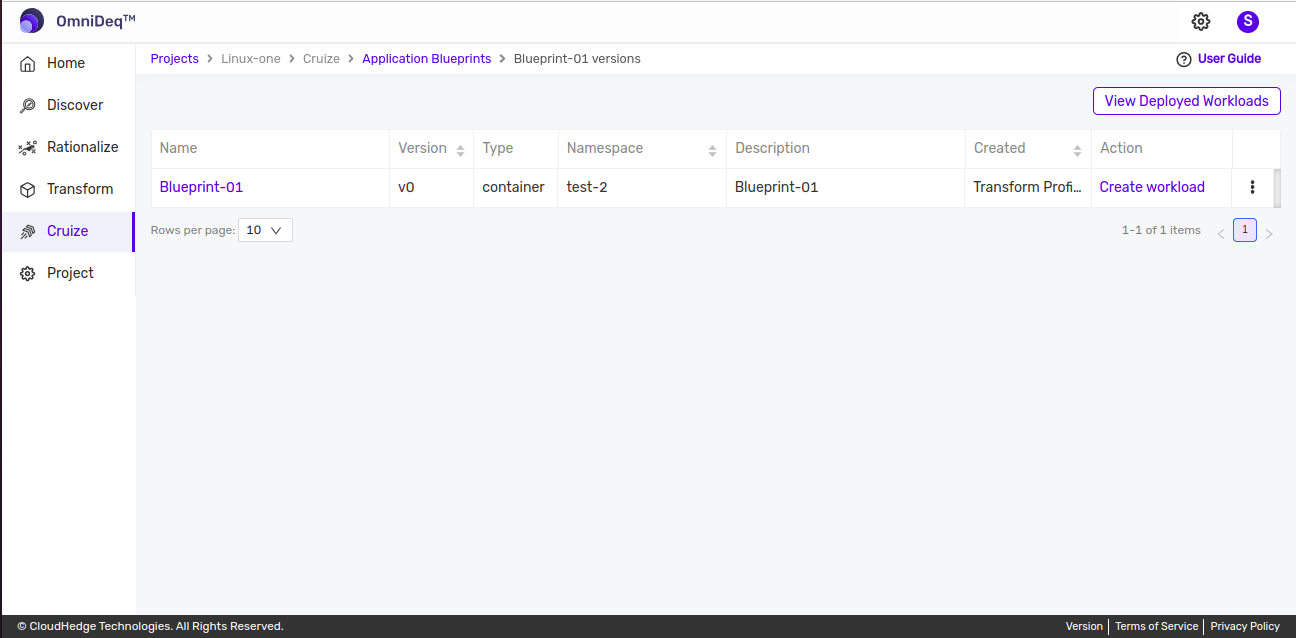
Click Cruize on the left side in the menu and click on the blueprint you want to deploy.
-
Click Create workload from the action column to create a workload.
-
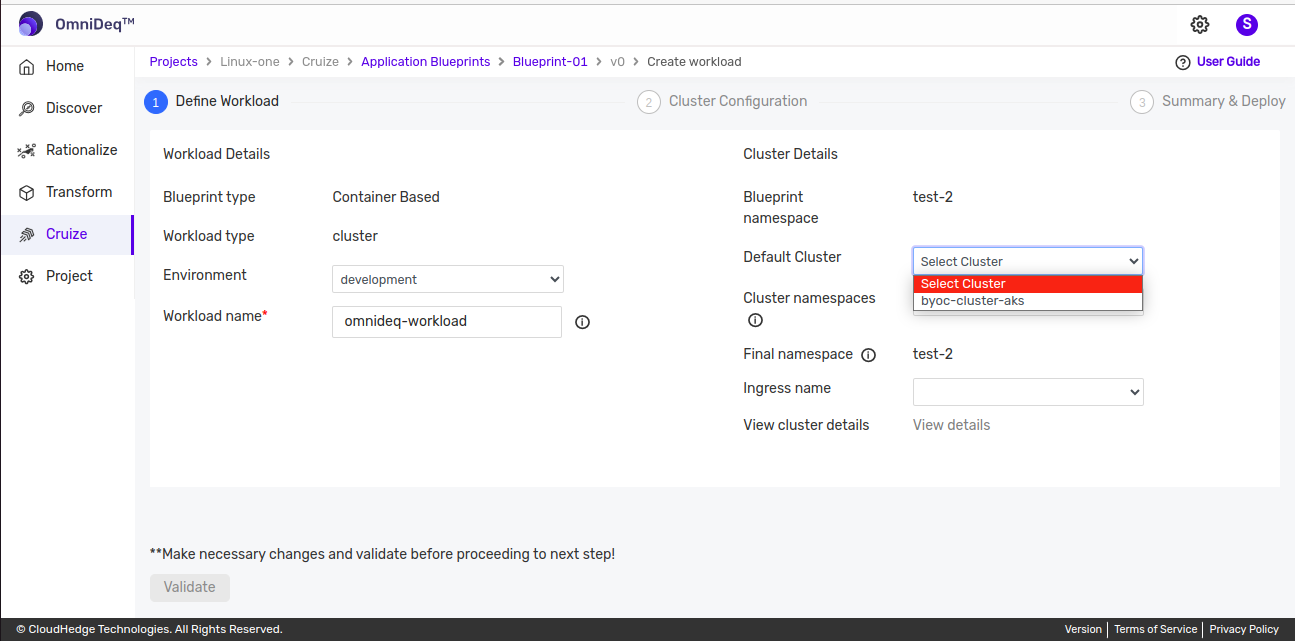
Once you click Create workload, a form will open to provide all details as shown in the image below.
Steps to Create Workload
There are three steps while creating a workload:
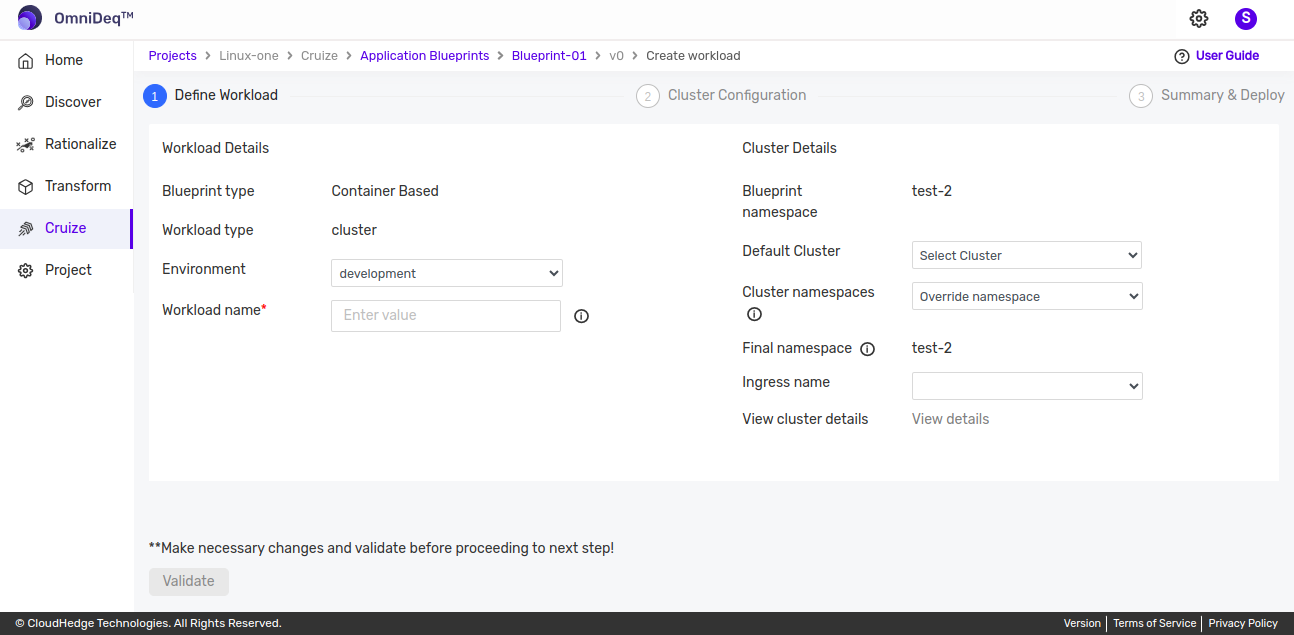
Step 1: Define Workload
In the define workload form, provide workload and cluster details to proceed to the next step.
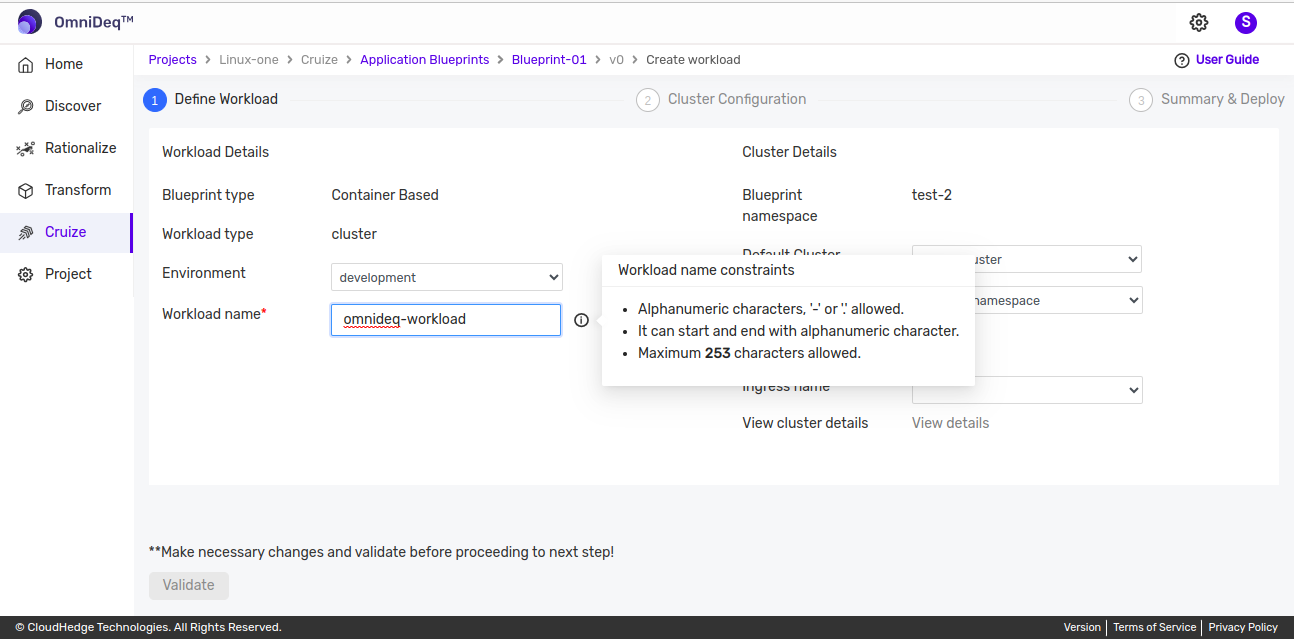
1. Workload Name
Naming requirements: - Name can contain only alphanumeric characters, hyphens (-), or periods (.) - Must start and end with an alphanumeric character - Maximum 253 characters allowed
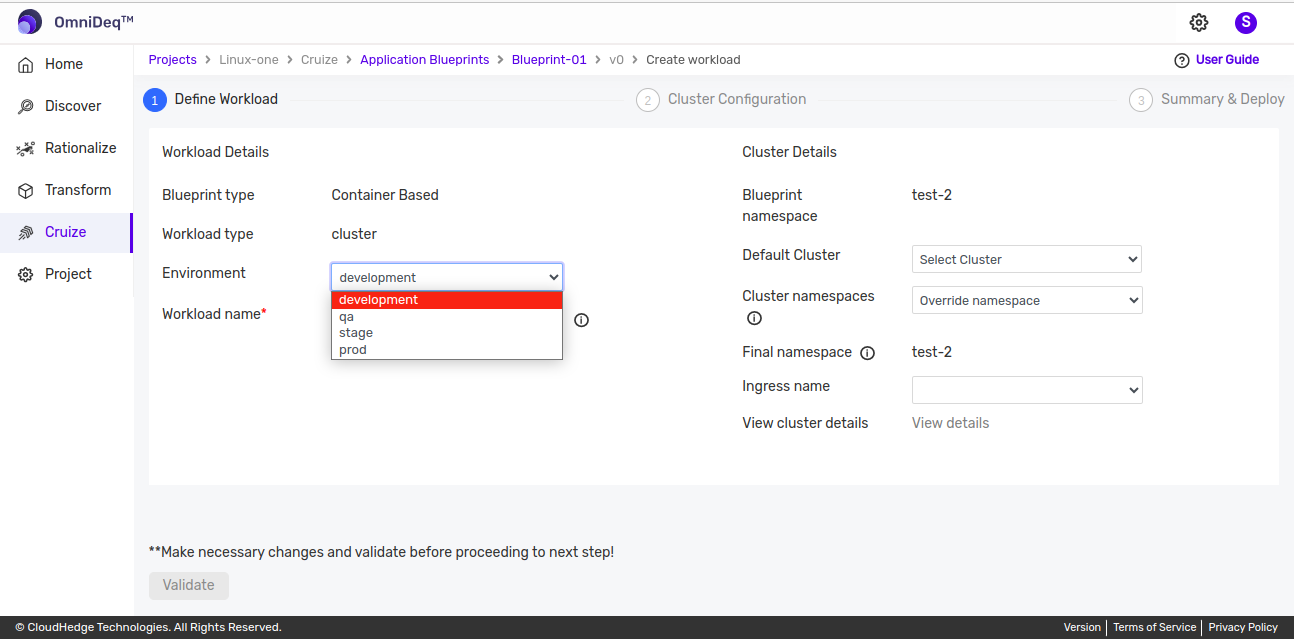
2. Environment
- Select the appropriate environment which will be used while deploying the blueprint
- Available environments are: Development, Stage, QA, and Production
3. Cluster Details
Provide the following cluster details:
| Field | Description |
|---|---|
| Cluster namespace | Namespace defined while creating the blueprint will be auto-populated here. You can use the dropdown to select a different namespace. |
| Cluster | Select the cluster here. Clusters created under the cluster section will be listed here. |
| Final namespace | The finalized namespace will be populated here. |
| Ingress name | Select the ingress name here. Ingress controllers available on the selected cluster will be listed here. |
Cluster
- Select the cluster which will be used for deployment
- Click here to learn more about clusters
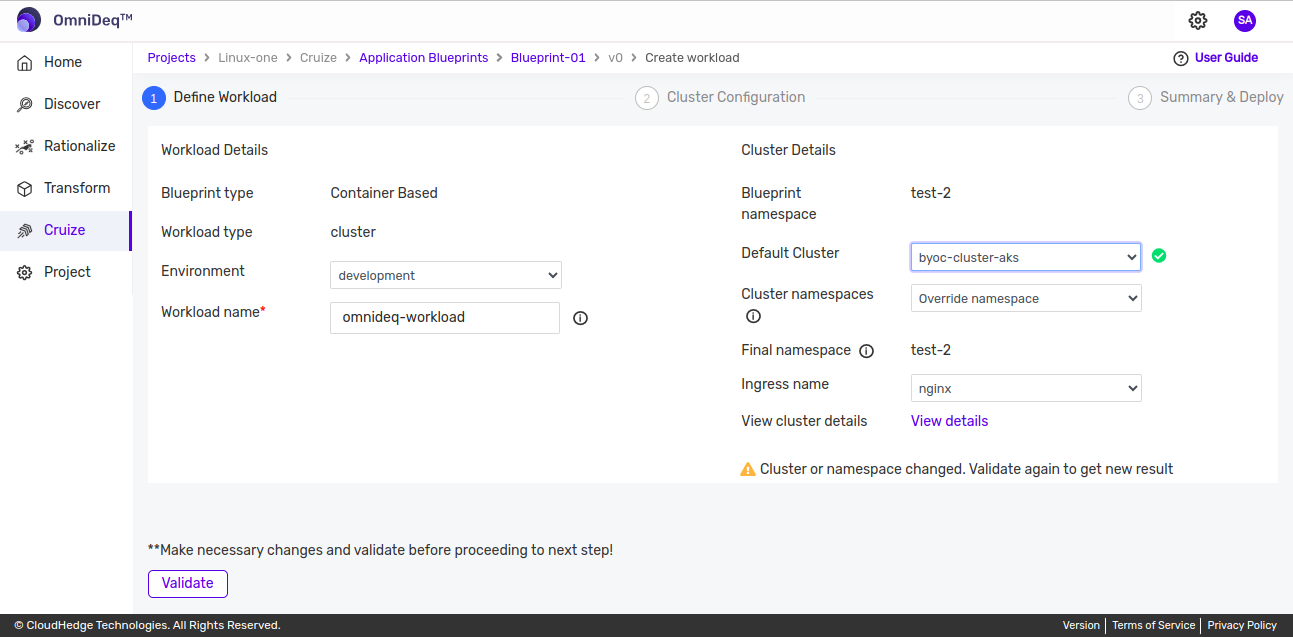
After selecting the cluster, it will fetch the details of the selected cluster and its availability. Once it fetches details successfully, a green check mark will be shown beside the selected cluster as shown in the image below.

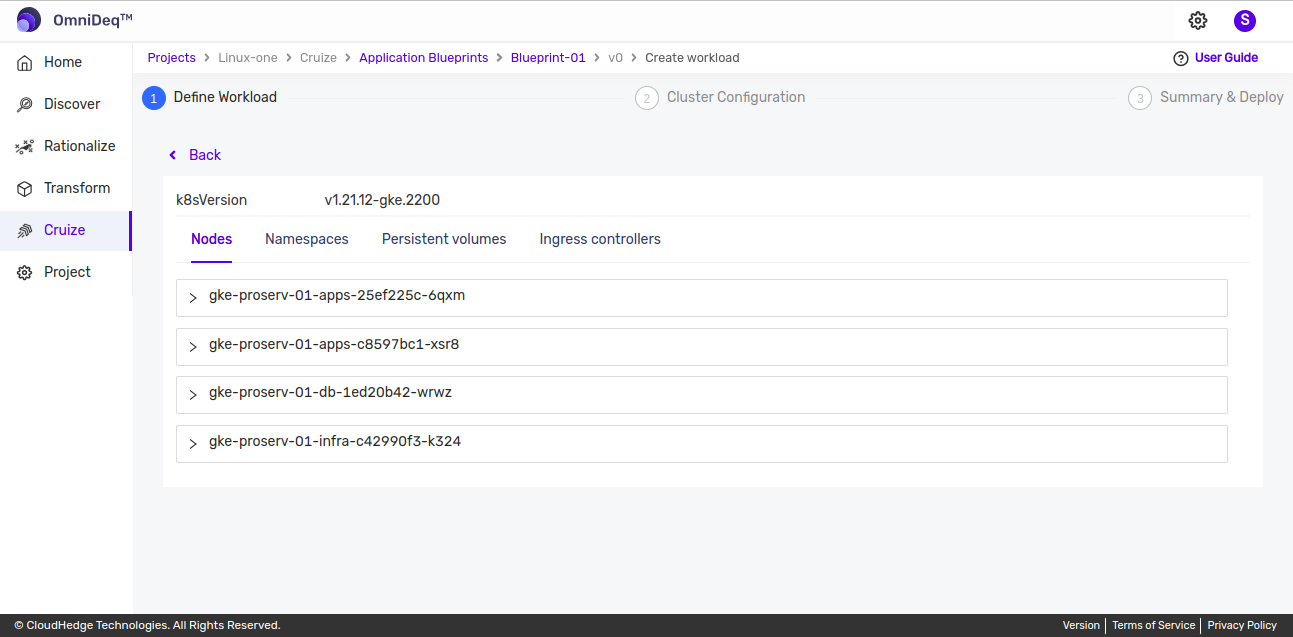
To view details of the cluster, click the View details link, which will show all cluster details such as Kubernetes version, nodes, ingress controllers, and persistent volumes as shown in the image below.
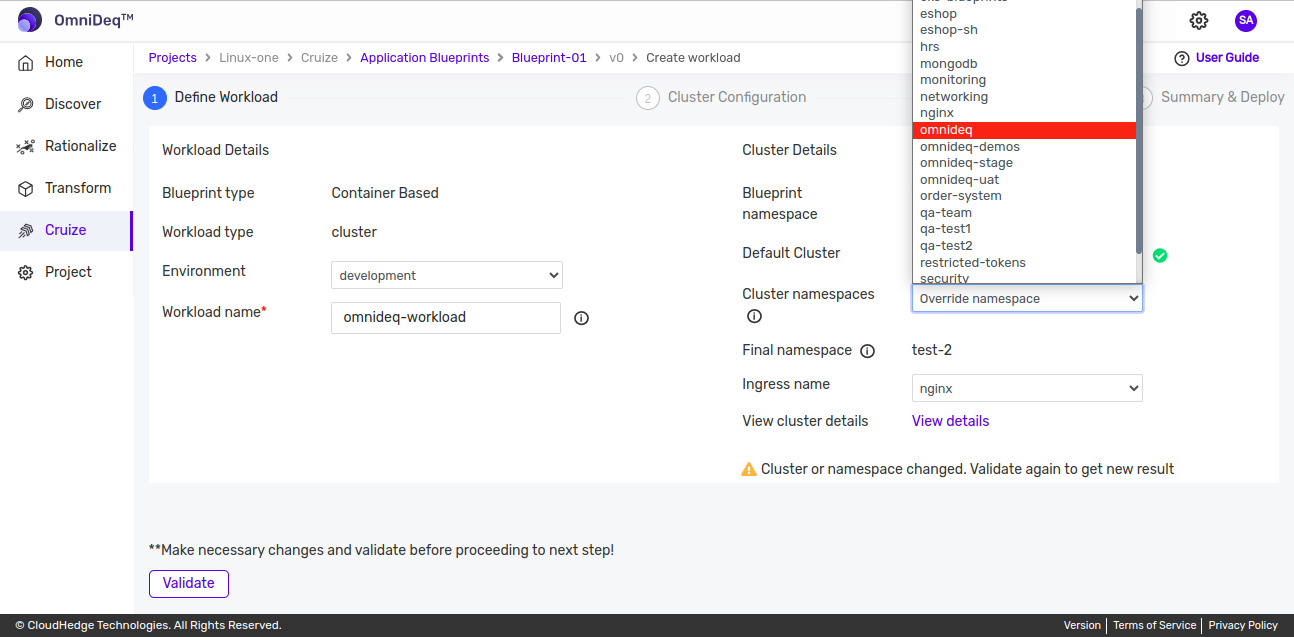
Cluster Namespaces
- If the namespace defined while creating the blueprint is not available on the cluster, you can override the namespace from the list
- Cluster namespaces available on the selected cluster will be listed here
Ingress Name
- Select the ingress here
- Ingress controllers available on the selected cluster will be listed here
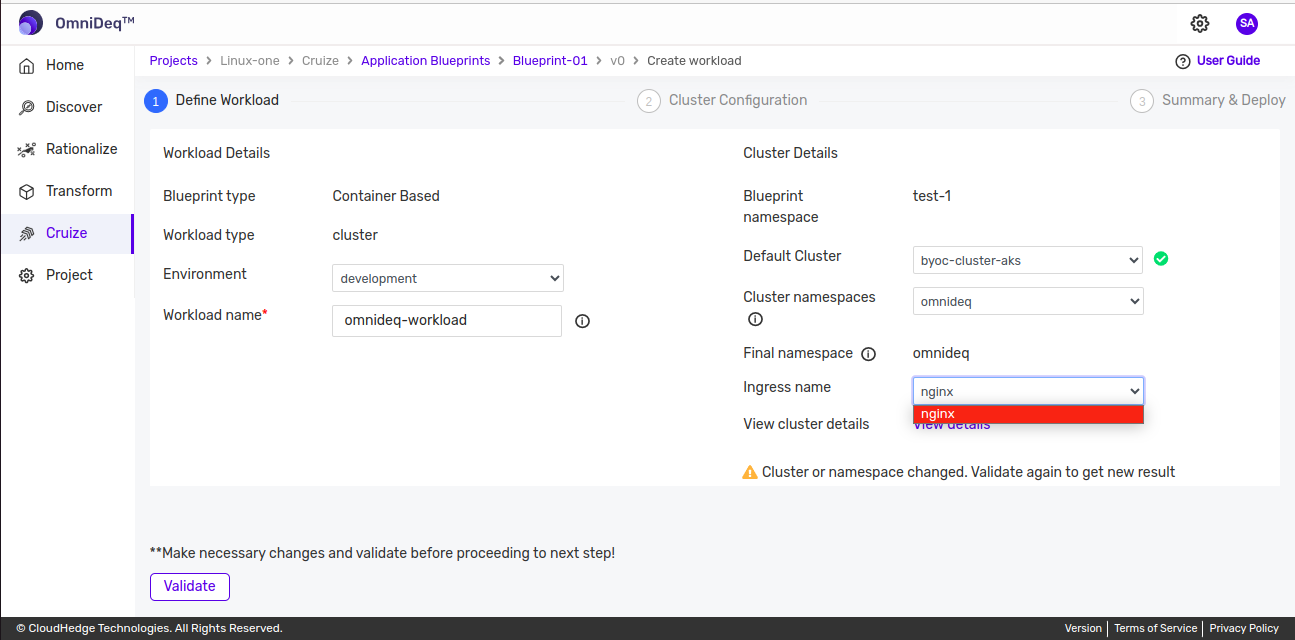
Validate Details
Once all valid details are provided in the define workload form, the Validate button displayed at the bottom will be enabled.

Click the Validate button, which will validate all provided details before proceeding to the next step.
Step 2: Cluster Configuration
After successfully validating workload and cluster details, you will be navigated to the Cluster Configuration step as shown below.
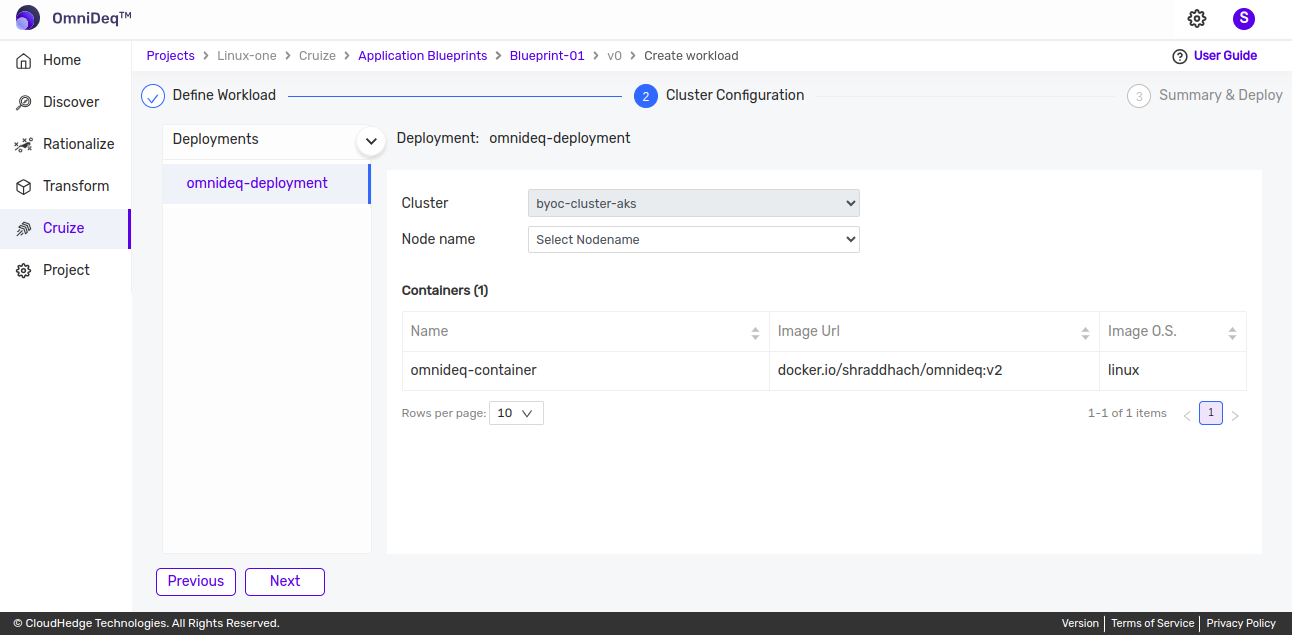
Under cluster configurations, all deployments of the selected blueprint version will be listed with all container details such as name, image URL, and image OS as shown in the image above.
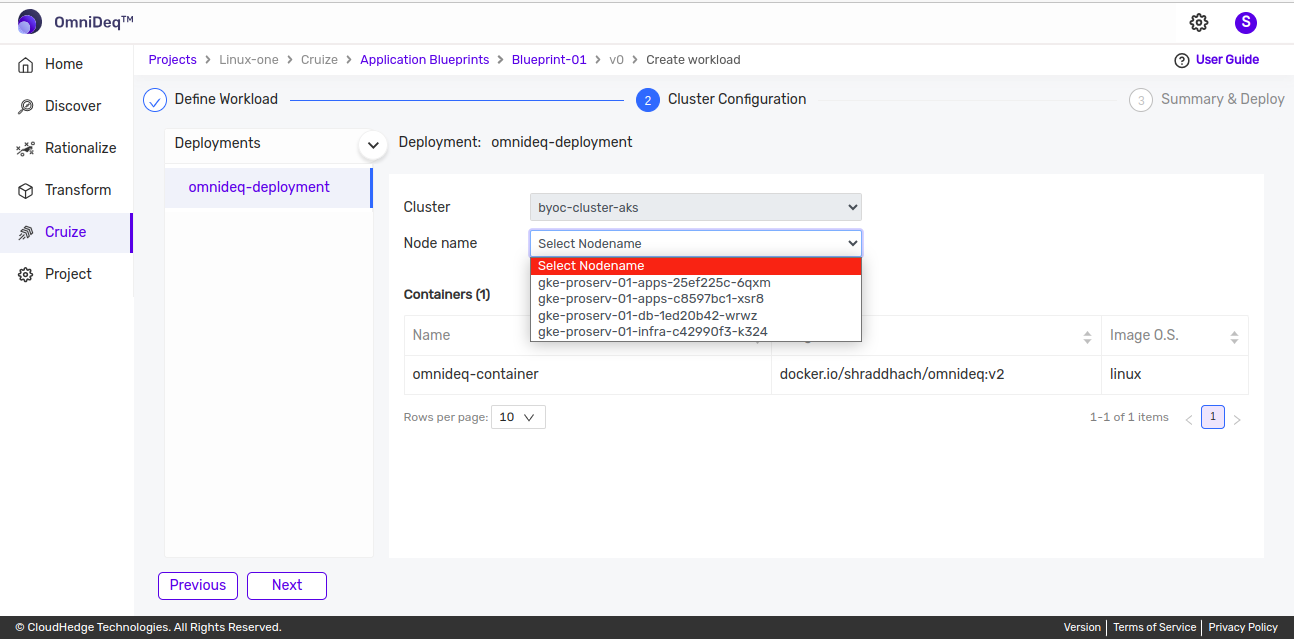
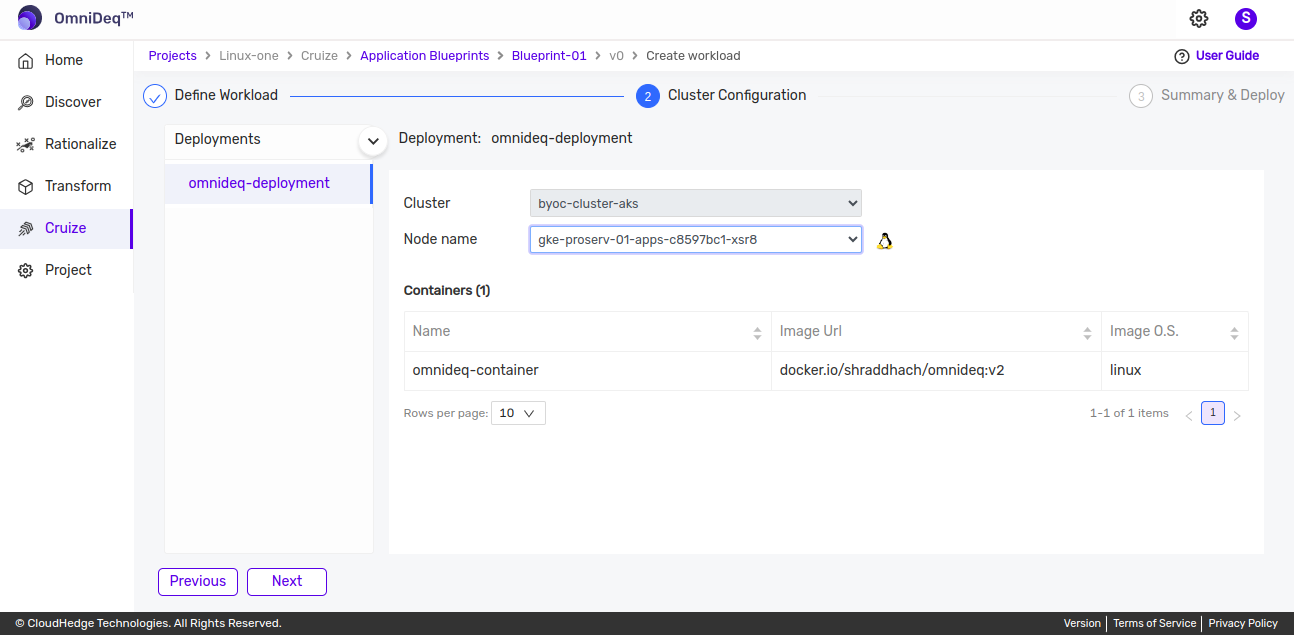
Select Node Names
For every listed deployment, select the node from the nodes which are available on the selected cluster. Node name selection is optional.
Proceed to Next Step
After reviewing deployment and container details, proceed to the next step Summary & Deploy using the Next button below.
You can also go to the previous step using the Previous button.
Step 3: Summary & Deploy
Under the Summary & Deploy step, a summary of all provided workload, cluster, and node details will be shown.
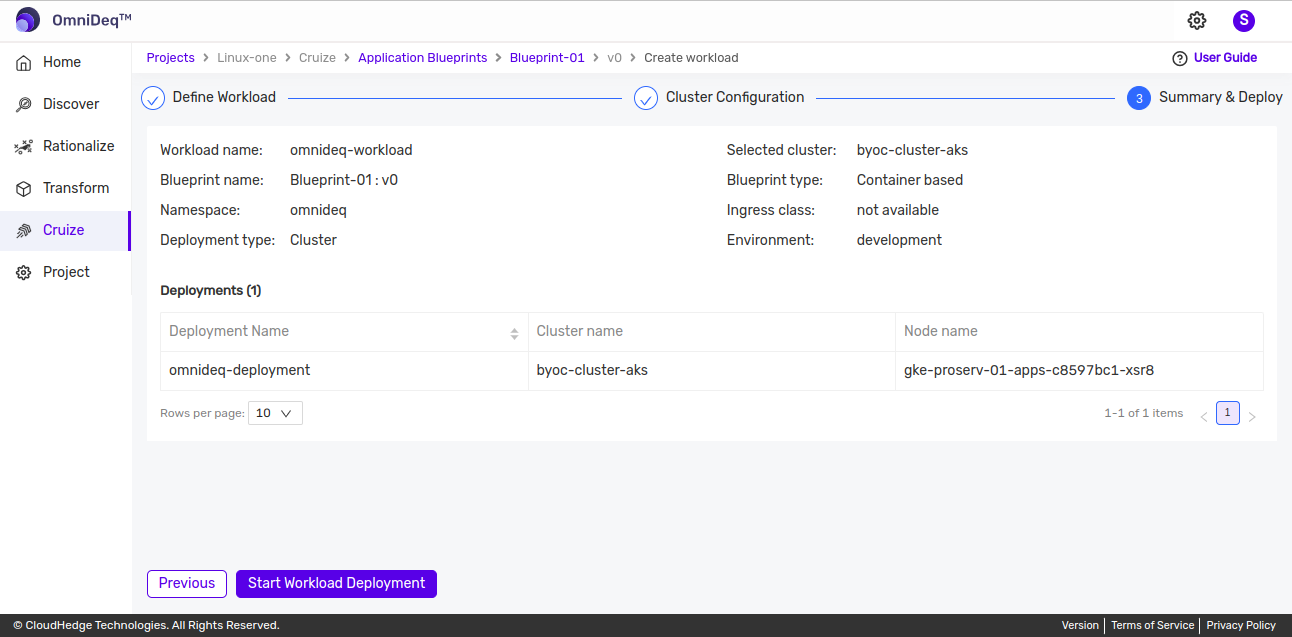
Review and Deploy
-
Review all provided details here before starting workload deployment.
-
Click the Start Workload Deployment button to start workload deployment.
-
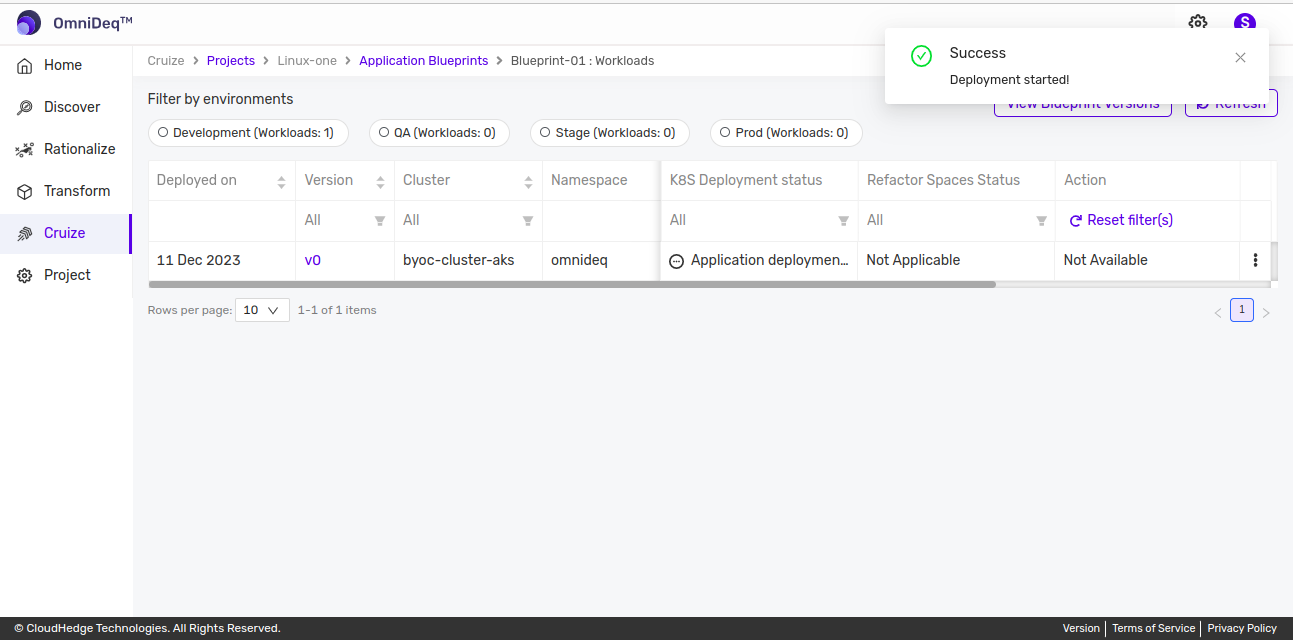
After successfully starting deployment, you will be navigated to the workloads page as shown below.
Reference:
For more details on workloads, please refer to Managing Workloads.