How to download log files for troubleshooting
A. By CHAI Service Logs
I. Logs from CHAI UI
Users can get the logs from CHAI UI by following below steps:
-
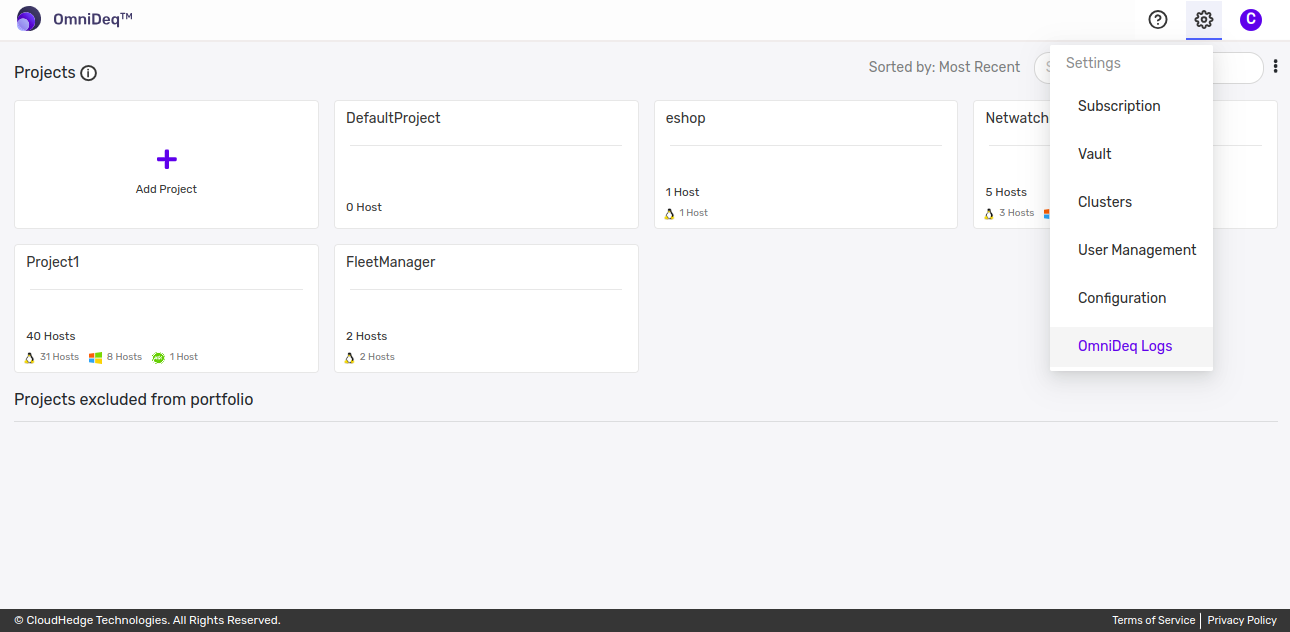
Navigate to the project at CHAI UI in the browser, click on settings at the upper right corner.
-
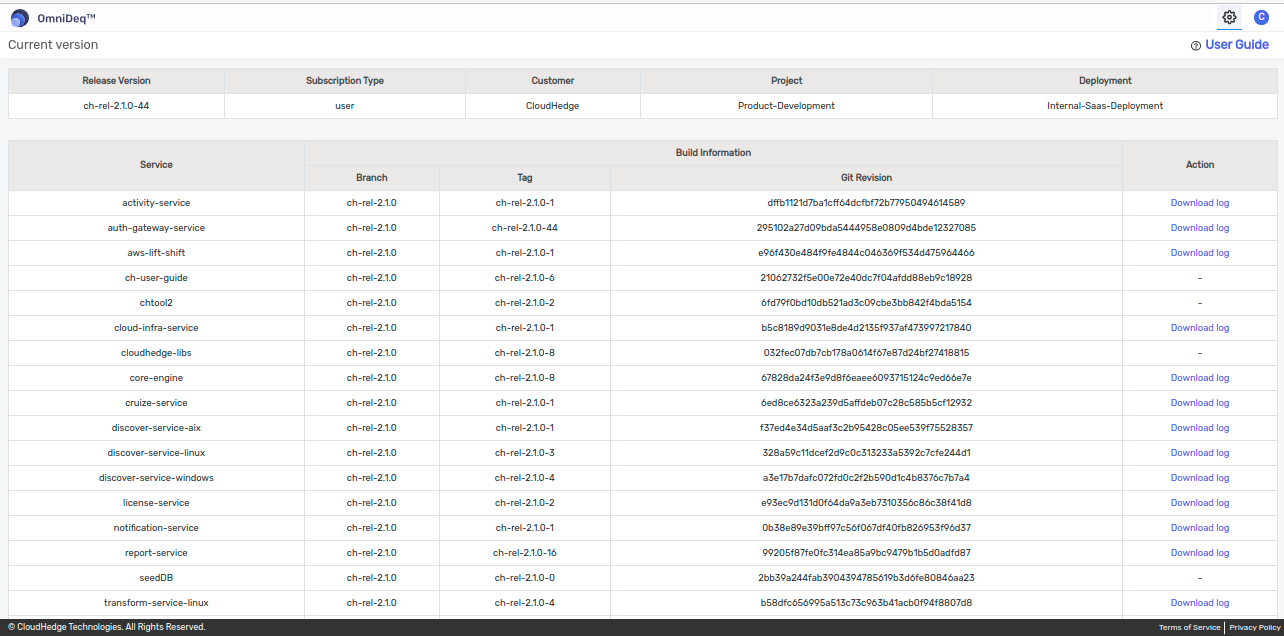
Click on CHAI logs, users will get all service logs here. click on the download logs for the particular service logs.
II. Logs from CHAI Enterprise Server
To obtain the logs from the CHAI Enterprise server, log in to it through SSH and execute the commands below.
sudo docker logs -f <CHAI_service_name>
Note: users can get the service names by running the command sudo docker images
| Phase | CHAI Service Name |
|---|---|
| Windows Pre-requsites | discover-service-windows |
| Windows Discovery | discover-service-windows, core-engine |
| Windows offline Discovery | discover-service-windows |
| Windows Netwatch | discover-service-windows |
| Windows Transform | transform-service-windows |
| Linux Pre-requisites | discover-service-linux |
| Linux Discovery | discover-service-linux, core-engine |
| Linux offline Discovery | discover-service-linux |
| Linux Netwatch | discover-service-linux |
| Linux Transform | transform-service-linux |
| Cruize | cruize-service |
| UI Related Issues | webapp, Network response for respective call |
| Vault Creation | vault-service, core-engine |
| Reports | report-service |
B. Host/VM Logs
Users can obtain the logs from the host machine through various methods, as outlined below.
I. Discovery logs
a. From CHAI UI:
We can get the Discover logs by requesting them from the CHAI UI by following the below steps:
-
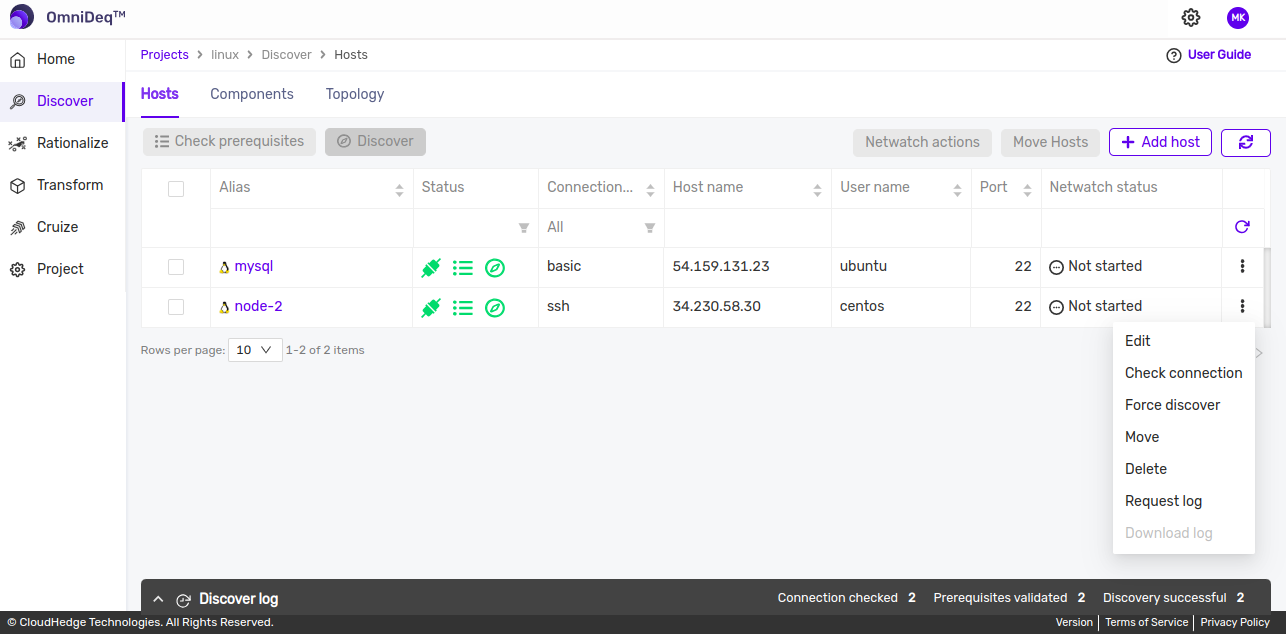
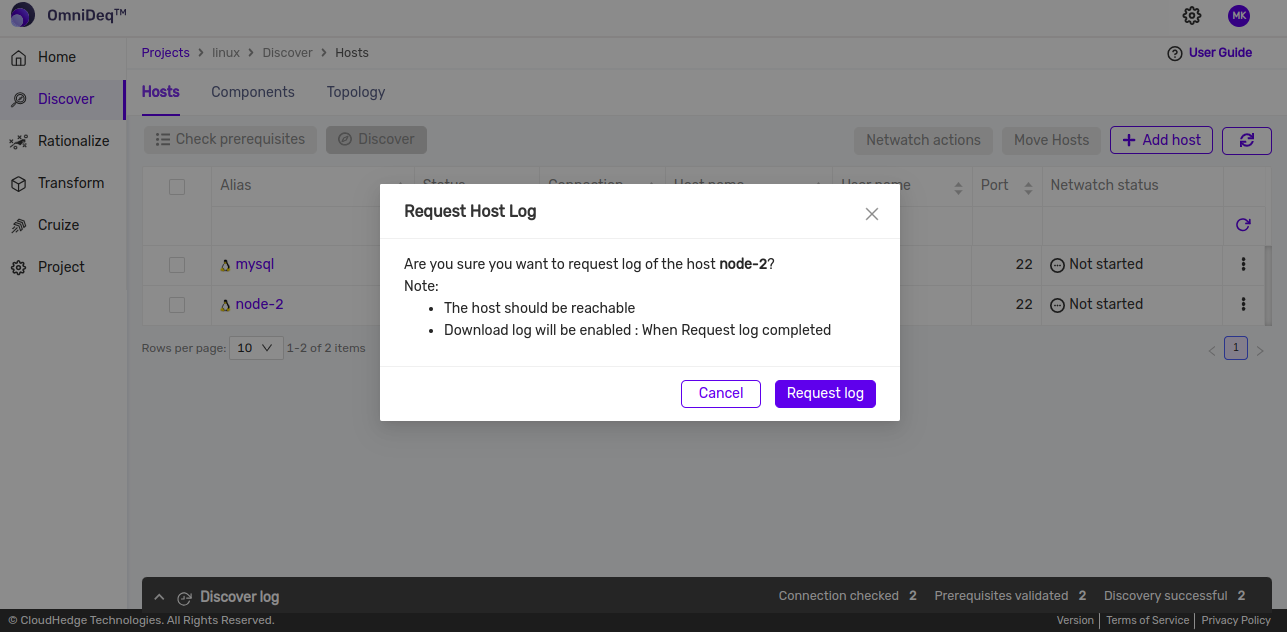
Navigate to the Project where the host or component exists that you want to collect logs for. Click on Discover and click on the 3 dots against the host you want to collect logs for.
-
Click on
Request log -
Once you click on it, a popup will be displayed for confirmation. Click on Request log
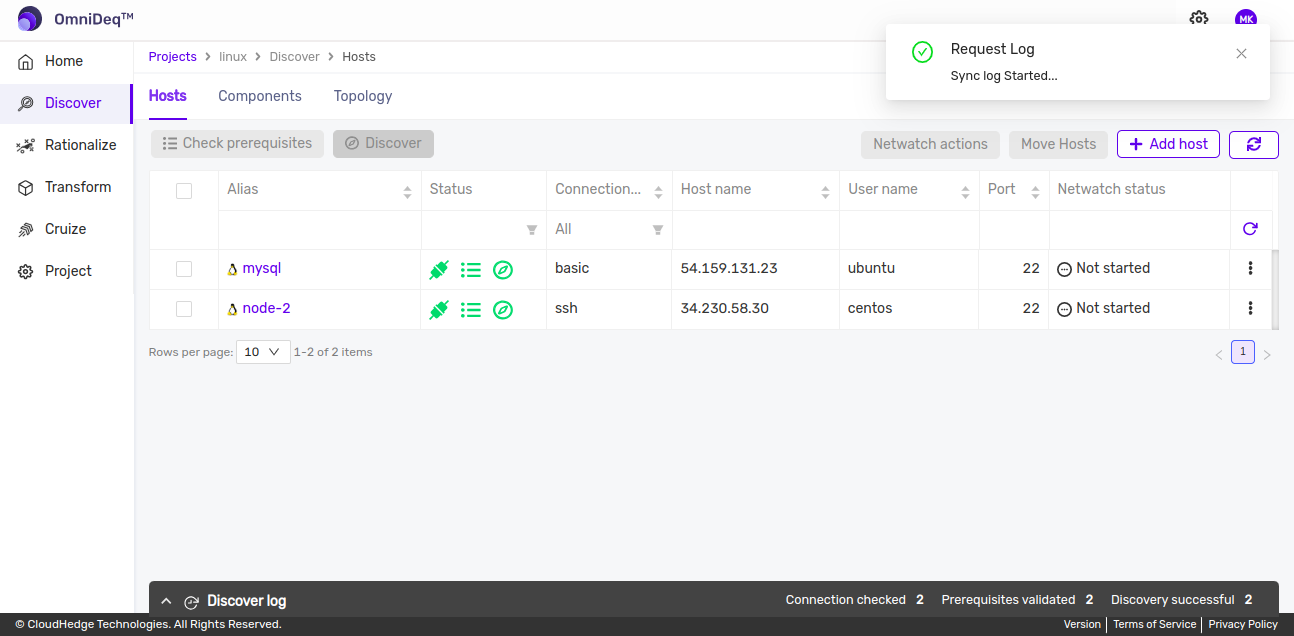
-
Once you click on it, a notification will be displayed as shown below
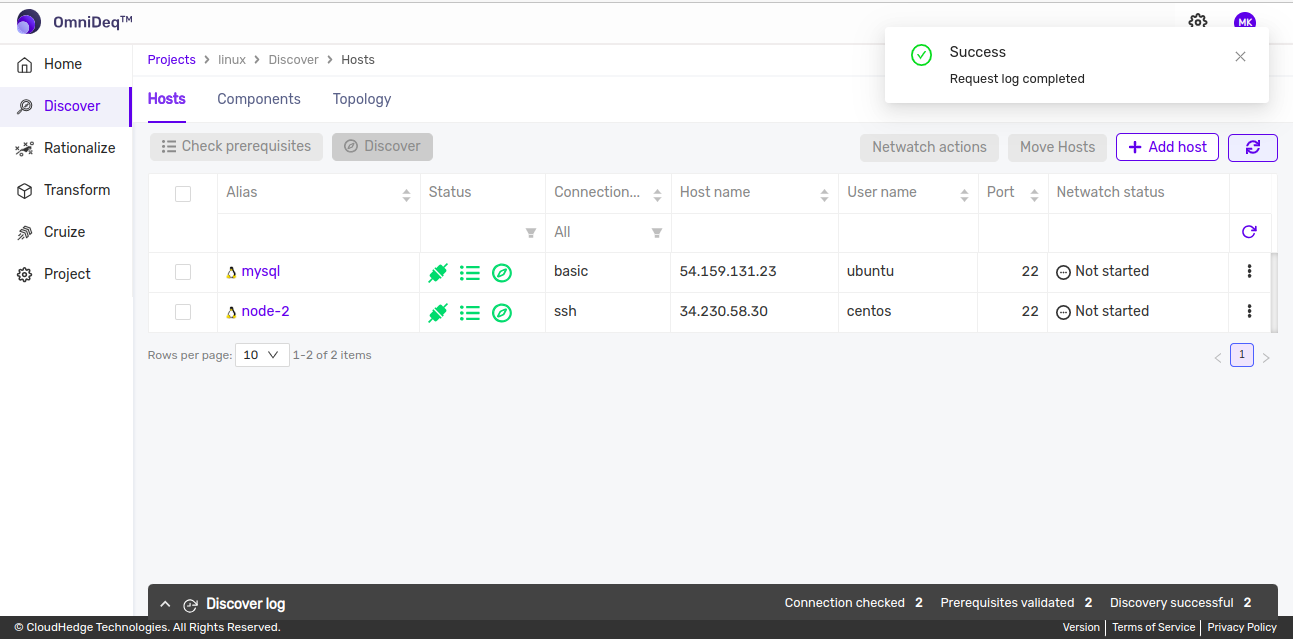
-
Once the logs have been collected, you will receive a notification for the same
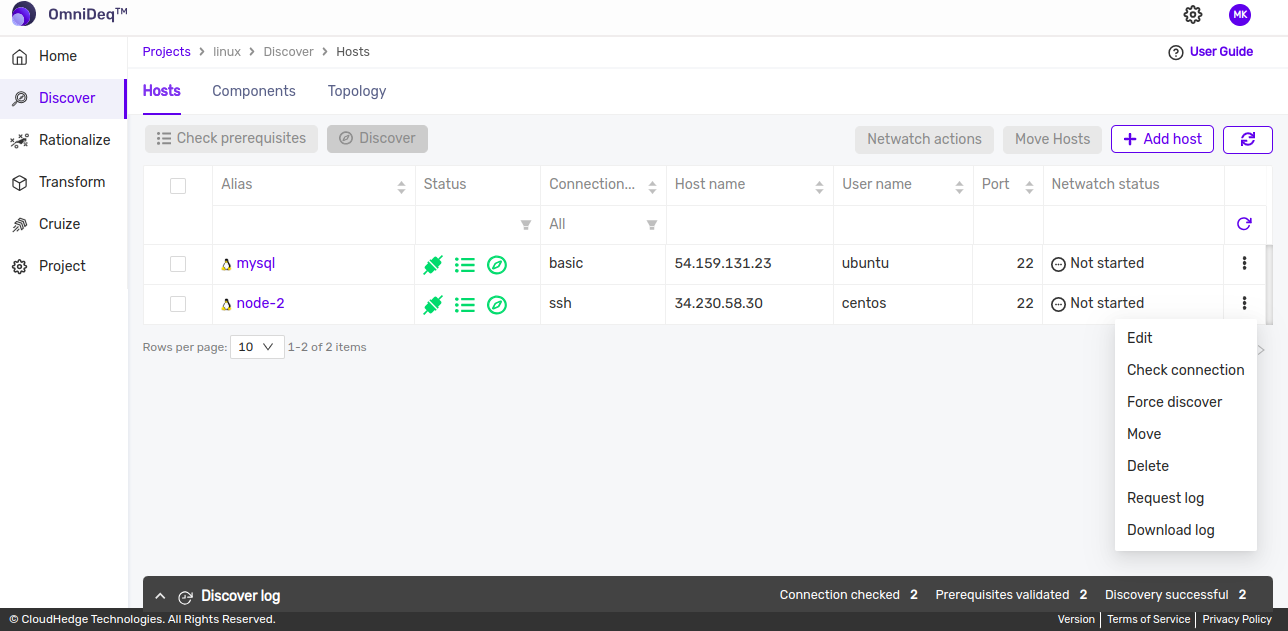
-
users can click on the 3 dots and download the log file by clicking on Download log
-
If, instead of a host log, you want to download log file for a component, navigate to the Components tab, click on the 3 dots against the component and select Request log
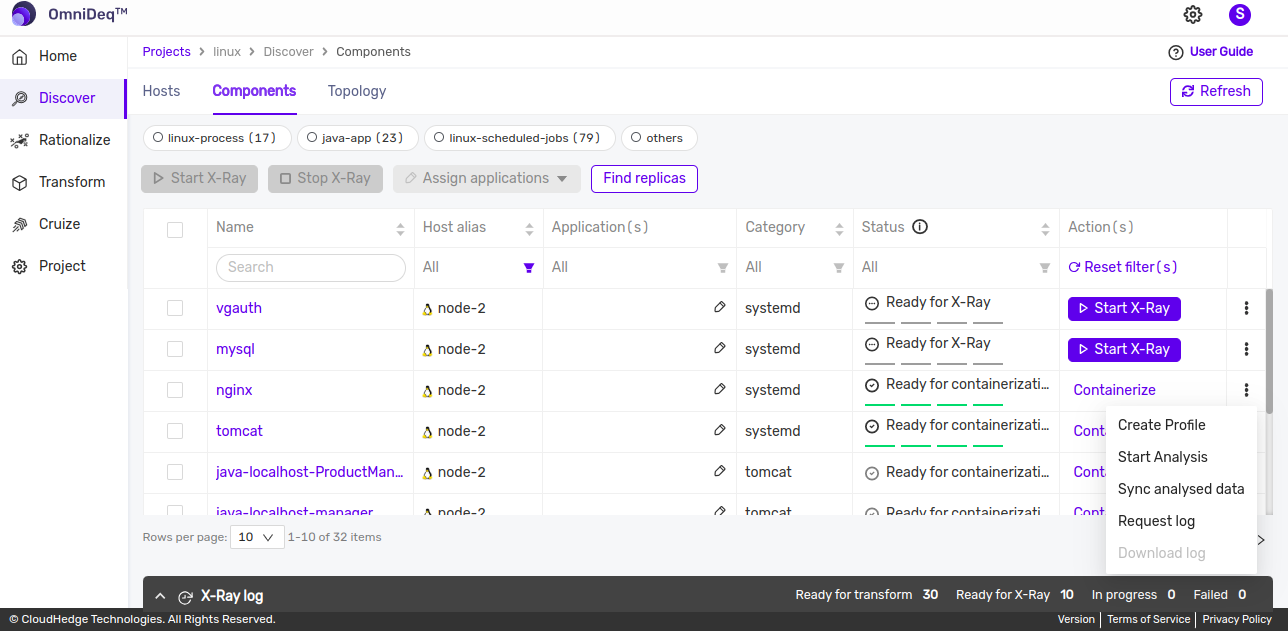
-
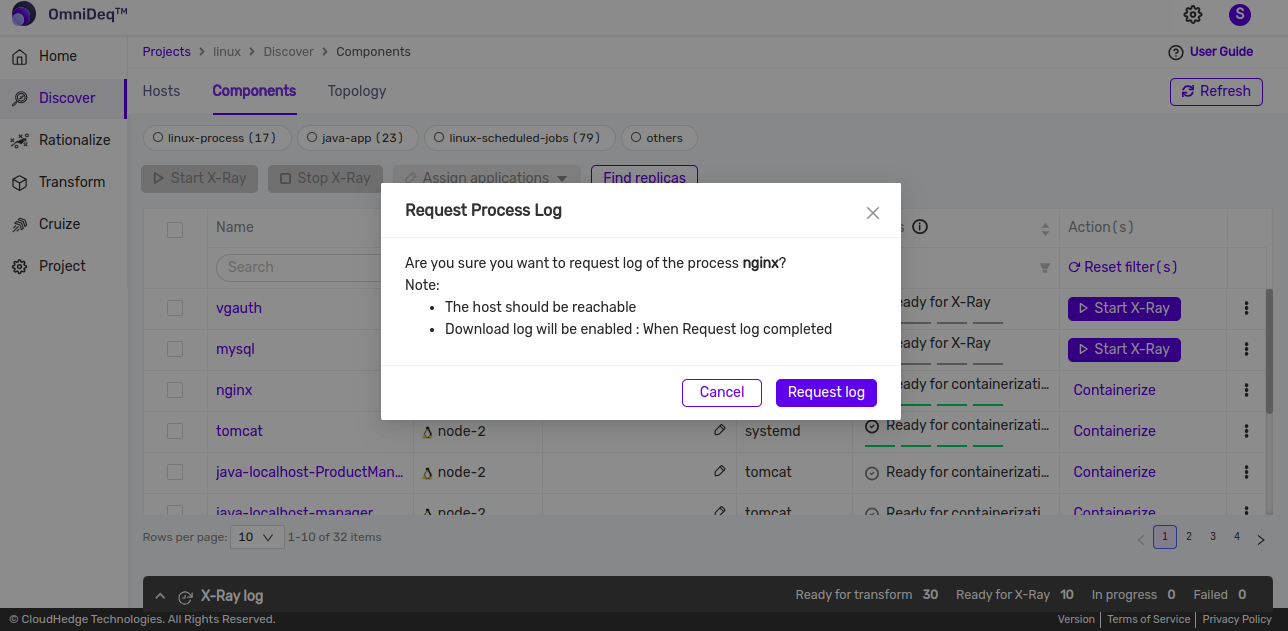
Once you click on it, a popup will be displayed for confirmation. Click on Request log
-
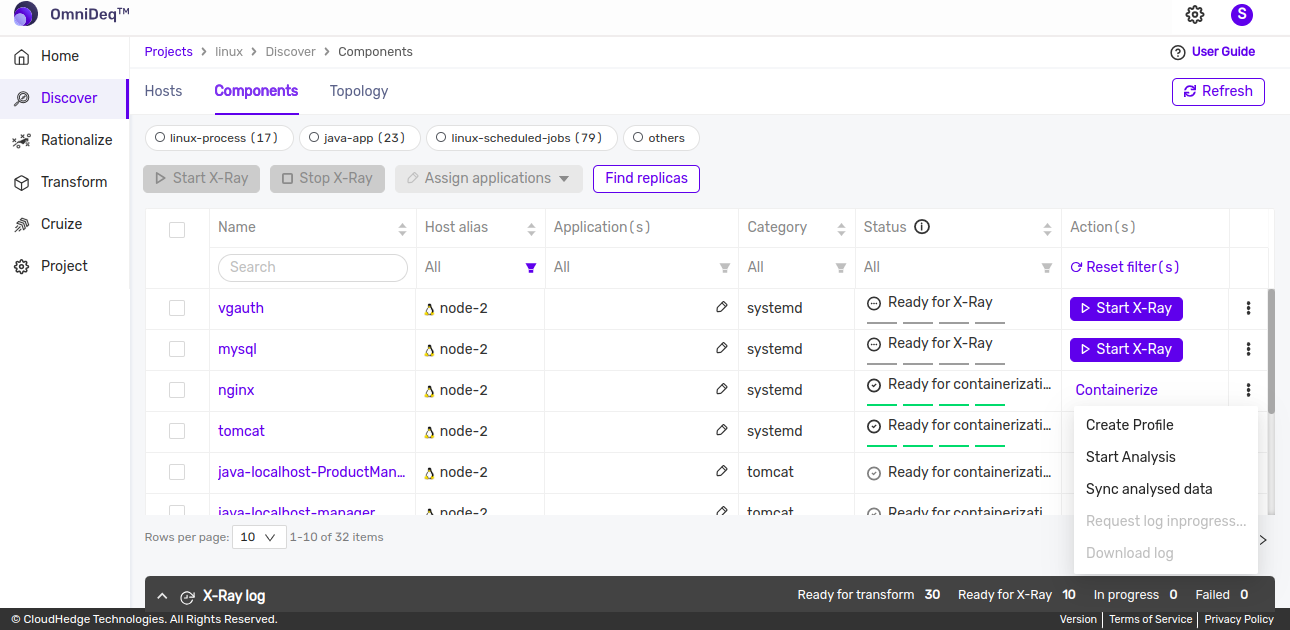
The Request log will change to Request log in progress...
-
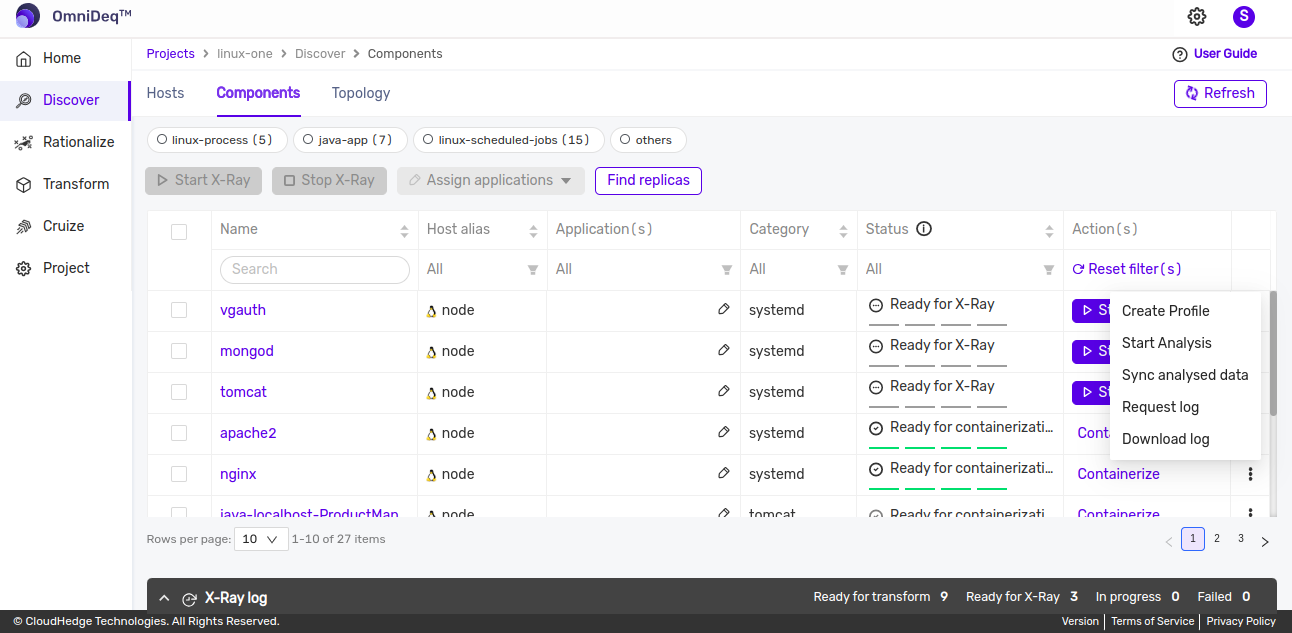
Once the log is generated, you can download it by clicking on Download log as shown below
b. From VM/Host:
i. Discovery logs from Linux Host
We can obtain discovery logs from a Linux Host/VM by navigating to the following path on Linux host machine.
| Phase | Host Machine (Latest Folders) |
|---|---|
| Linux Pre-requisites | /opt/.ch-tools/logs/discover/livelinesscheck.log |
| Linux Discovery | Discover Logs: /opt/.ch-tools/logs/discover/*.log Probe Logs: /opt/.ch-tools/logs/chtool.out Error Logs: /opt/.ch-tools/logs/chtool.error |
| Linux offline Discovery | Discover Logs: /opt/.ch-tools/logs/discover/*.log Probe Logs: /opt/.ch-tools/logs/chtool.out Error Logs: /opt/.ch-tools/logs/chtool.error |
| Linux Netwatch | /opt/.ch-tools/logs/discover/netwatch.log |
ii. Discovery logs from Windows Host
We can obtain discovery logs from a Linux Host/VM by navigating to the following path on Windows host machine.
| Phase | Host Machine (Latest Folders) |
|---|---|
| Windows Pre-requisites | <UserHomeDir>\.ch-dis-<someNumber>\DiscoveryData\liveliness.txt |
| Windows Discovery | <UserHomeDir>\.ch-dis-<someNumber>\DiscoveryLogs\winchtoolpy.txt |
| Windows offline Discovery | While Discovery : <Folder_Where_Winchtoolpy_is_copied>\DiscoveryLogs\winchtoolpy.txtWhile creating Zip:<Folder_Where_Winchtoolpy_is_copied>\DiscoveryLogs\archive.log.<somenumber>Zip Present at : <Folder_Where_Winchtoolpy_is_copied>\DiscoverData\result<somenumer>.zip |
| Windows Netwatch | NetMon Utility : <UserHomeDir>\.ch_netwatch_<someNumber>\odNetMonlog_<Date>.txtNetMon Utility data transfer: <UserHomeDir>\.ch_netwatch<someNumber>\DiscoveryLogs\winchtoolpy_netwatch_<someNumber>.log |
II. Transform logs
a. From CHAI UI:
Similar to the discover logs, you can access the transform logs from the CHAI UI. Follow these steps:
- Navigate to the project in CHAI UI using your browser.
- Click on Settings in the upper-right corner.
- Select CHAI Logs. All service logs, including transform logs linux, will be listed here.
- Click Download Logs for the specific service(Transform-logs-linux).
b. From Host/Application VMs and Buildboxes
Note: Transform logs are not directly available on the VMs. However, artifacts generated during the transformation process can be found on both the Host/Application VMs and the Buildboxes. Use these artifacts for troubleshooting.
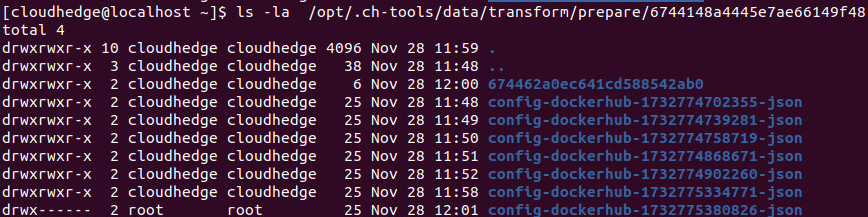
i. Transform Artifacts from Linux Application Host
-
Access the Linux Host via SSH:
ssh <username>@<linux_host_ip> -
Navigate to the artifacts directory: Replace
with the latest folder or file based on the timestamp.

ii. Transform Artifacts from Linux Buildbox
-
Access the Linux Buildbox via SSH:
ssh <username>@<linux_buildbox_ip> -
Navigate to the artifacts directory: Replace
with the latest folder or file based on the timestamp.
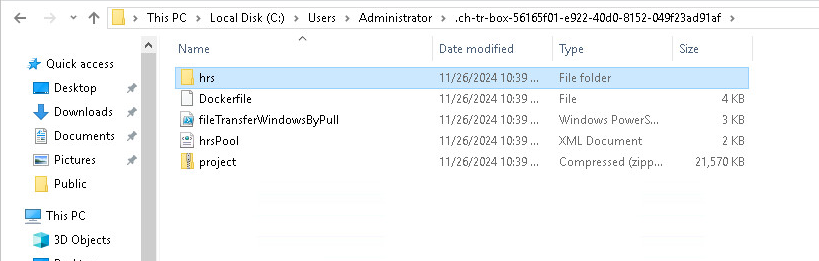
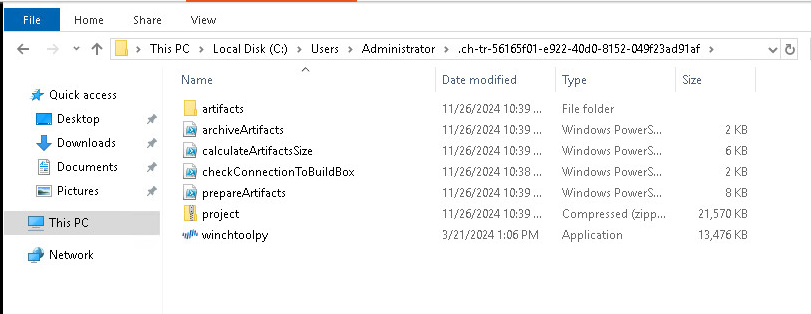
iii. Transform Artifacts from Windows Application Host
- Access the Windows Host via RDP or SSH (if configured).
-
Navigate to the artifacts directory: Replace
with the latest folder or file based on the timestamp. C:\Users\Administrator\.ch-tr-box-<someNumber>
iv. Transform Artifacts from Windows Buildbox
- Access the Windows Host via RDP or SSH (if configured).
-
Navigate to the artifacts directory: Replace
with the latest folder or file based on the timestamp. C:\Users\Administrator\.ch-tr-box-<someNumber>