Discover WebSphere
Understanding WebSphere Applications
WebSphere deployment consists of a deployment manager and the application servers scattered over different nodes (servers), where the node agent is also running, serving the applications. A WebSphere application running on an application server will have its dependencies on various resources configured on the container, such as data sources, JMS modules, shared application libraries, server configurations, etc.
Discover WebSphere Applications
When the host machine is running the WebSphere deployment manager, the Discover Host feature not only collects all the information from the host machine such as system information, process information, memory information, etc., but also scans the WebSphere deployment manager for all the applications that can be containerized into separate independent containers.
WebSphere Application Discovery - A Single Phase Discovery
Discovery of WebSphere applications is a single-stage process. The discovery should be run on the WebSphere deployment manager.
Information About WebSphere Applications
Once the discovery of a WebSphere deployment manager host is done, CHAI™ UI lists each application that is ready for individual containerization. These applications include the applications deployed on all the clusters or to the standalone servers. The following information is revealed by the CHAI™ UI for each application:
- The WebSphere application information
- The shared application libraries on which the WebSphere application depends
- The resource configurations on the server on which the application is running. In the case of an application deployed on a cluster, the configuration info of any one server is taken as a template, as the assumption is that the servers in the cluster will probably have the same configuration
- The application configurations like data sources and JMS modules that are deployed on the server/cluster
WebSphere Application Server Objects Supported for Transform
| Objects | Discover | Transform |
|---|---|---|
| Shared Application Libraries | Yes | Yes |
| Server Certificates | Yes | Yes |
| Data Sources | Yes | Yes |
| JMS Configuration | Yes | Yes, only IBM MQ Server |
| Cluster | Yes | No |
| JNDI Realms | Yes | Yes, only Active Directory |
Process Flow for Discovery of WebSphere Applications
- Add WebSphere deployment manager in discovery host
- Prerequisites check on discovery host
- Phase 1 discovery
- Transform a WebSphere application into a container
To find out about Linux host prerequisites, please click here.
WebSphere Applications Discovery
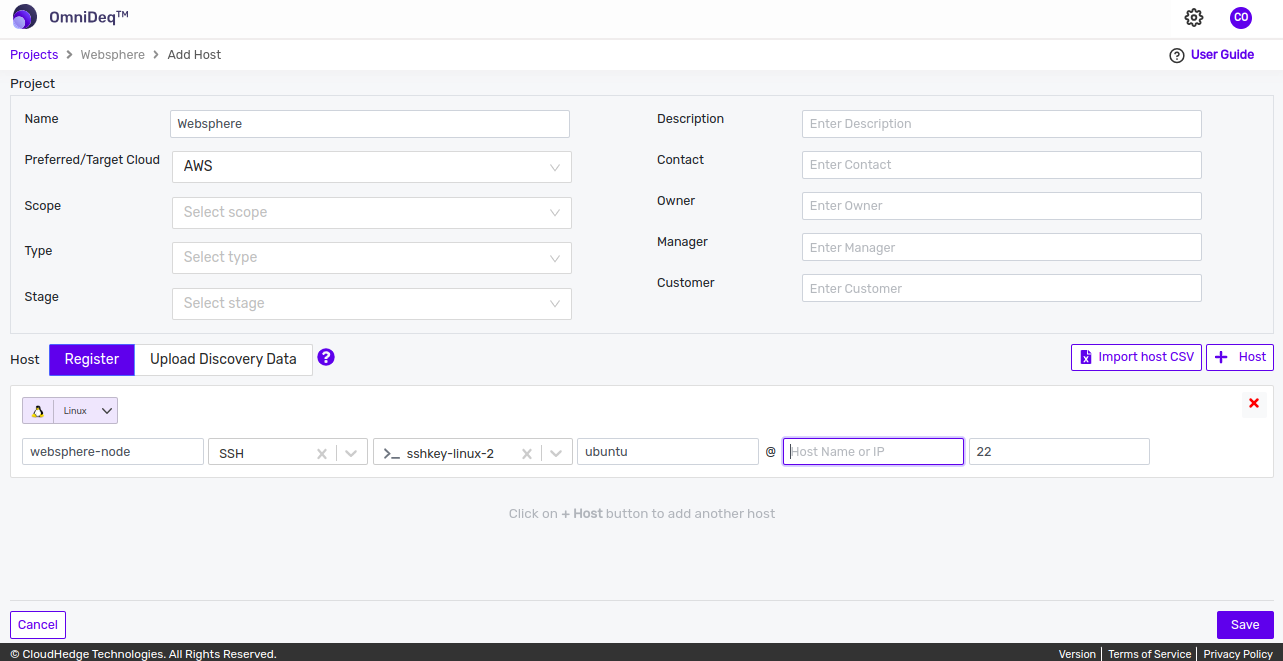
Step 1: Add Project
In the landing page, click Add Project. Add respective details and click Save. This will take you to the discover page.
Step 2: Check Connection
Click on the 3 horizontal dots beside the host and click Check Connection and wait for a few seconds.
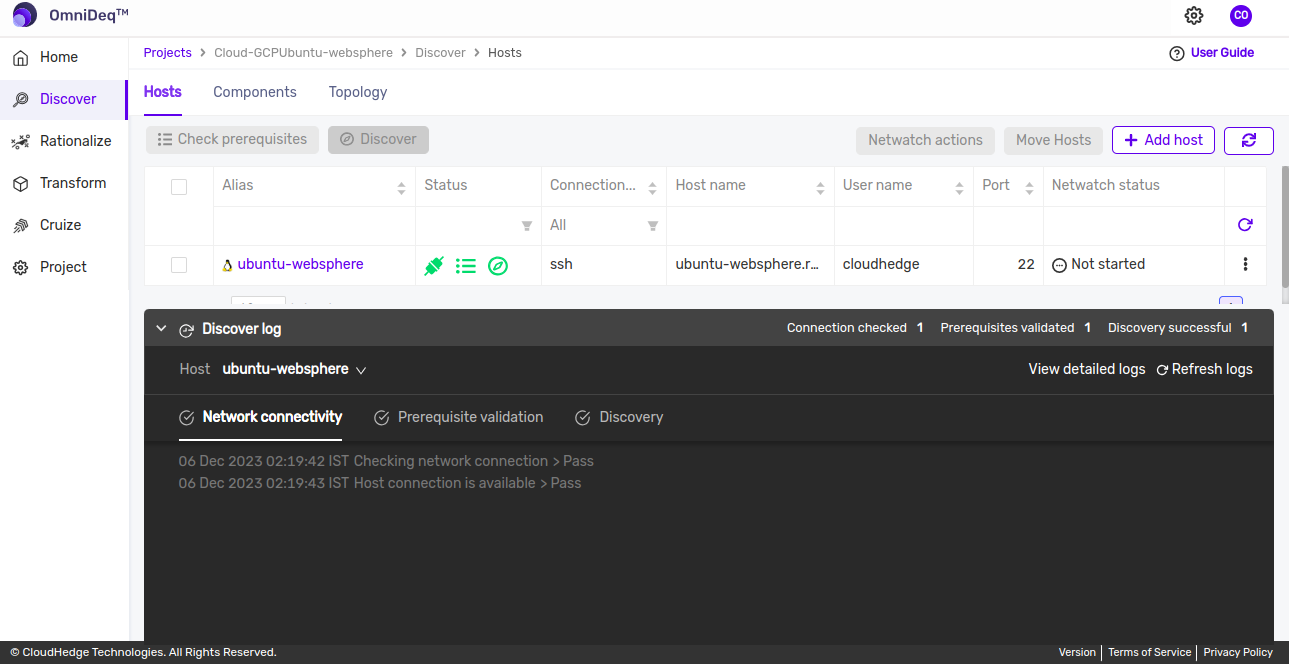
Note: - You will get a success message in a few seconds - This step is optional. This step is just to make sure that the connection is established successfully
Step 3: Check Prerequisites
Click the Check Prerequisites button as shown in the image below and wait for a few seconds.
You can see the prerequisites logs from the Logs section at the bottom when the prerequisite check is started as shown in the image below.
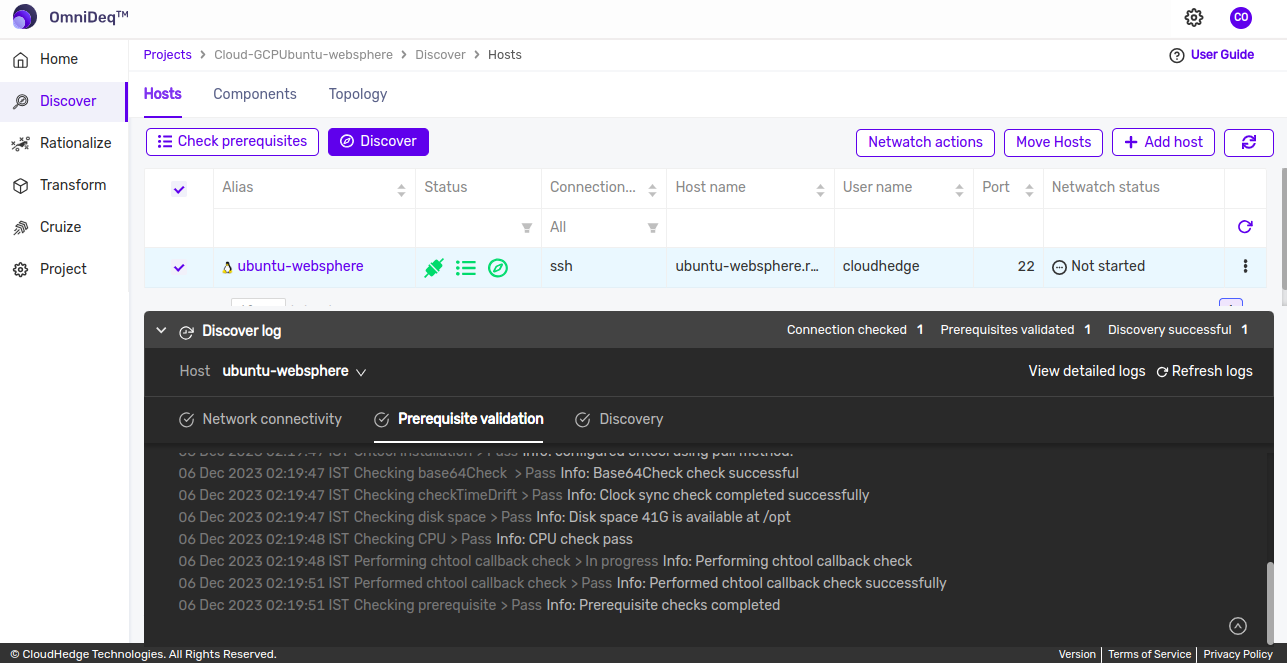
Logs are divided into 2 parts:
- Network Connectivity Checks: Shows the network connectivity checks on the host machine
- Validating Prerequisites: Shows the checks if all the prerequisites are available or not
Step 4: Edit the Ignore List (Optional)
You can edit the ignore list before starting a discovery by clicking on the Process Ignore List button as shown in the image below. The ignore list is used to skip the discovery process from analyzing these processes on the host. Do not ignore the Java processes. Using this feature, you can include or exclude the processes for discovery as shown in the image below.
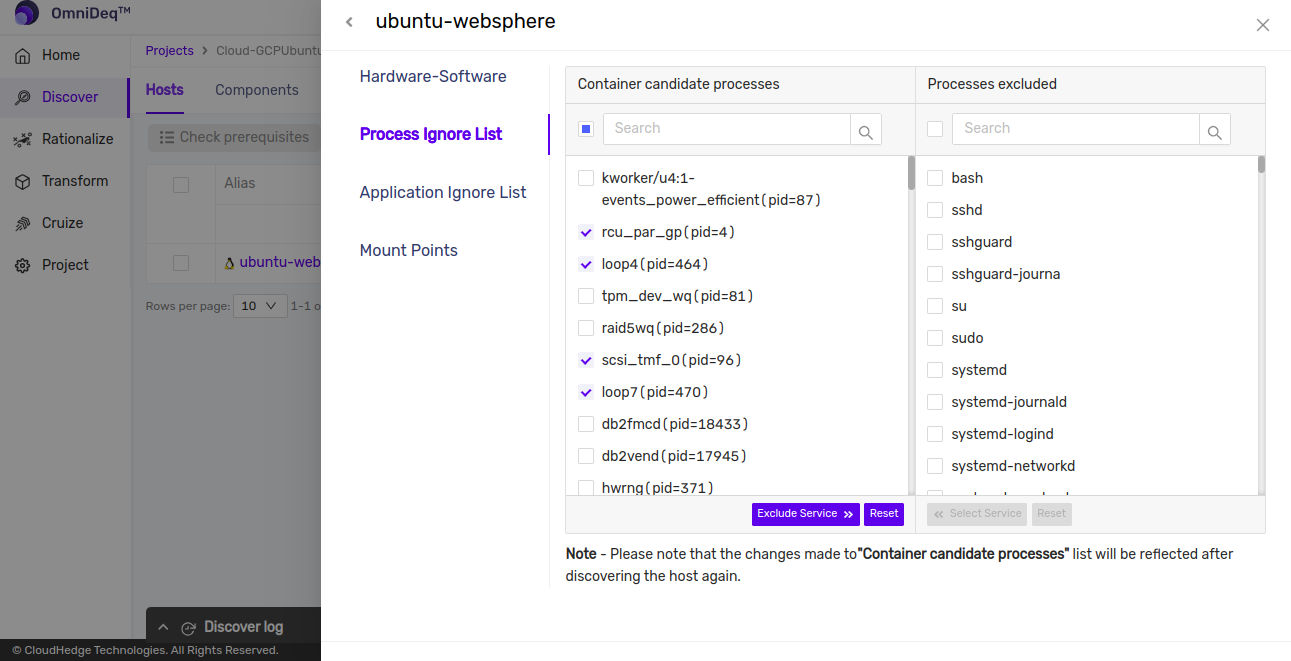
Notes: - You can also edit the ignore list after a discovery is done - Any modification done in the ignore list after discovery will require the discovery for the host to be performed again
Step 5: Edit the Application Ignore List (Optional)
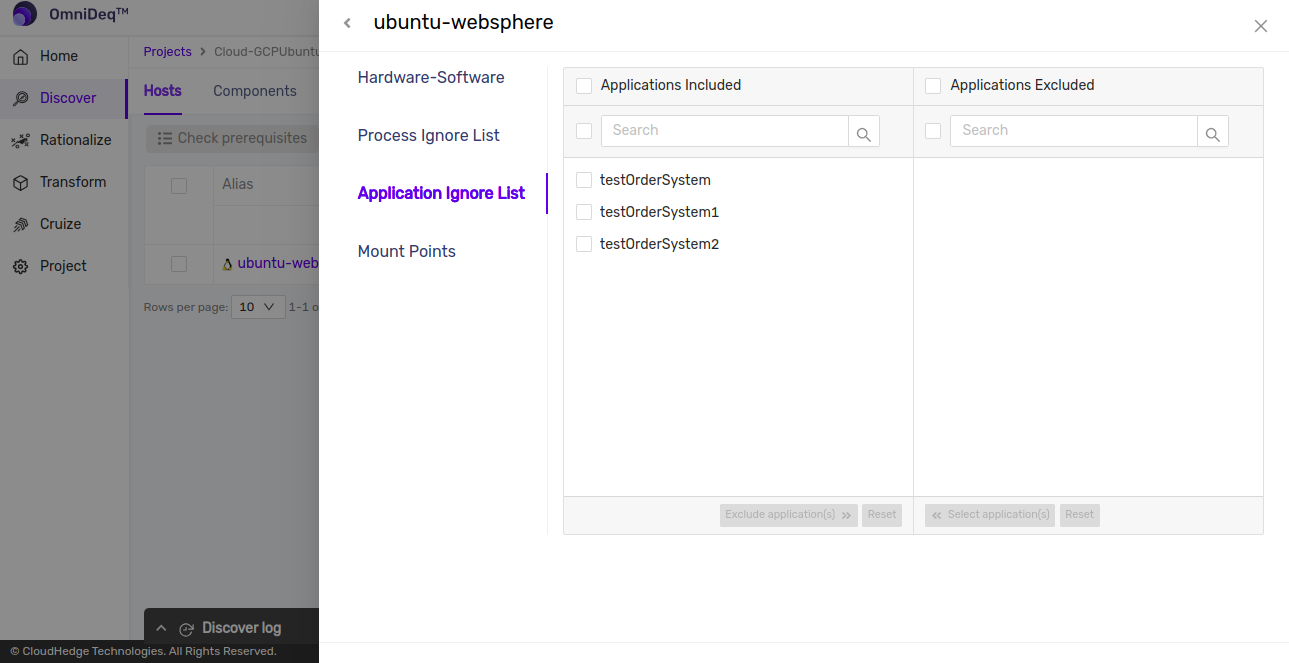
You can edit the application ignore list before starting a discovery by clicking on the Application Ignore List tab as shown in the image below.
The application ignore list is used to name the applications that you want to containerize.
Using this feature, you can specify the application names only which are to be included for discovery, as shown in the image below. All the other applications will not be scanned by the discovery process.
Step 6: Discover
Click the Discover button and wait for a few seconds.
- You will get the message "Triggering Discovery"
- After a few minutes, you will see the discovery status as Completed if all the prerequisites are met
- You can see the discover logs from the Logs section at the bottom when the discover process is started as shown in the image below
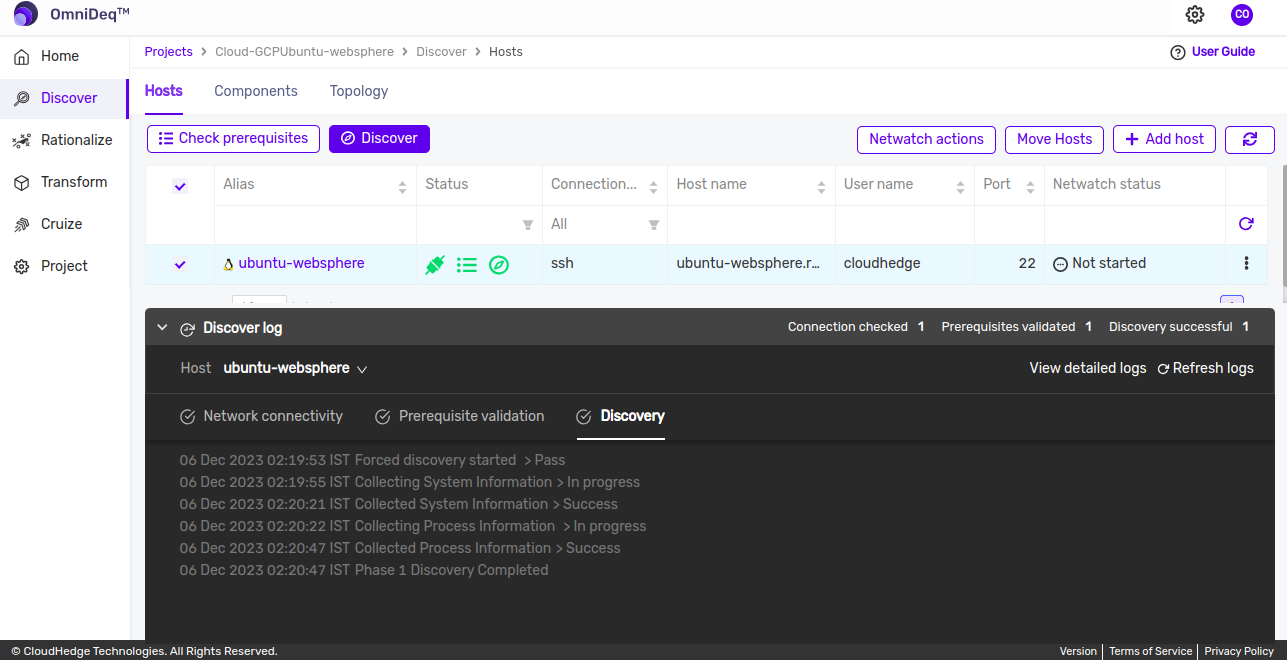
Logs are divided into 3 parts (including the prerequisites):
- Network Connectivity Checks: Shows the network connectivity checks on the host machine
- Validating Prerequisites: Shows the checks if all the prerequisites are available or not
- Collecting System State Information: Shows the logs for collecting all the system information
Once the discovery is completed, you will be able to see all the processes discovered, including the WebSphere processes (java), and the web applications that are discovered, as shown in the image below.
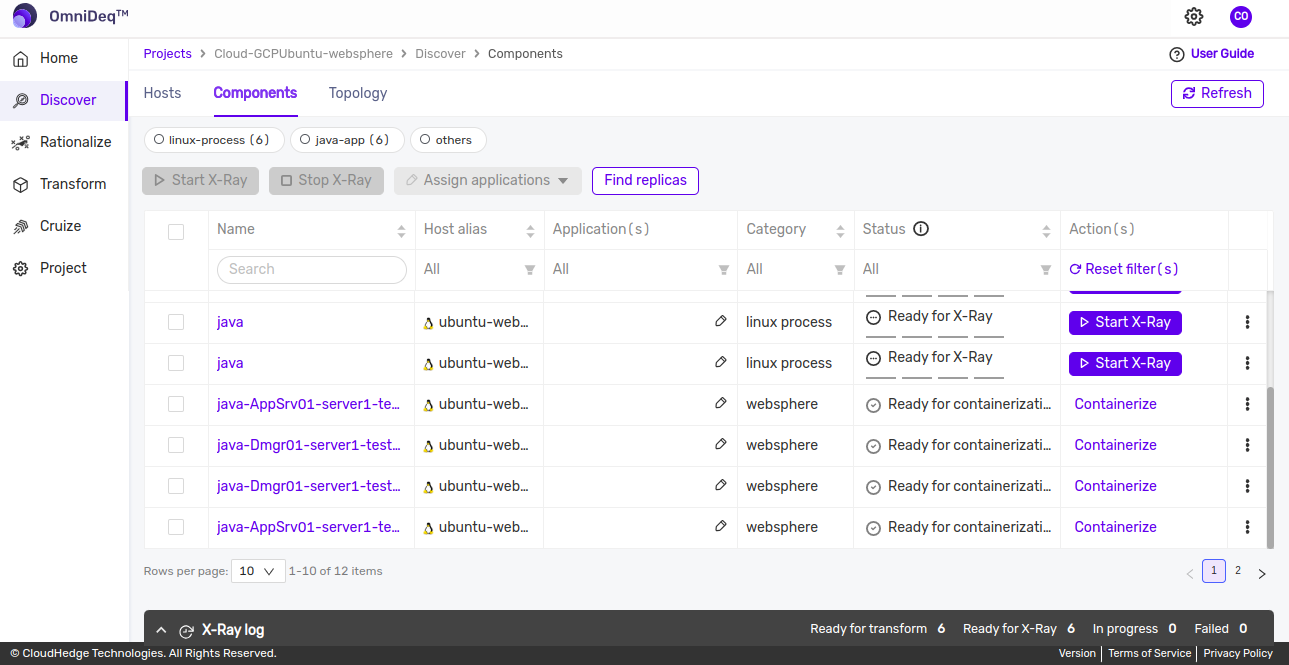
The web applications that are discovered from WebSphere are listed in the table with the process name formatted as java-<Cluster/Server name>-<applicationName>. For example, if an application say 'appX' is deployed on one standalone server say Server-1, and a cluster Cluster-0, then the table will show two entries for the application with names as java-Server-1-appX and java-Cluster-0-appX. This helps you to choose the application to transform with the specific server settings or the cluster settings.
Step 7: View Web Application Information
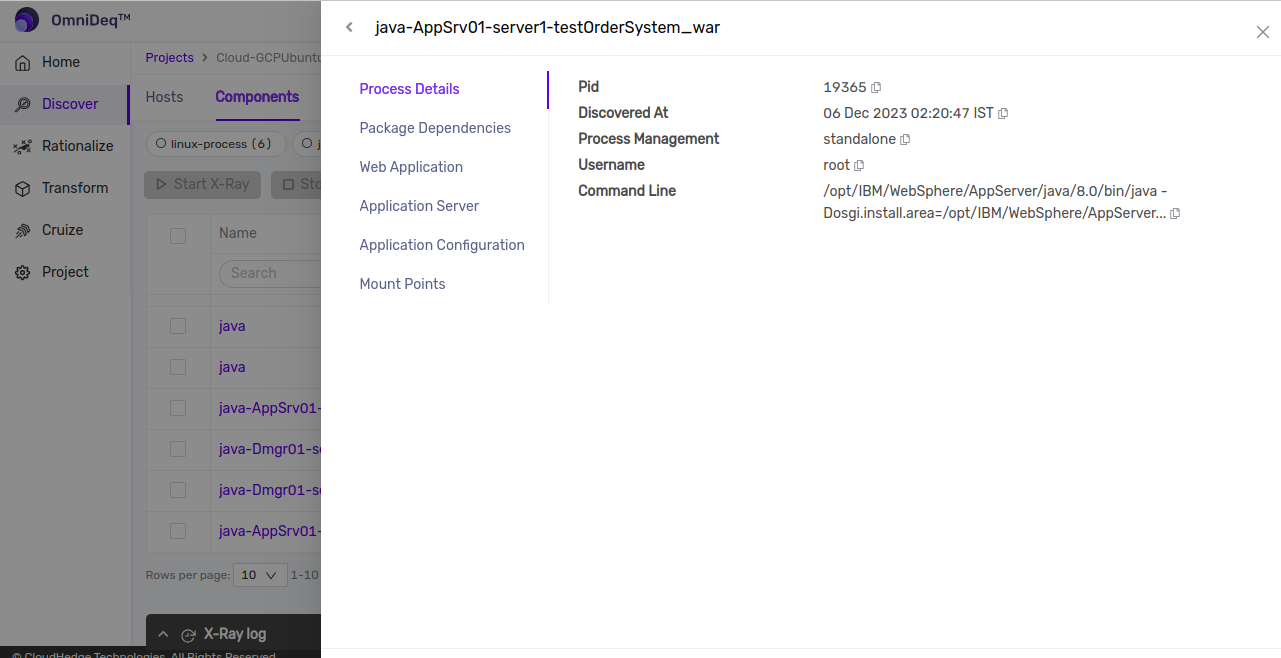
You can view the web application information specific to WebSphere application by clicking on the name of the application (More Info) under the Name column. The information screen with tabs will be shown as below:
Process Details Tab
This tab shows the details of the process which enabled discovering the applications. This will usually be the WebSphere deployment manager process as the discovery is run on the deployment manager.
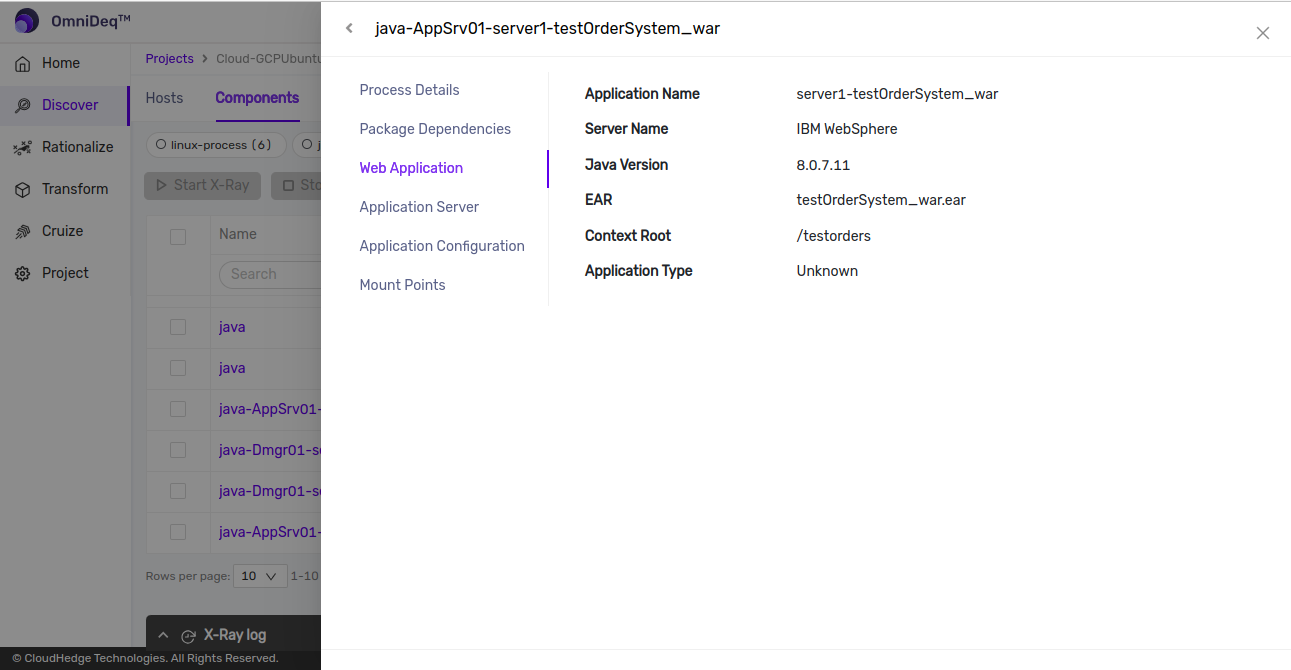
Web Application Details Tab
This tab shows the details of the web application as shown below:
- Application Name: Shows the name of the application. This is the same as that shown in the process table that is clicked. The formation of the application name includes the name followed by
#<specification version>@<app/library version> - Server Name: Shows the name of the target server for this application
- Java Version: Shows the version of Java used by the WebSphere deployment manager process. Assuming the same version is being used across all the servers in the WebSphere deployment
- Context Root: Shows the context root of the web application if specifically defined in application.xml of the war/ear
- Location: Shows the location of the application archive (war/ear). This application archive is copied over to the container for deployment
- Dependent Shared Libraries: Shows the list of shared application libraries detected on the cluster/server on which the application is also targeted. The assumption is that the application may refer to any of these dependencies as they are all existing on the same target
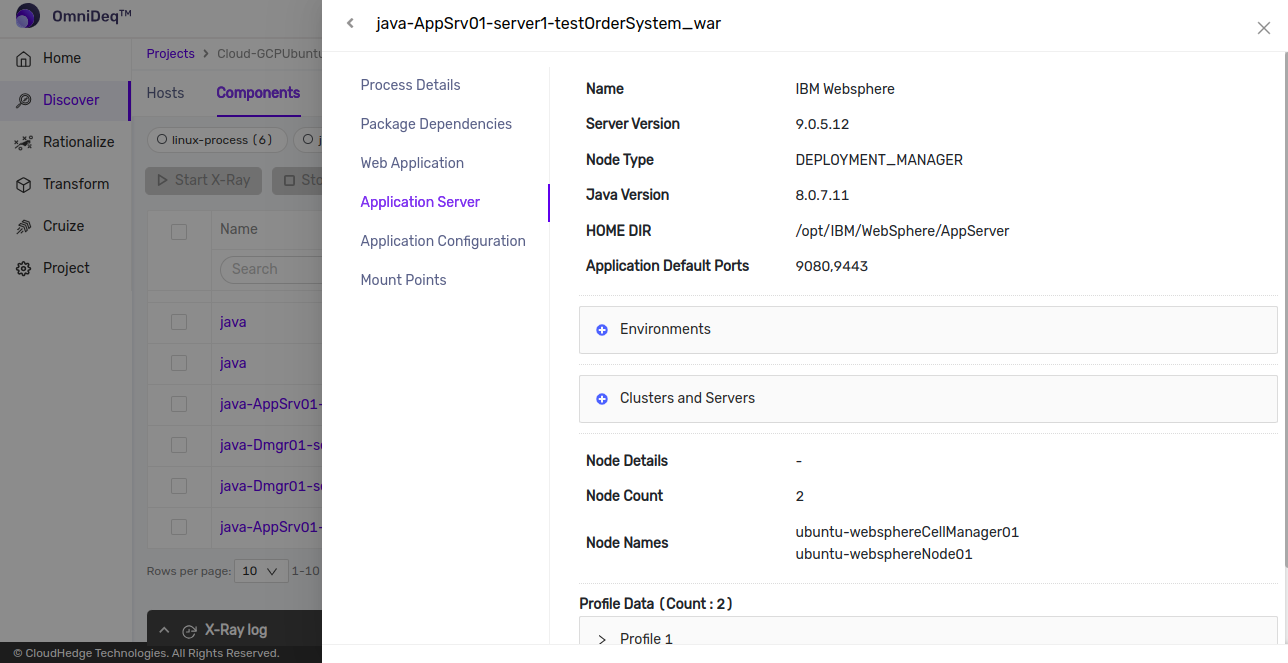
Application Server Tab
This tab shows the details about the target server or cluster-specific configuration information. The assumption is that the Java version will be the same across all servers in the domain. Also, the servers in the cluster will all have the same configurations.
- Name: Shows the name of the application server; in this case it is "IBM WebSphere"
- Server Version: Shows the WebSphere application server version of the process detected on the discovered system (i.e., WebSphere deployment manager). Assumption is that the version of Java and the WebSphere server is the same across all the server instances of the deployment
- HOME DIR: Shows the WebSphere server process's home directory
- Application Default Ports: Shows the ports (SSL and non-SSL) being used by the target server for this application
- Environments List: Shows the startup parameters of the server. These parameters are carried over to the container during transform
- Clusters & Servers List: Shows the list of all the servers and clusters that this application is targeted on
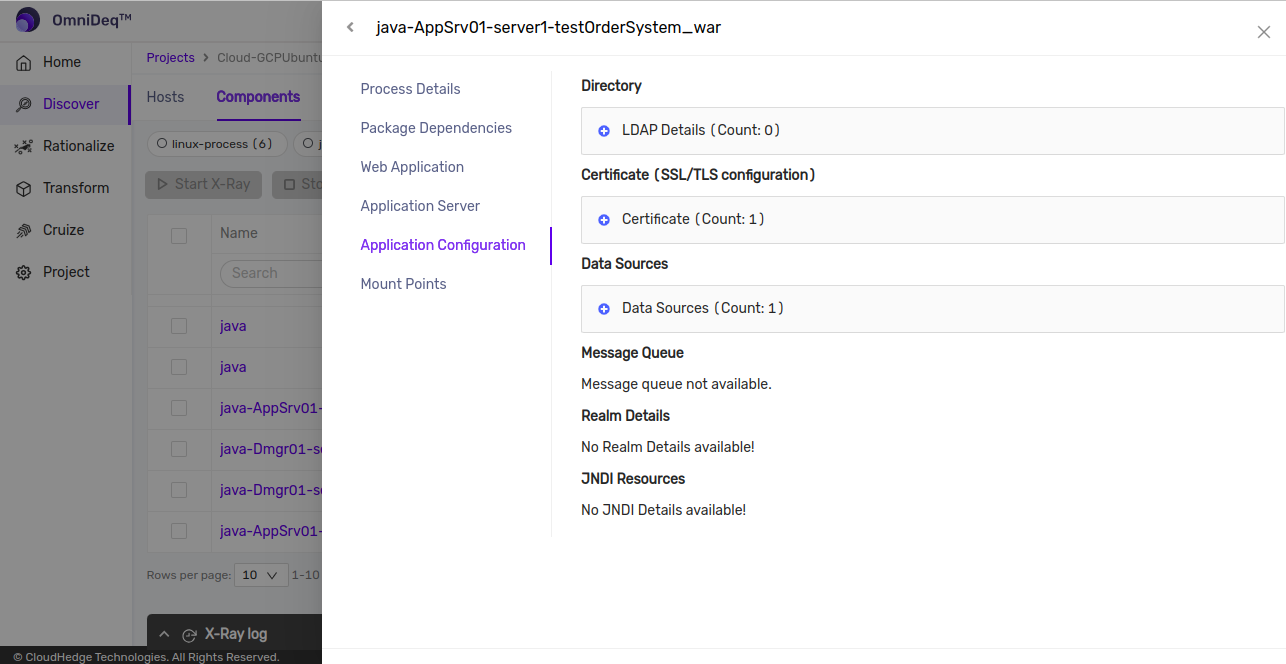
Application Configuration Details Tab
- Certificate Details: Shows the WebSphere server's SSL configuration. It displays the identity key store file and the trust store details configured on the WebSphere server
- Data Sources: Shows the list of data sources configured on the server on which this application is targeted. All these data source configurations are carried over to the container during transformation of this application
- JMS Modules: Shows the list of JMS modules targeted on the server on which this application is also targeted. These JMS module configurations are carried over to the container with the assumption that the JMS server will remain running as is and the container will be able to use the existing JMS server for its queues/topics. The container will be configured with foreign server connection factory, configured to connect to this existing JMS server
Step 8: Next Step - Transformation
The next step will be transformation of the WebSphere application. Please click here.
Force Discover
You can also force discover the host if the discovery process is taking a long time and you want to re-initiate the discovery.
To force discover the host, you will have to click the Force Discover button.