Vault
CHAI™ vault manages all the credentials used during CHAI™ operations.
CHAI™ accepts different types of credentials such as:
- AWS
- Google Cloud
- SSH Key
- Username and Password
- Azure
- Docker Config
- JSON
- Kerberos Config
- Red Hat
- Dynatrace
- New Relic
- DataDog
- Build Box
- Container Registry
Go to Vault
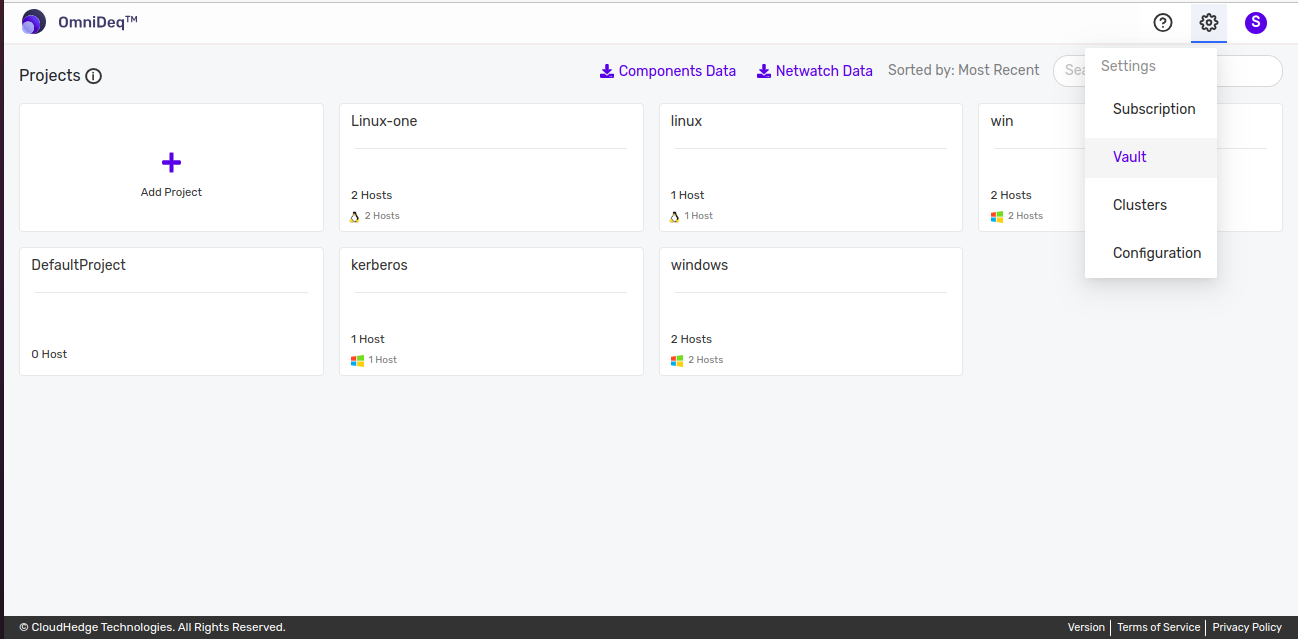
user can go to Vault page by clicking on "Settings" menu to get drop down options and select the Vault submenu, as shown in image below
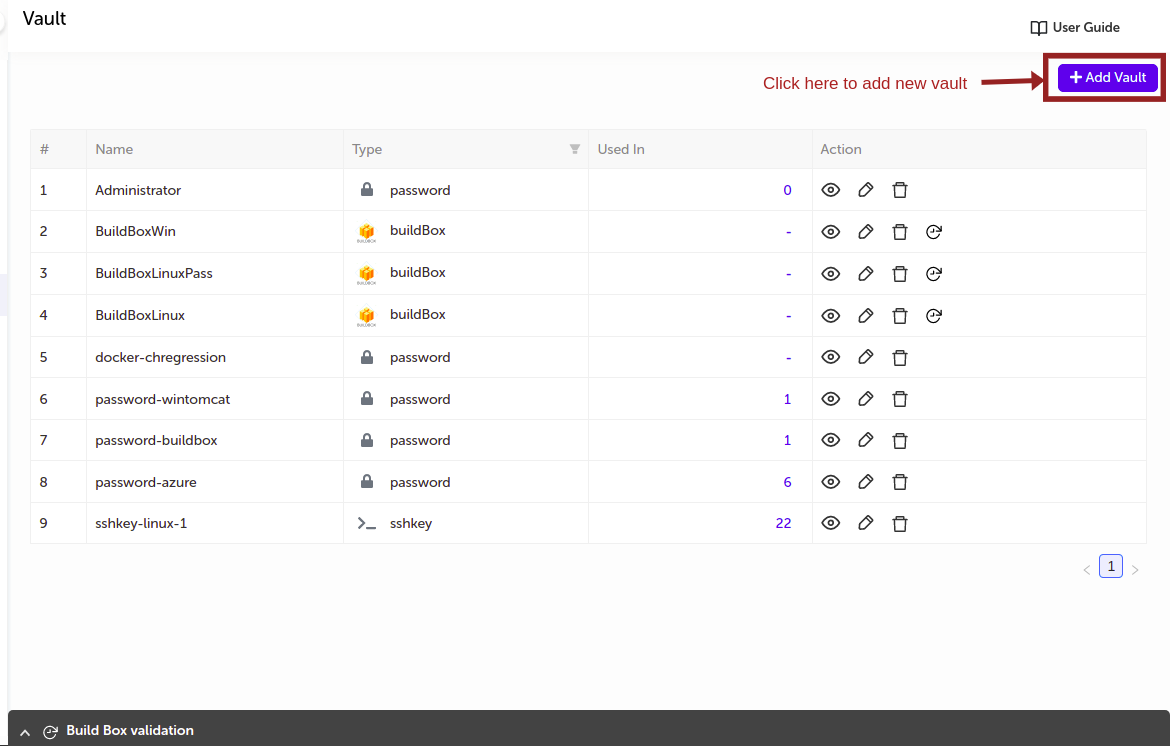
- Once you land on Vault page, you can see list of previously created vaults.
Add a vault
To create the vault click on **Add** Vault button on the right side as shown in the image below with appropriate type.
AWS
- Supply the appropriate values and click on
Savebutton.
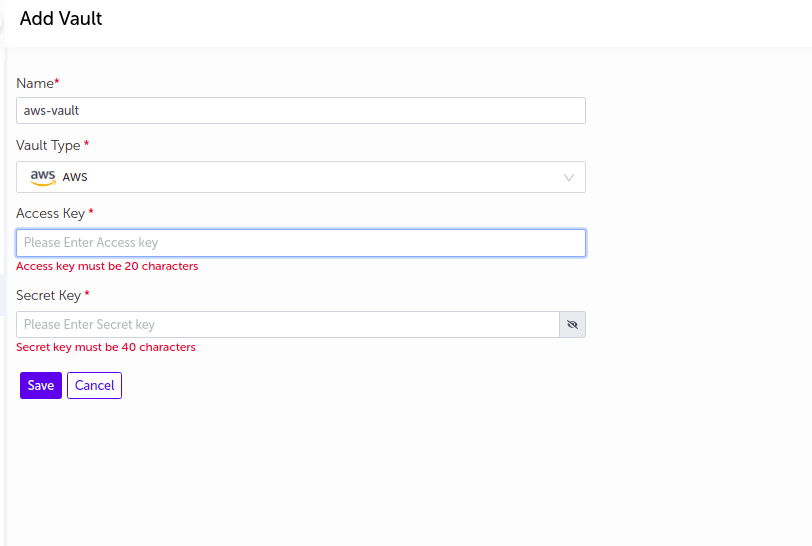
| Field Name | Description |
|---|---|
| Name | Supply desired name here |
| Vault Type | Select AWS |
| Access Key | Enter Access key for AWS account |
| Secret Key | Enter Secret key for AWS account |
Note :
-
Secret Key value will be masked by default. user can view the secret key by clicking on the
Showbutton. -
The vault will be added in the list of vaults.
Google Cloud
- Supply the appropriate values and click on
Savebutton.
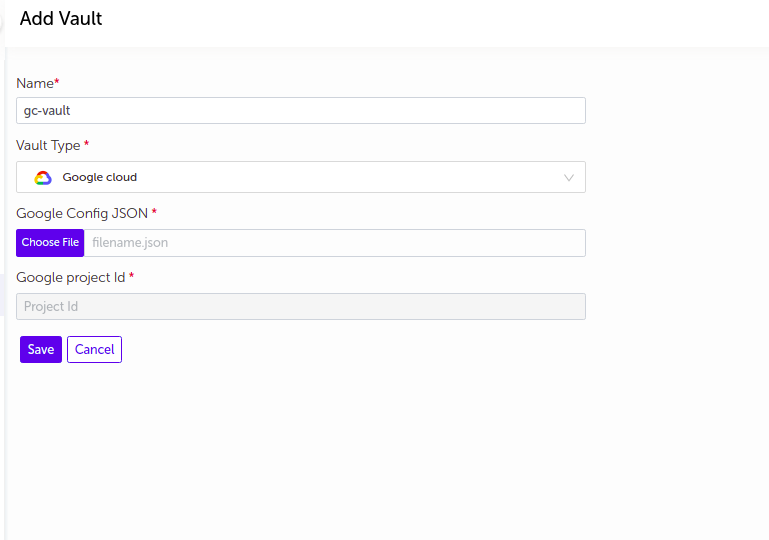
| Field Name | Description |
|---|---|
| Name | Supply desired name here |
| Vault Type | Select Google Cloud |
| Google Config JSON | Upload the Config JSON file from your machine |
| Google Project Id | Enter Project Id |
2. The vault will be added in the list of vaults.
SSH Key
- Supply the appropriate values and click on
Savebutton.
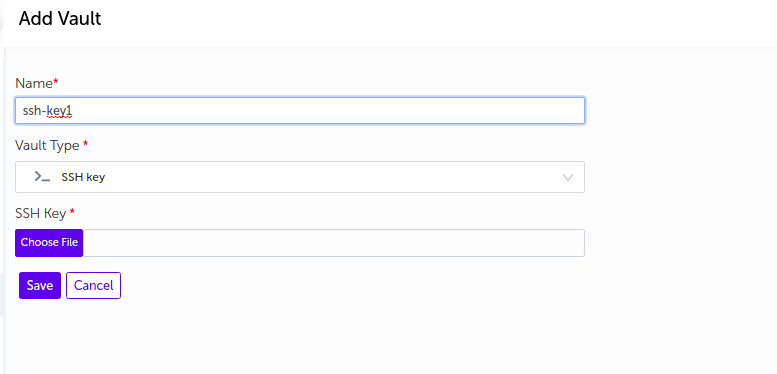
| Field Name | Description |
|---|---|
| Name | Supply desired name here |
| Vault Type | Select SSH Key |
| SSH Key | Upload the SSH Key (.Pem/ *_rsa file) from your machine |
- The vault will be added in the list of vaults.
Password
- Supply the appropriate values and click on
Savebutton.
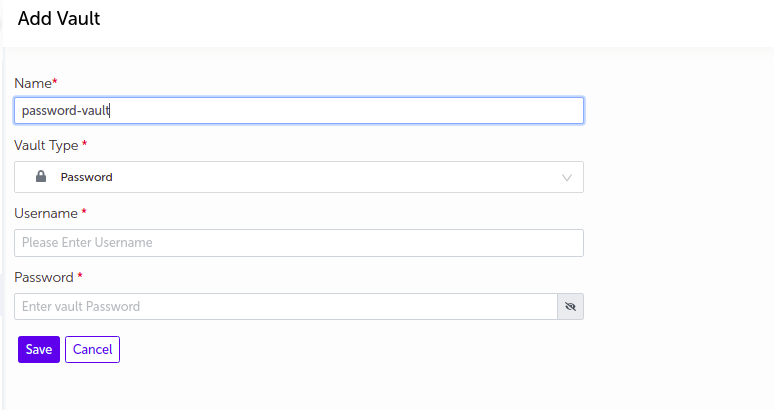
| Field Name | Description |
|---|---|
| Name | Supply desired name here |
| Vault Type | Select Password |
| Username | Enter Username |
| Password | Enter Password |
Notes :
- Password value will be masked by default. user can view the password by clicking on the
Showbutton. -
Password vault can be used to store the login credentials like Windows login credentials, Docker hub login credentials, Custom registry login credentials etc.
-
The vault will be added in the list of vaults.
Azure
- Supply the appropriate values and click on
Savebutton.
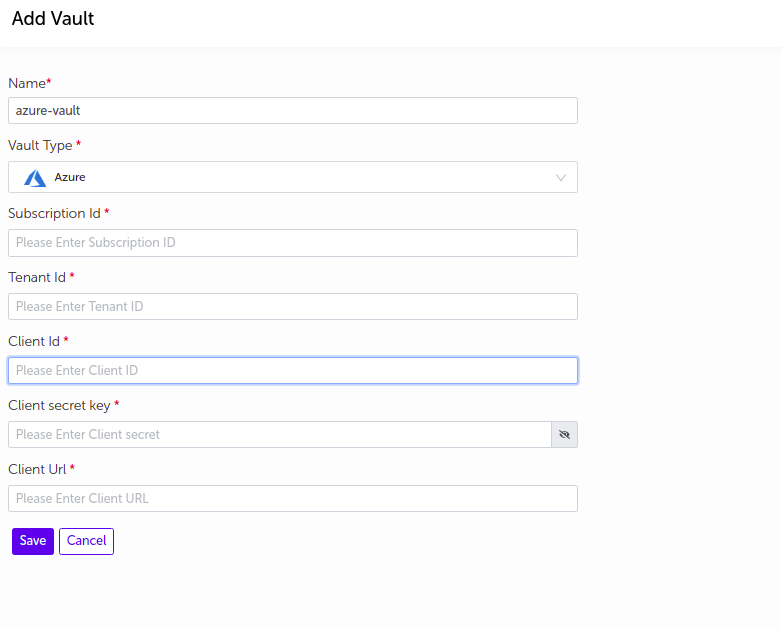
| Field Name | Description |
|---|---|
| Name | Supply desired name here |
| Vault Type | Select Azure |
| Subscription Id | Enter Azure Subscription Id |
| Tenant Id | Enter Azure Tenant Id |
| Client Id | Enter Azure Client Id |
| Client secret key | Enter Client secret key |
| Client URL | Enter Azure Client URL |
Notes :
- Client secret id value will be masked by default. user can view the Client secret id by clicking on the
Showbutton. -
Password vault can be used to store the login credentials like Windows login credentials, Docker hub login credentials, Custom registry login credentials etc.
-
The vault will be added in the list of vaults.
Docker Config
- Supply the appropriate values and click on
Savebutton.
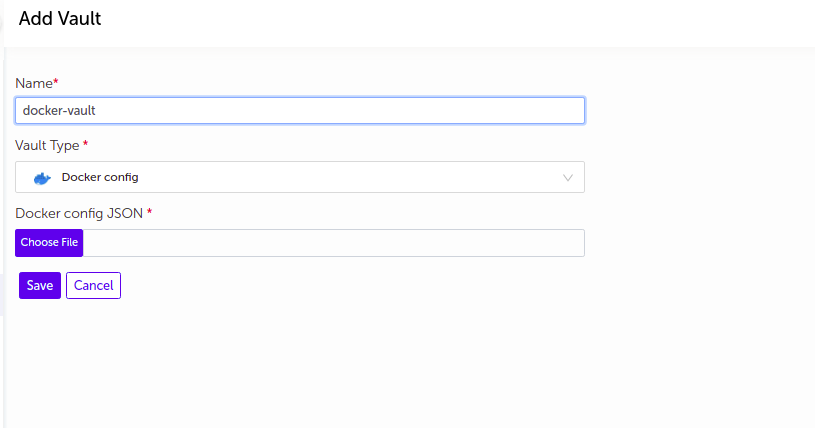
| Field Name | Description |
|---|---|
| Name | Supply desired name here |
| Vault Type | Select Docker Config |
| Docker config JSON | Upload valid docker config JSON file |
- The vault will be added in the list of vaults.
JSON
- Supply the appropriate values and click on
Savebutton.
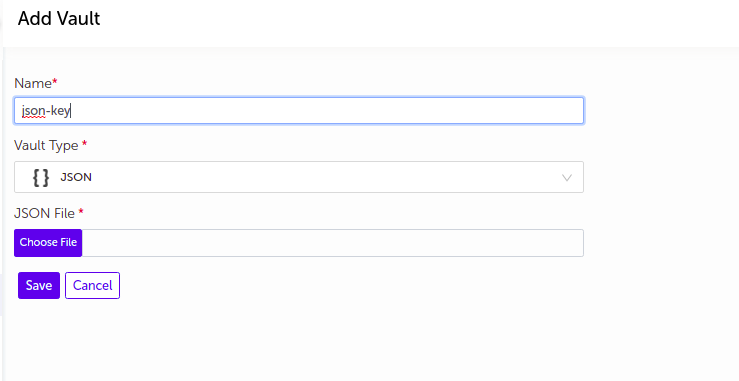
| Field Name | Description |
|---|---|
| Name | Supply desired name here |
| Vault Type | Select JSON |
| JSON file | upload JSON file |
- The vault will be added in the list of vaults.
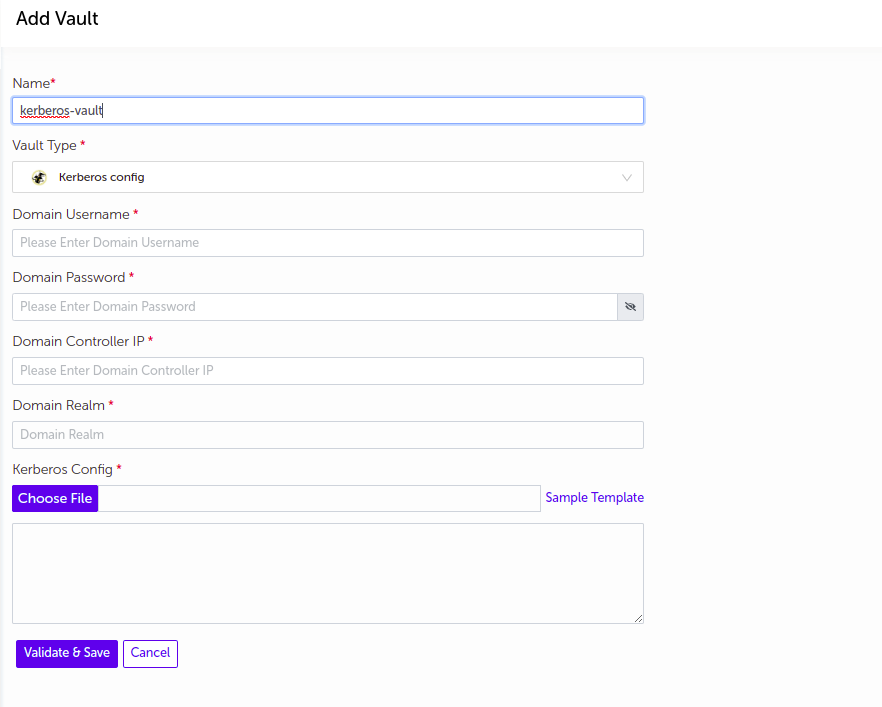
Kerberos Config
- Supply the appropriate values and click on
Savebutton.
Sample Template
- Save below sample template content as .conf file.
[logging]
default = FILE:/var/log/krb5libs.log
kdc = FILE:/var/log/krb5kdc.log
admin_server = FILE:/var/log/kadmind.log
[libdefaults]
default_realm = <REPLACE_ME>
dns_lookup_realm = false
dns_lookup_kdc = false
ticket_lifetime = 24h
renew_lifetime = 7d
forwardable = true
[realms]
<REPLACE_ME> = {
kdc = <REPLACE_ME>
admin_server = <REPLACE_ME>
}
[domain_realm]
.website.com = <REPLACE_ME>
website.com = <REPLACE_ME>
- Replace the "REPLACE_ME" text with appropriate values
- Upload the modified file with appropriate kerberos details
| Field Name | Description |
|---|---|
| Name | Supply desired name here |
| Vault Type | Select Kerberos config |
| Domain Realm | Enter valid Realm |
| Domain Controller IP | Enter valid controller IP |
| Domain Username | Enter valid domain username |
| Domain Password | Enter valid domain password |
| Kerberos config | Upload kerberos config file (.conf) |
Notes:
- Domain password value will be masked by default. user can view the Domain password by clicking on the
Showbutton. -
user can view sample kerberos config file, just hover on
file iconbefore kerberos config title -
The vault will be added in the list of vaults.
Red Hat
- Supply the appropriate values and click on
Savebutton.
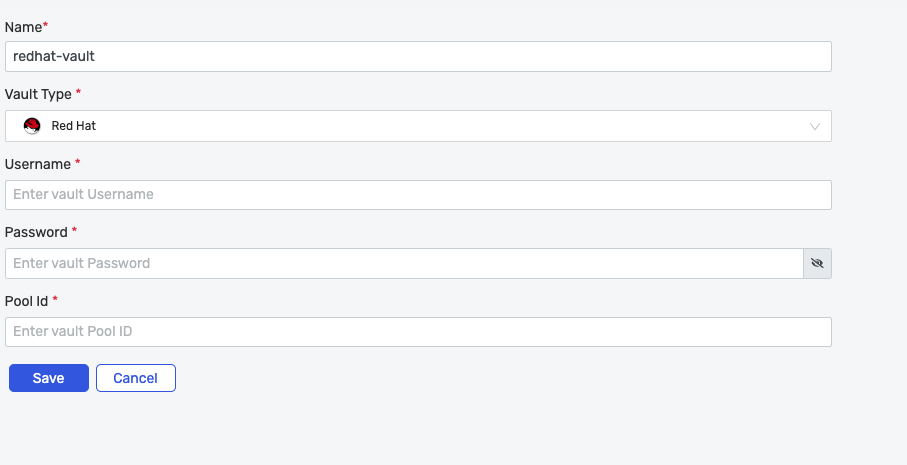
| Field Name | Description |
|---|---|
| Name | Supply desired name here |
| Vault Type | Select Red Hat |
| Username | Enter username |
| Password | Enter Password |
| Pool Id | Enter valid pool Id |
Note:
-
Password value will be masked by default. user can view the password by clicking on the
Showbutton. -
The vault will be added in the list of vaults.
Dynatrace
- Supply the appropriate values and click on
Savebutton.
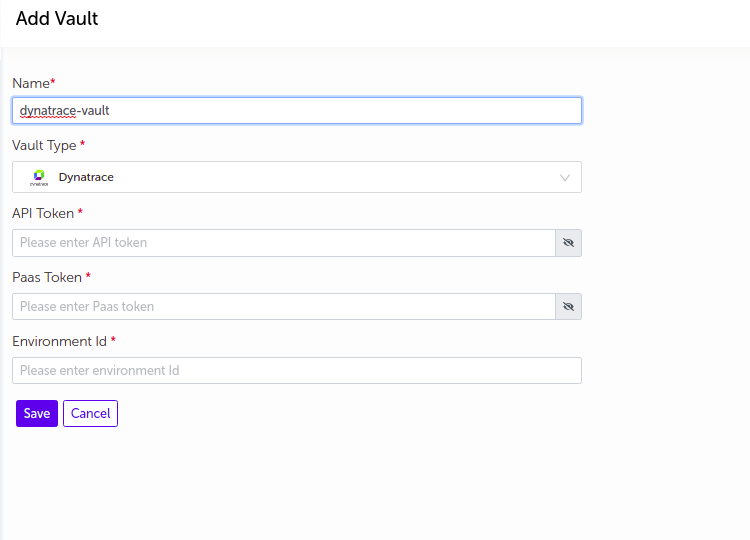
| Field Name | Description |
|---|---|
| Name | Supply desired name here |
| Vault Type | Select Dynatrace |
| Api Token | Enter Api token |
| Pass Token | Enter Pass token |
| Environment Id | Enter Environment Id |
Note:
-
Api token and Pass token values will be masked by default. user can view the Api token and pass token by clicking on the
Showbutton. -
The vault will be added in the list of vaults.
New Relic
- Supply the appropriate values and click on
Savebutton.
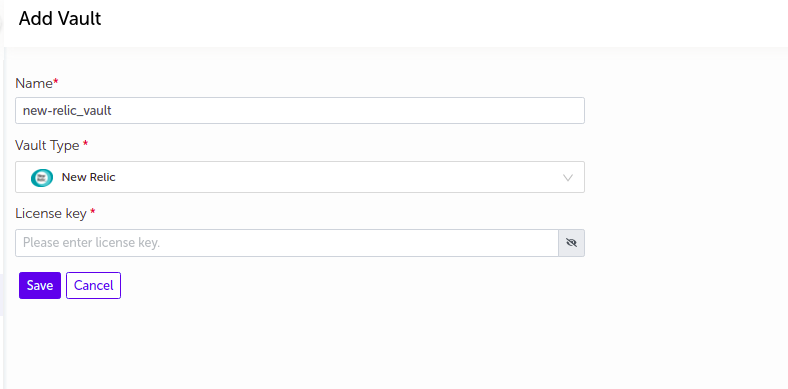
| Field Name | Description |
|---|---|
| Name | Supply desired name here |
| Vault Type | Select New Relic |
| License key | Enter license key |
Note:
-
License key value will be masked by default. user can view the license key by clicking on the
Showbutton. -
The vault will be added in the list of vaults.
DataDog
- Supply the appropriate values and click on
Savebutton.
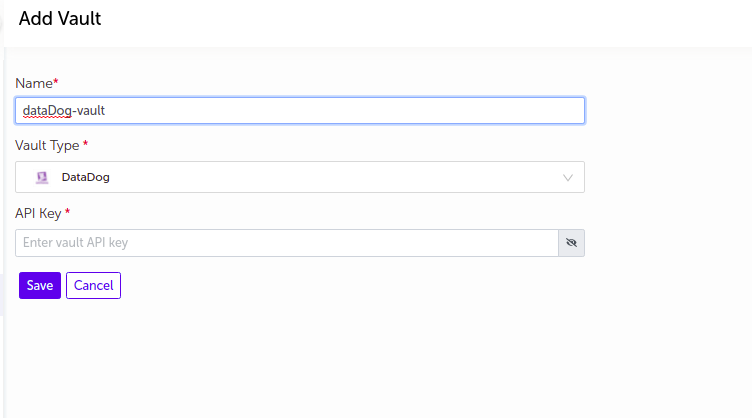
| Field Name | Description |
|---|---|
| Name | Supply desired name here |
| Vault Type | Select DataDog |
| Api key | Enter Api key |
Note:
-
Api key value will be masked by default. user can view the api key by clicking on the
Showbutton. -
The vault will be added in the list of vaults.
Build Box
-
Supply the appropriate values.

Field Name Description Name Supply desired name here Vault Type Select Build Box Container type Select Linux or Windows Username Username to authenticate on Build Box Host Build Box IP or FQDN Port Build Box port Connection Type Enter either SSH or password Kerberos IP Provide kerberos IP (Active only in case of windows buildbox) Build Box Credentials Credential vault to connect to Build Box ( either SSH or password)
-
For both Build Boxes that is Linux and Windows, you can see the button as
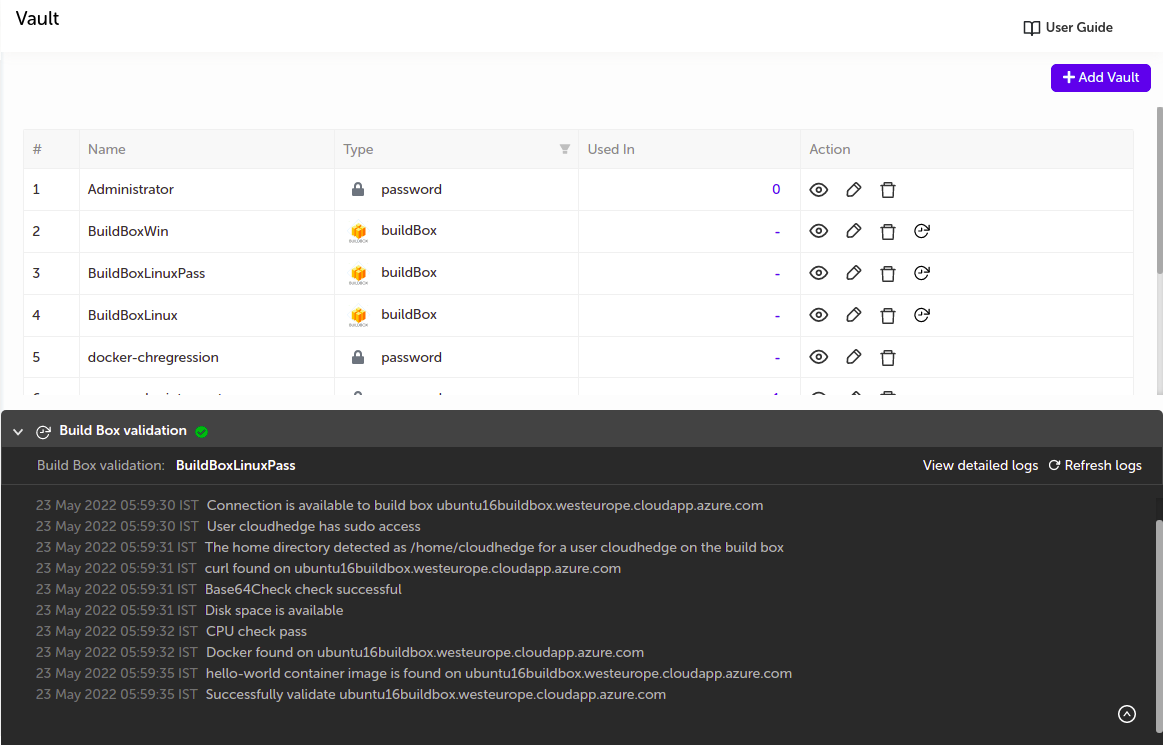
Validate and Saveas only valid Build Box gets saved. user can see appropriate logs as shown in below image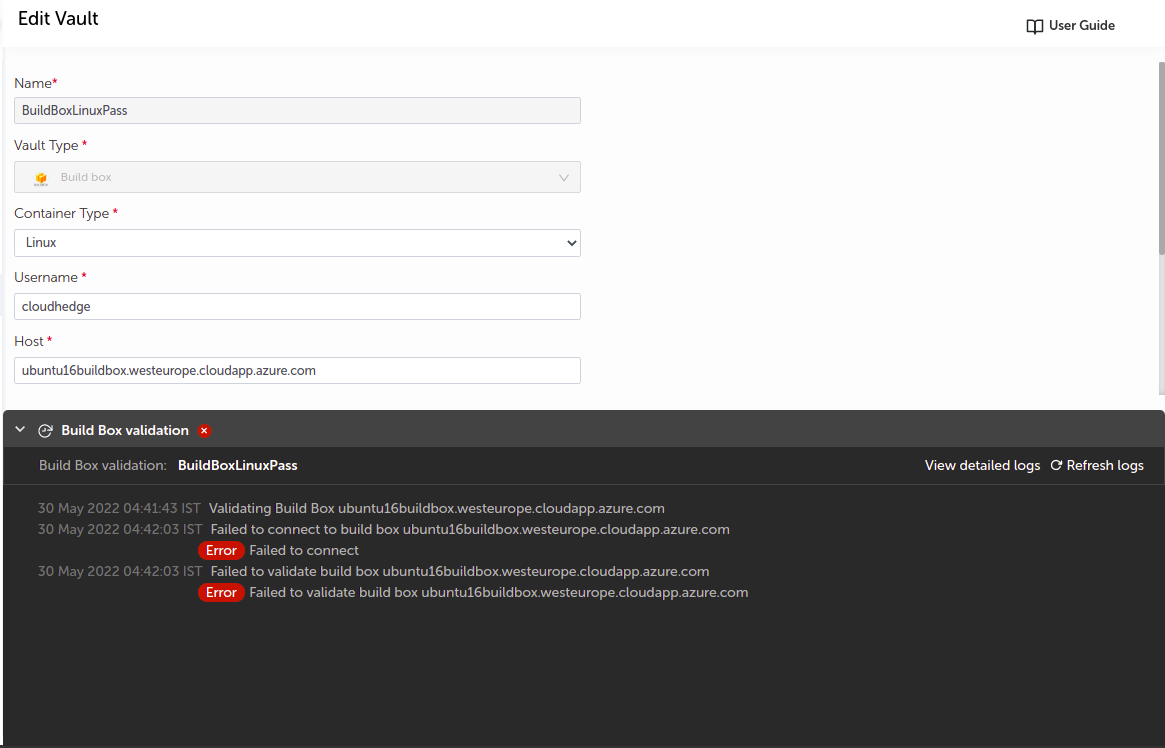
Notes :
- SSH, Password or kerberos vault can be used to store the login credentials like Windows login credentials, Docker hub login credentials, Custom registry login credentials etc.
- Build Box username can be 20 characters long
-
The vault will be added in the list of vaults.
Container Registry
- Supply the appropriate details and click on
Savebutton.
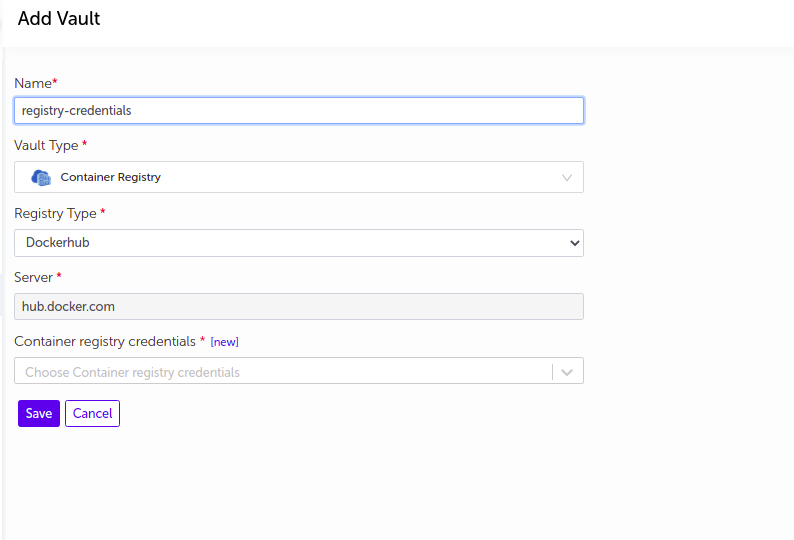
| Field Name | Description |
|---|---|
| Name | Supply desired name here |
| Vault Type | Select Container Registry |
| Registry Type | Select DockerHub, ECR, Quay or Custom |
| Server | Specify the appropriate Registy Server |
| Registry Credentials | Credential vault to connect to Registry ( either SSH or password) |
Note :
-
SSH or Password vault can be used to store the login credentials like Windows login credentials, Docker hub login credentials, Custom registry login credentials etc.
-
The vault will be added in the list of vaults.
View, Edit and Delete Vault
-
user can perform actions like
- View
- Edit
- Delete
- View Logs (Applicable only in case of Build box vault)
-
Click on any of the desired action button to perform actions on respective vault. As shown in below image.

-
Once you click on the icon with title
View Logsfrom one of the actions, you can see the previous logs of the respective build box. As shown in below image.