Linux Application Discovery in Detail
How to Access the Host(s)
-
On the landing page, click on the project added earlier and click Discover
-
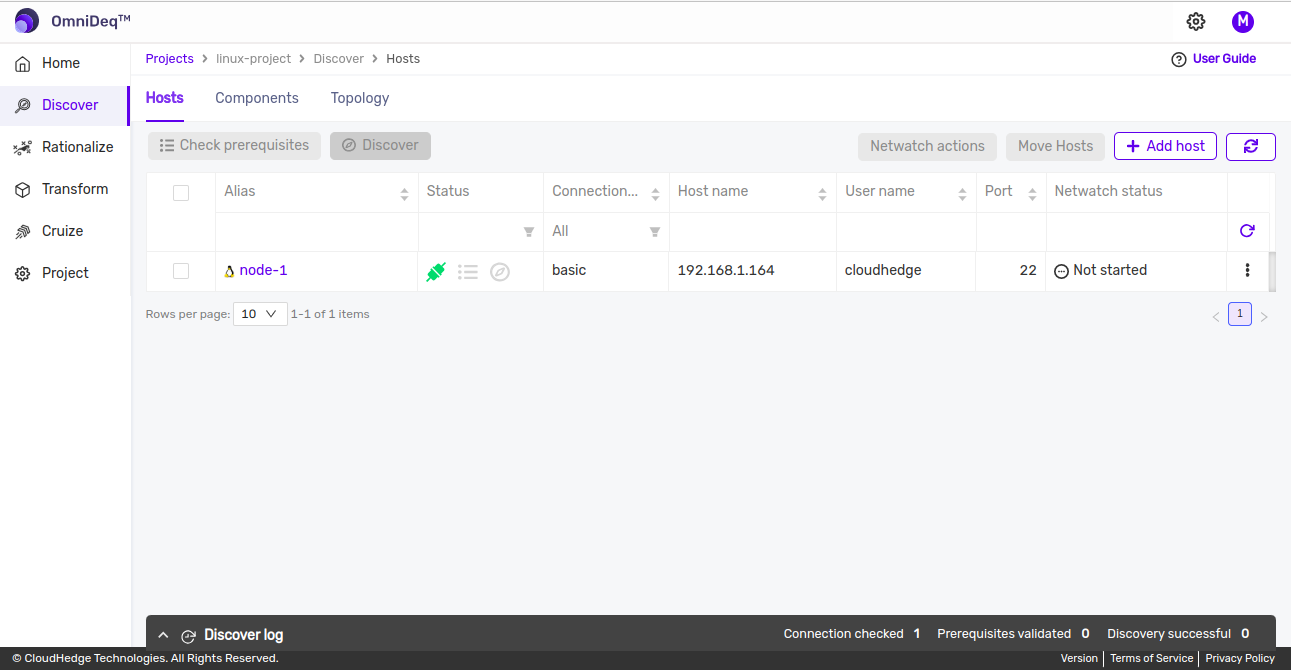
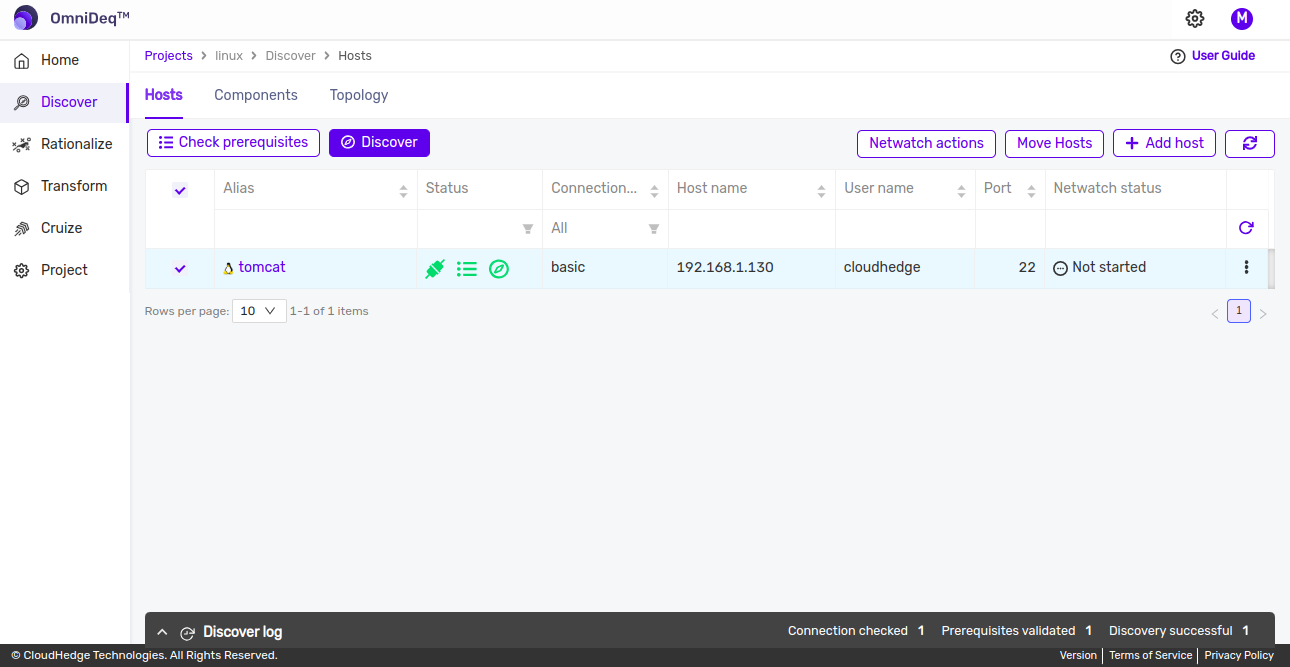
The list of host(s) in the project will appear which you have added earlier, as shown in the image below

Steps to Perform Discovery of Host(s)
Step 1: Check Connection
-
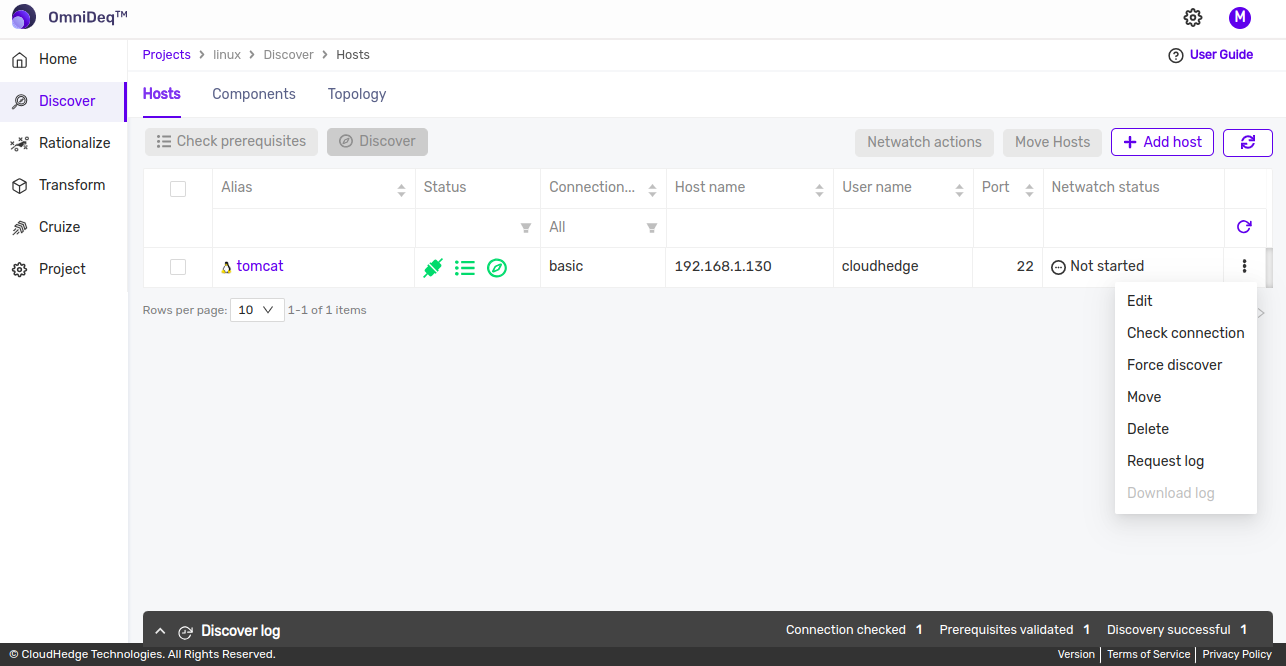
Select the Linux host added earlier to perform Check Connection
-
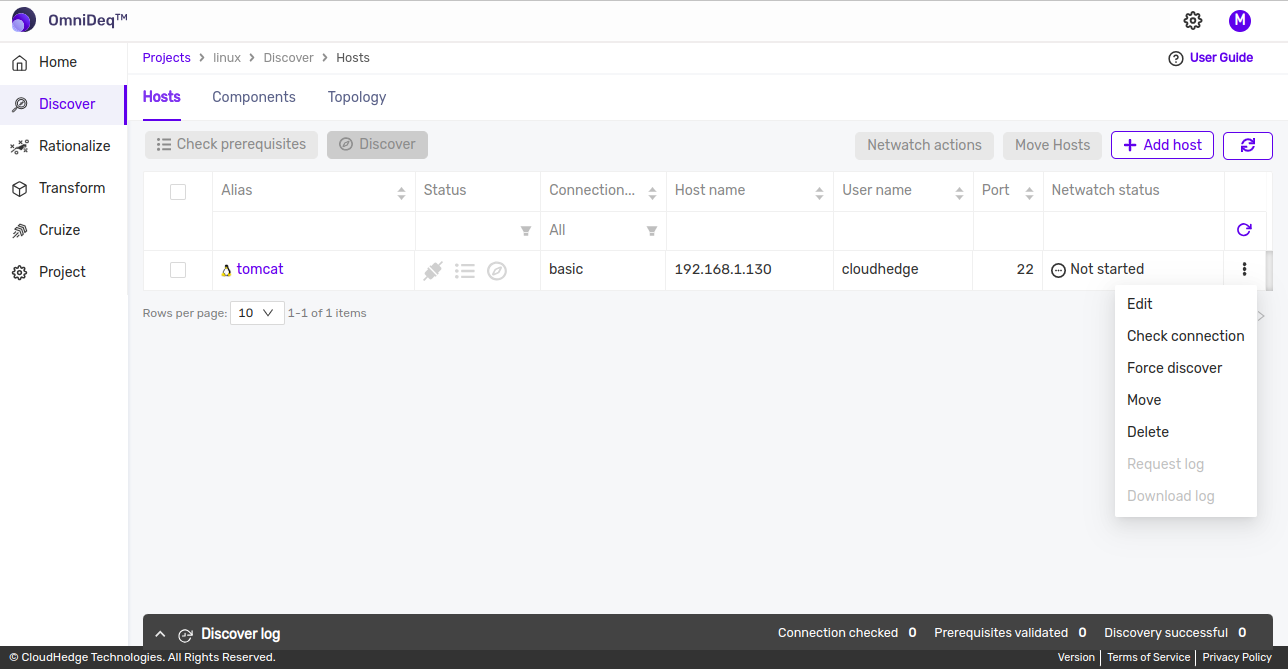
Click on the 3 horizontal dots beside the host and click Check Connection and wait for a few seconds
-
You will get the check connection status in a few seconds as shown in the images below
-
You can see the status and time of last connection check by hovering the mouse pointer on the check connection status icon
-
You can see the connection logs from the Logs section
Note:
This step is optional. This step is just to make sure that the connection is established successfully.
Step 2: Check Prerequisites
-
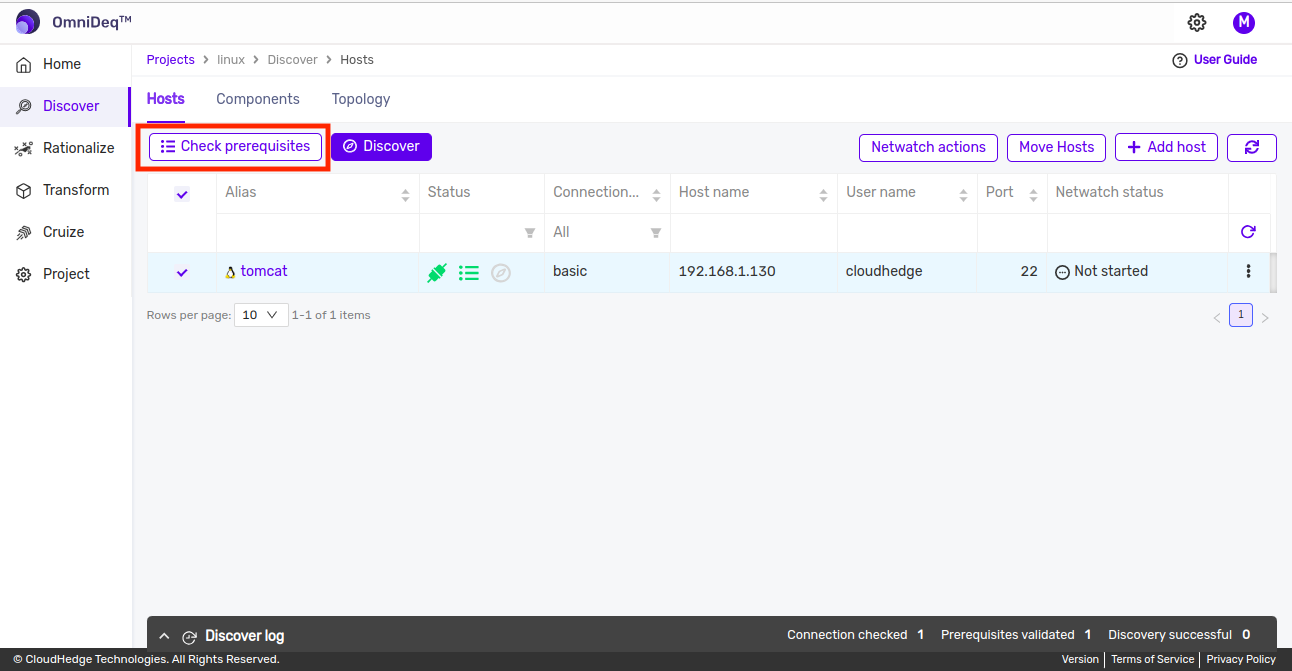
Select the host for which you want to perform Check prerequisites
-
Click the Check prerequisites button as shown in the image below and wait for a few minutes
-
You can select multiple hosts to perform check prerequisites
-
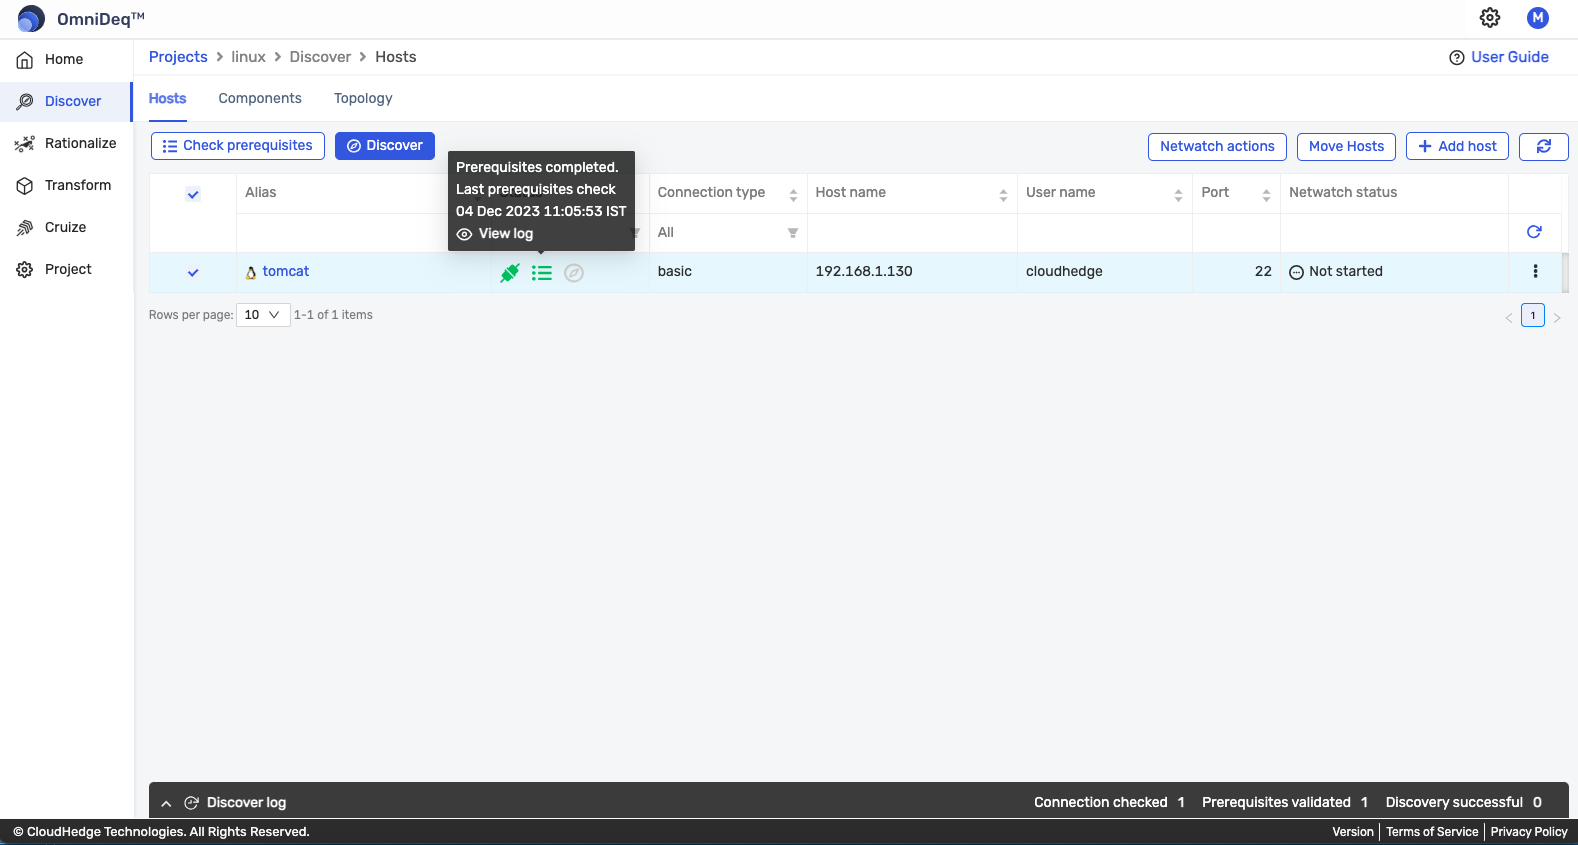
After a few minutes, you will see the prerequisites check status as completed if all the prerequisites are met as shown below
-
You can see the status and time of last prerequisites check by hovering the mouse pointer on the check prerequisites status icon
-
You can see the prerequisites logs from the Logs section
Important Notes:
- Phase 1 Discover process is now divided into 2 steps:
- Check Prerequisites
-
Discover
-
Please make sure that you perform prerequisites check on the host before starting the discovery
- If the check prerequisites status is completed, only then will you be able to trigger discovery on the host
Prerequisite Check After Discovery (Post-Discovery Prerequisite Check)
-
If you have discovered the host successfully, and after that you perform a prerequisite check, the host's discovery status goes to pending state
-
If you want to perform a prerequisite check on an already discovered host, then select the respective host and click Check prerequisites as shown in the image below
- Once you click the Check prerequisites button for an already discovered host, then a confirmation popup will open as shown in the image below

- Then if you continue to check prerequisite, it gets executed and after check completion you will notice the change in status of discovery in the status column with an appropriate message as shown in the image below
Step 3: Edit the Ignore List (Optional)
You can edit the ignore list before starting a discovery.
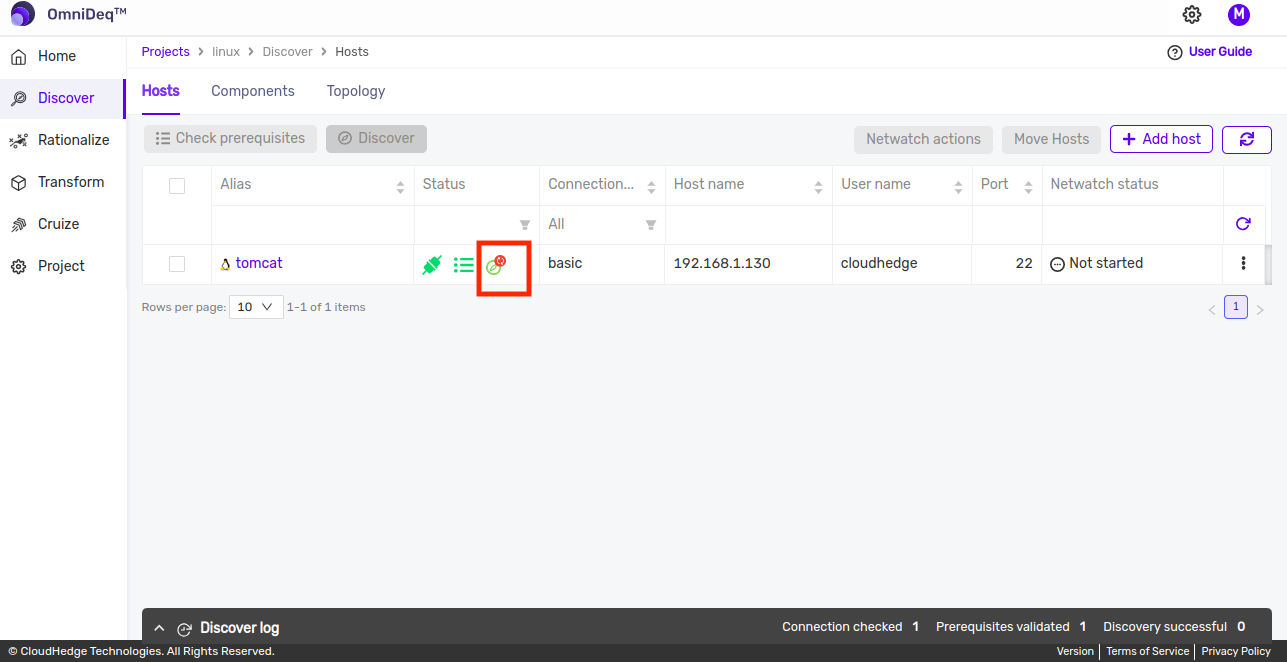
- Click on the alias displayed in the Alias column of the desired host row as shown in the image below
- After clicking on the alias, you will see the Host Info drawer. In that drawer, go to the Process Ignore List tab to edit the ignore list as shown in the image below
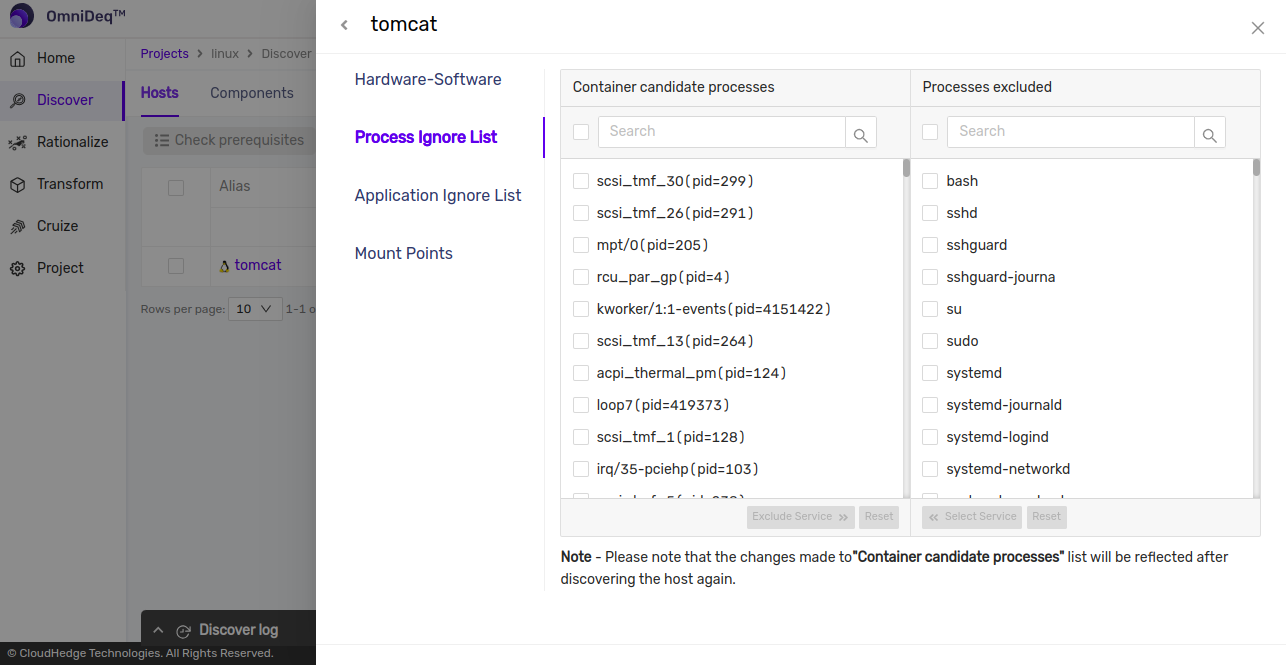
Notes: - Using this feature, you can include or exclude the processes for discovery as shown in the image above - You can also edit the ignore list after a discovery is done - Any modification done in the ignore list after discovery will require you to discover the host again
Step 4: Discover
Please perform Check Prerequisites before performing the discovery.
-
Select the host for which you want to perform Discover
-
Click the Discover button as shown in the image below and wait for a few minutes

-
You will get the message Triggering Discovery
-
You will get the discovery status in a few minutes as shown in the images below
-
You can see the discover logs from the Logs section
Log Sections
Logs are divided into 3 parts:
- Network Connectivity Checks: Shows the network connectivity checks to the host machine from CHAI™
- Validating Prerequisites: Shows the checks if all the prerequisites are available or not
- Discovery Information: Shows the logs for collecting the system and process information
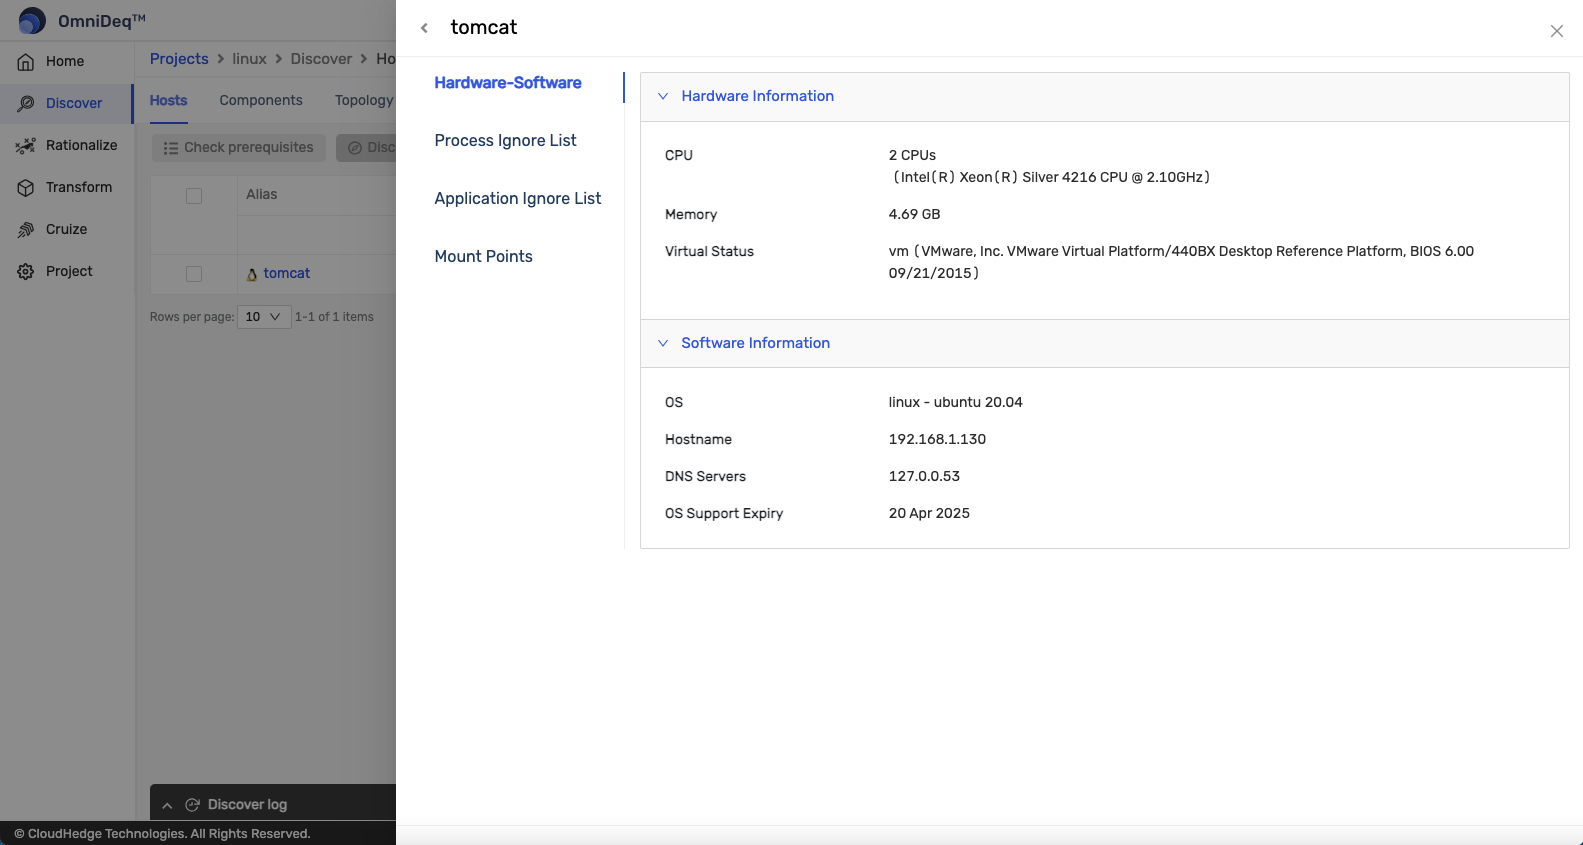
Viewing Discovery Results
Once the discovery is completed, you will be able to see all the system information and process information in the host as shown in the images below.
System Information:
You can see system information by clicking on the Alias displayed in the Alias column of the desired host row.
Process Information:
To see the process information, go to the Components tab as shown in the image below.
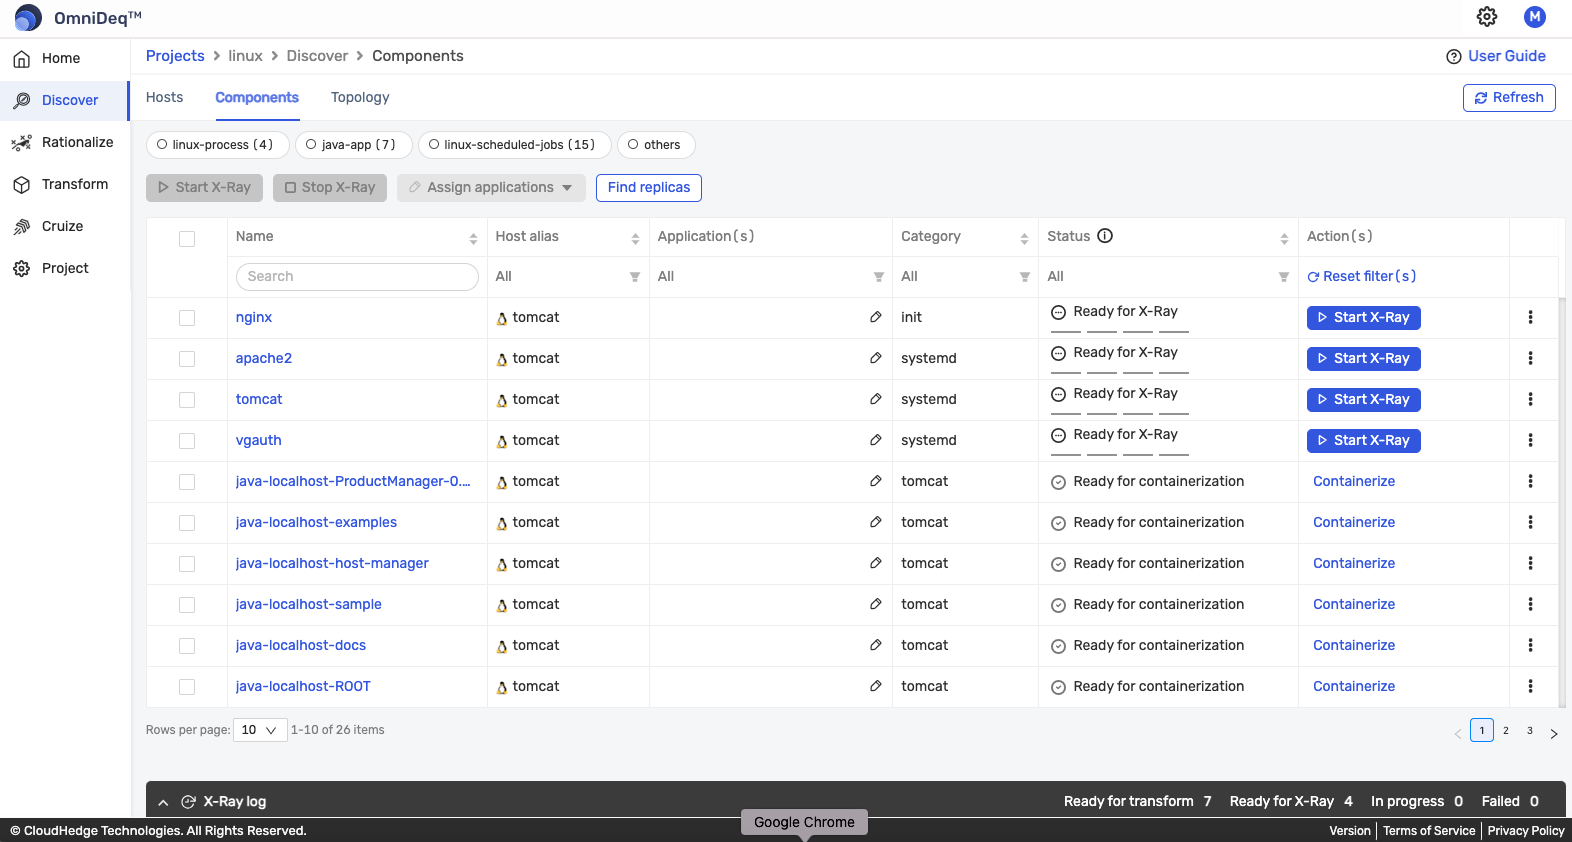
Notes: - Under the Components tab, you can see all the processes of the selected project - You can filter processes based on host using the filter shown in the Host Alias column header
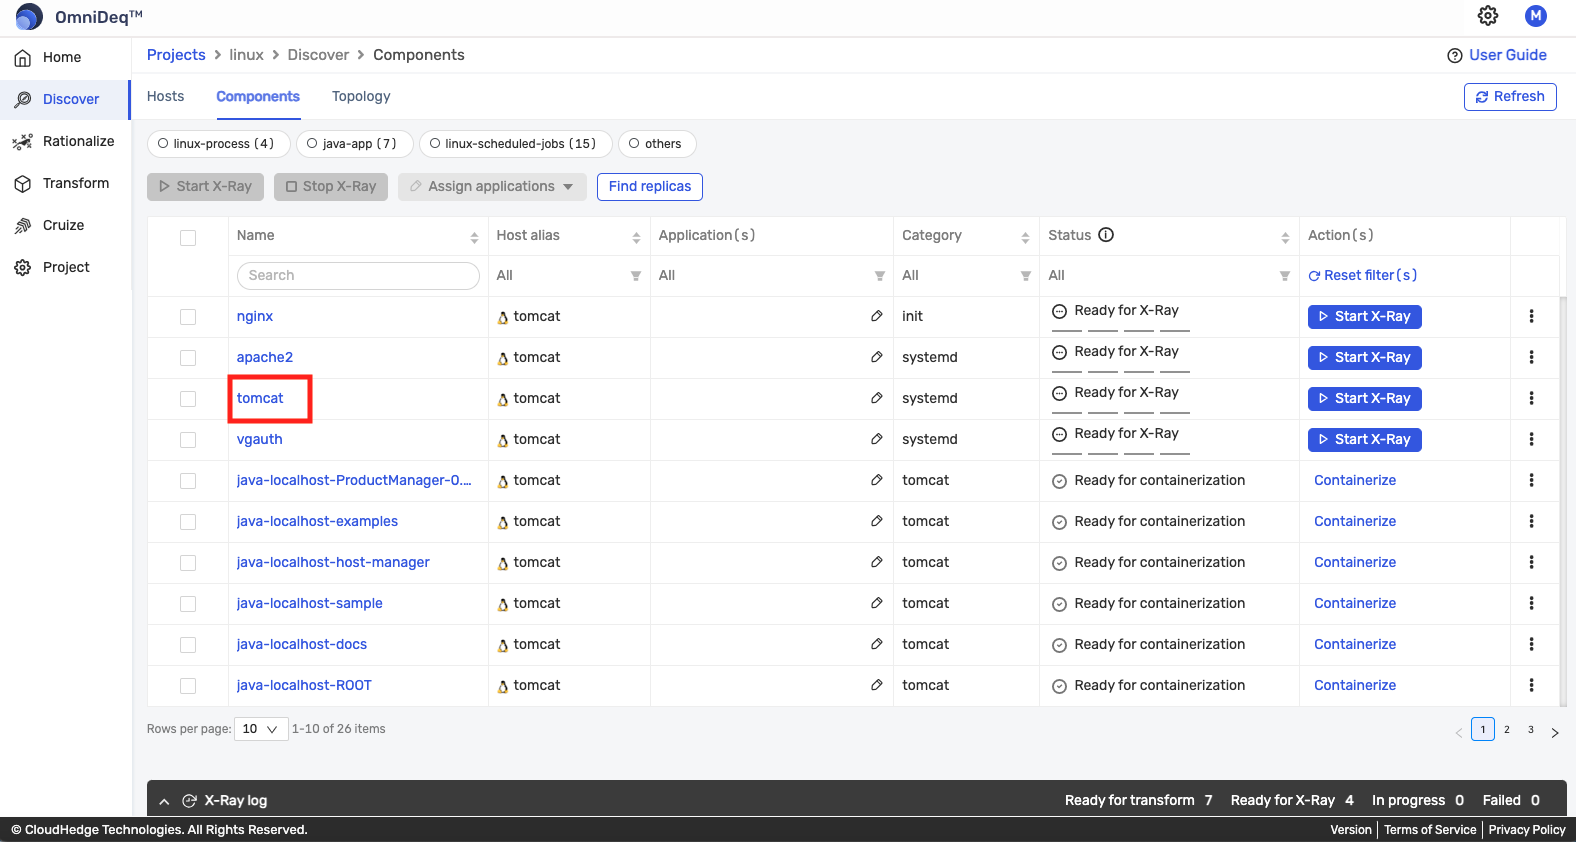
Step 5: View Process Information in Detail
You can view the process information in detail by following the steps below.
-
Go to the Components tab
-
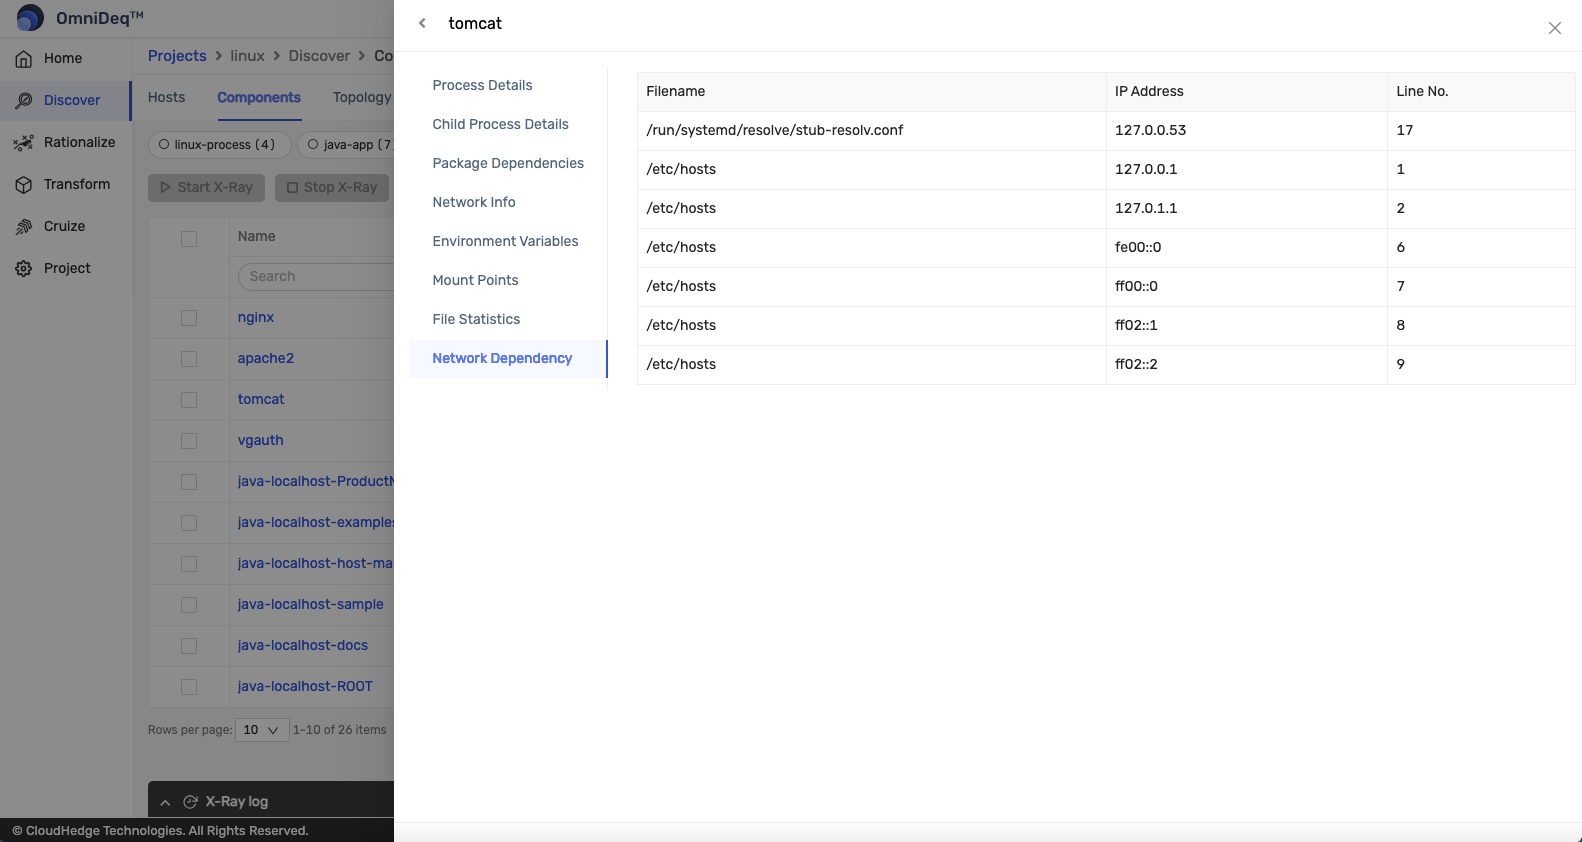
Under the Components tab, you can see the process details by clicking on the process name displayed in the Name column of the desired process
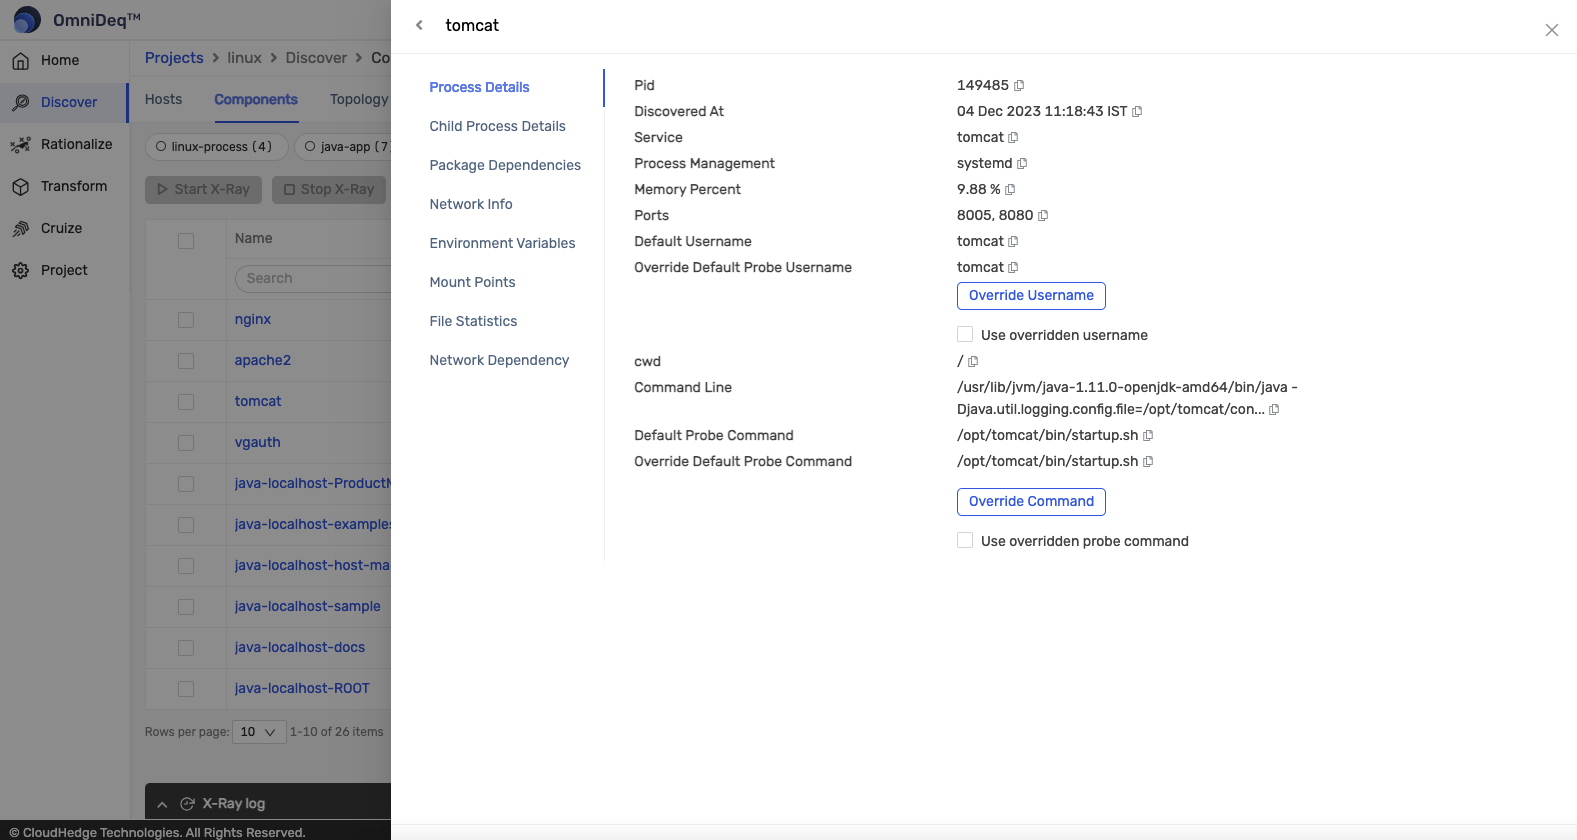
- You can see the following information on the more info popup:
- Dependencies
- Process Details
- Child Process details
- Network Info
- Environment Variables
- File Statistics
- Network Dependency
Process Information Sections
Process Details:
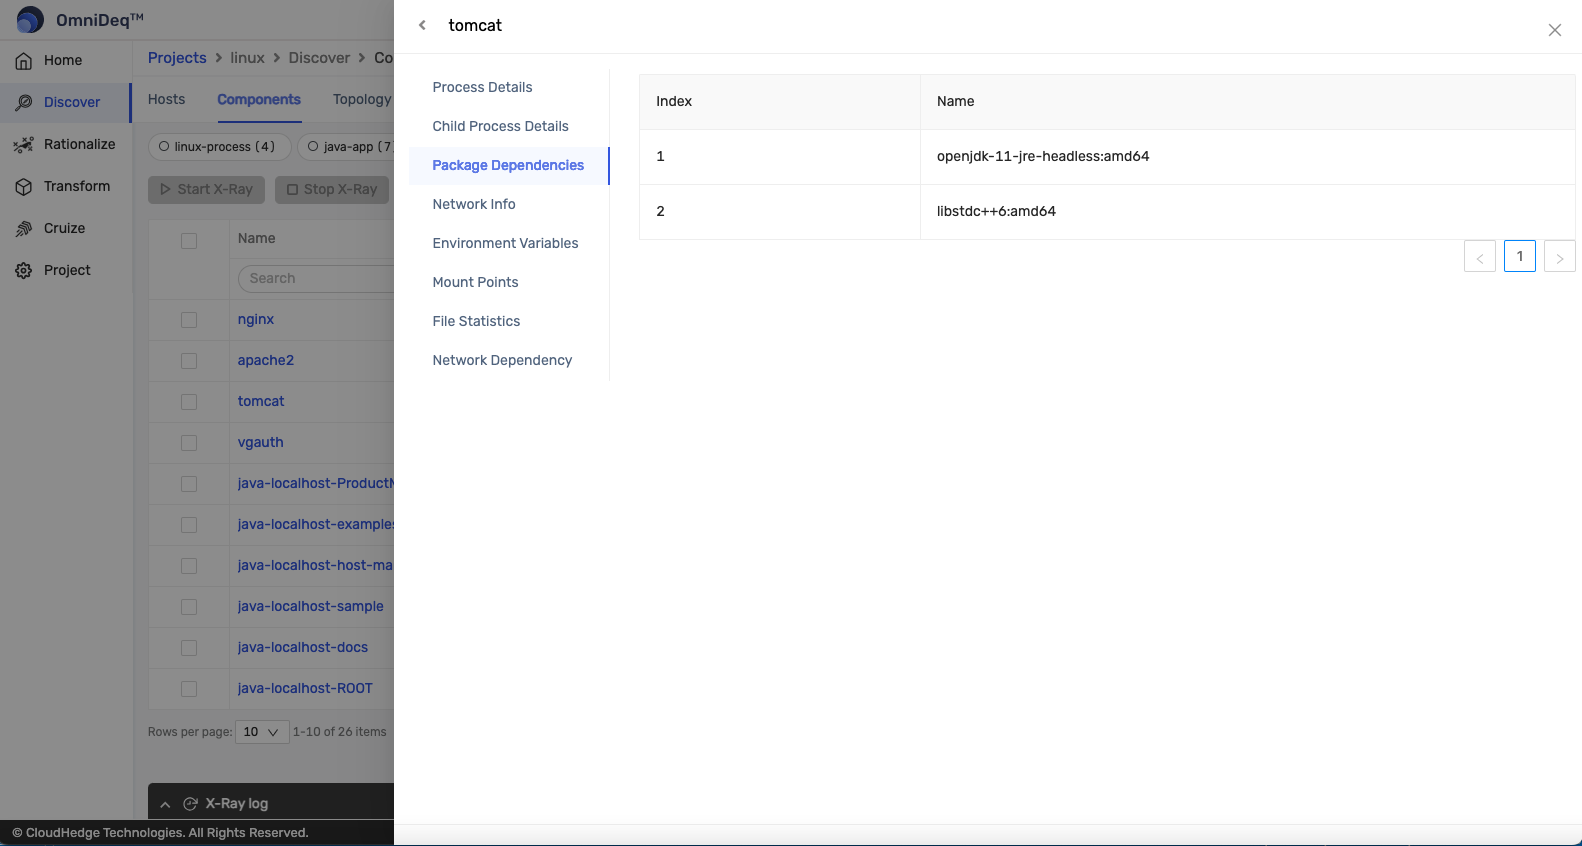
Package Dependencies:
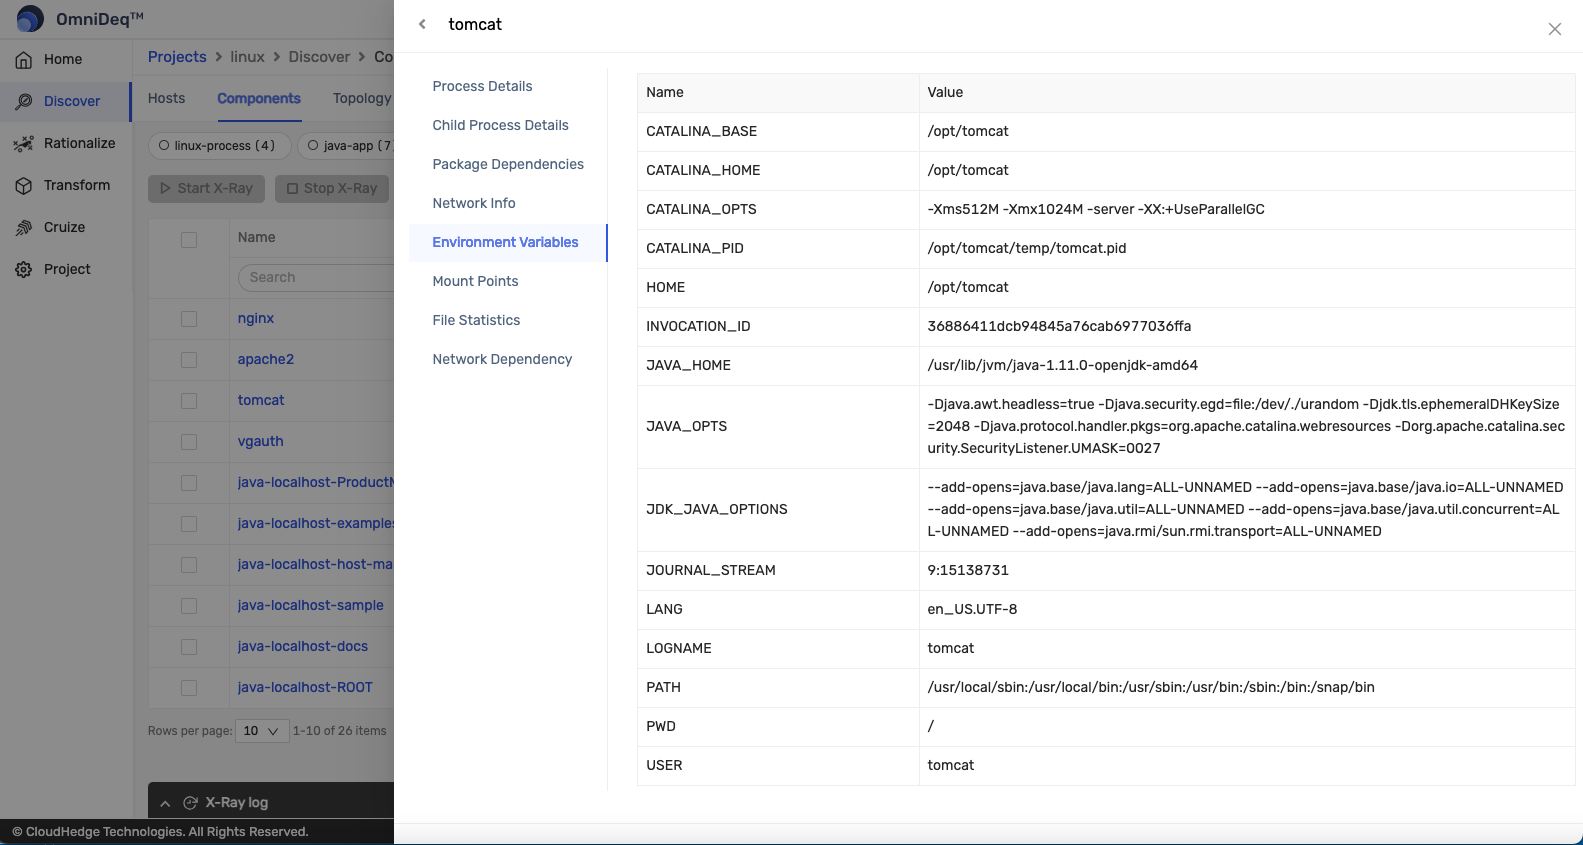
Environment Variables:
Important Note:
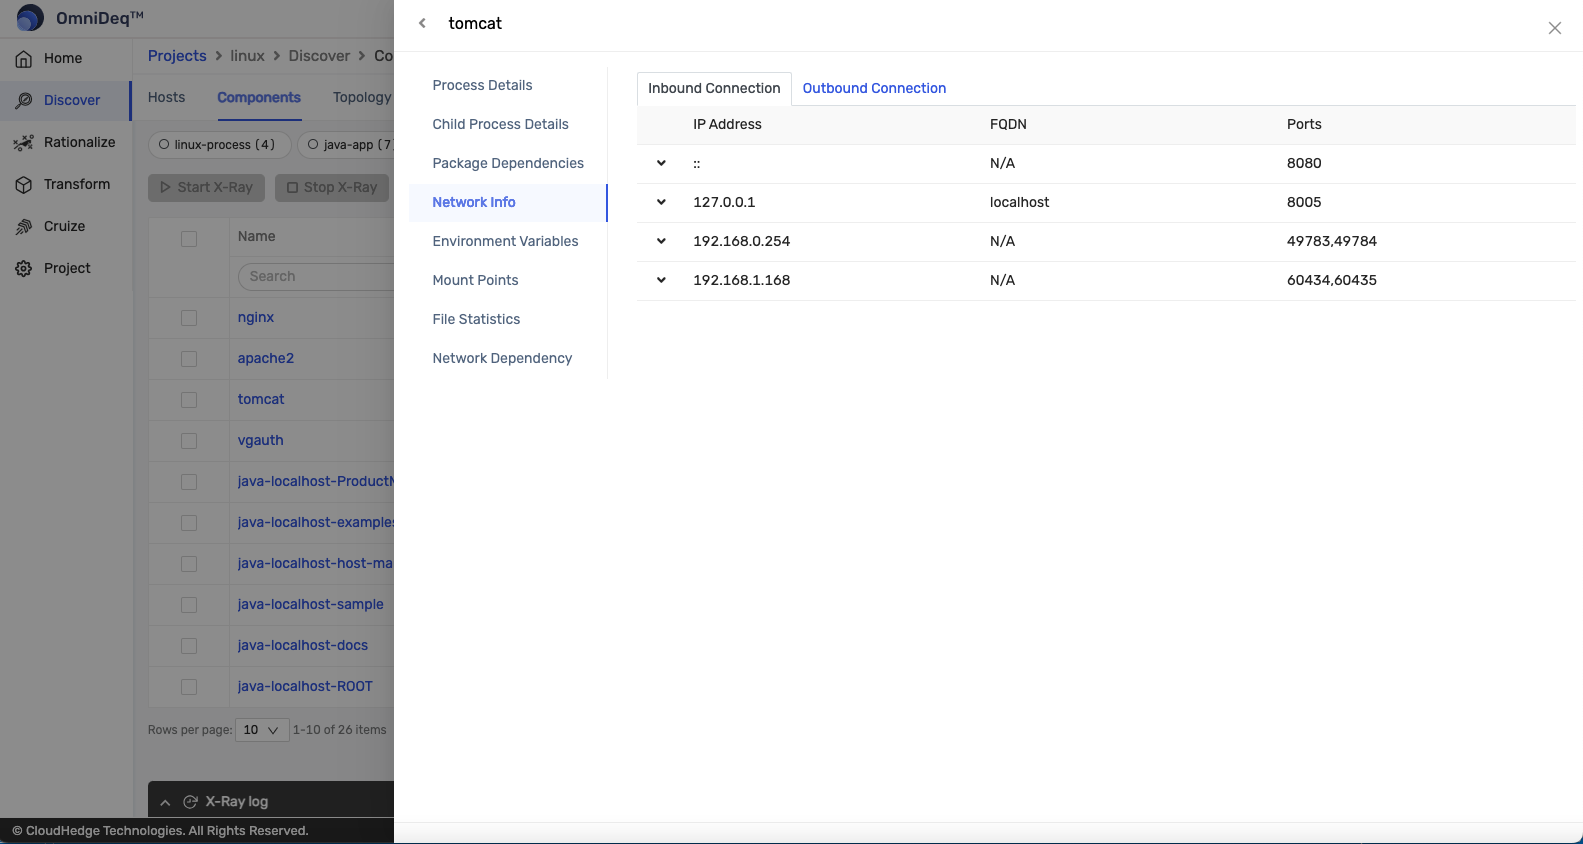
Network Info, File Statistics, and Network Dependency sections are empty before X-ray. They will be auto-populated after X-ray. Click here to jump to Process Params from X-ray tab.
Network Info:
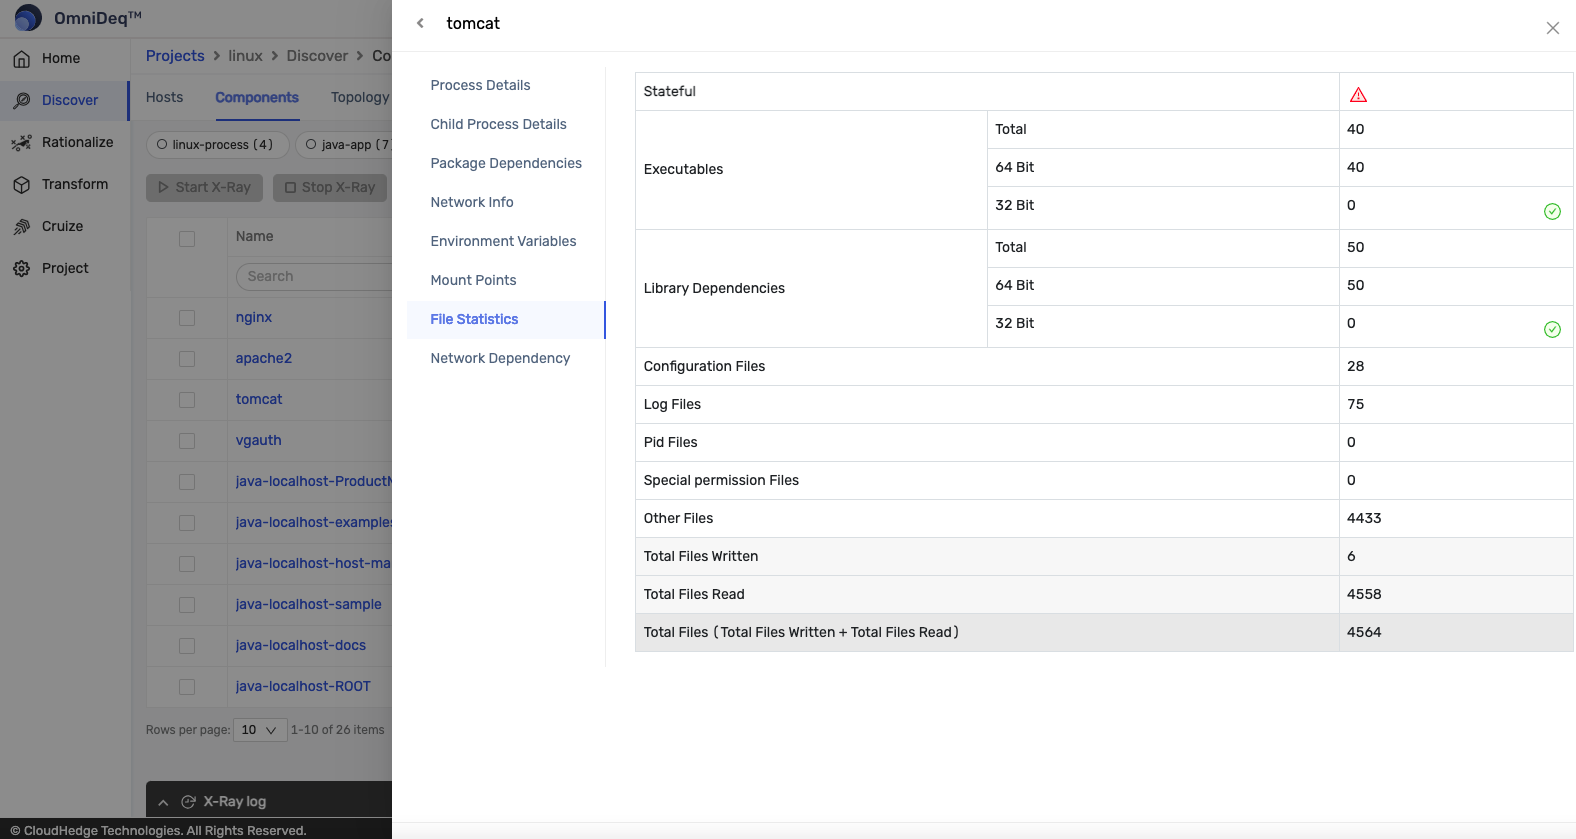
File Statistics:
Network Dependency:
Note:
This step is just to see the process information. This is not a part of the flow.
Step 6: X-Ray of Process
The next step will be X-ray of the process. Please click here to learn more about X-ray.
Force Discover
You can also force discover the host if the discovery process is taking a long time and you want to re-initiate the discovery.
To force discover the host, you will have to click the Force Discover button as shown in the image below.