Rehost
Prerequisites
Access to CHAI™
- In order to use CHAI™'s lift shift solution, first we need to have access to CloudHedge's CHAI™
- Open your web browser (recommended Chrome) and navigate to the 'CHAI™-appliance-URL' to access CHAI™
- Login using credentials you received from CloudHedge team
AWS Account
- AWS account/s with programmatic access (Access Key, Secret Access Key)
- Initializing Application Migration Service in required AWS account and region
- Note that only Admin users can initialize this service. This is one time activity per region. Visit link to learn more
- Add AWS vault in CHAI™. Refer to this page
Source Server Configurations
CHAI™ Requirements
Linux Source Servers:
- Verify the prerequisites mentioned on this page are met
python3,wget,make,gcc,perl,tar,gawk,rpmare installed-
Add below line in
/etc/sudoersfile. In below line, we have added python3 path at the end:<ssh-user-for-CHAI™-host> ALL=(ALL) NOPASSWD:/opt/.ch-tools/*/*/*, /opt/.ch-tools/*/*, /bin/mkdir, /bin/echo, /bin/chmod 755 /opt/.ch-tools/*, /bin/chmod 755 /home/<ssh-user-for-CHAI™-host>/chcmd, /bin/chmod -R 755 /opt/.ch-tools, /bin/chmod -R 755 /home/<ssh-user-for-CHAI™-host>/.ch-tools, /bin/chown <ssh-user-for-CHAI™-host>\: /opt/.ch-tools/*, /bin/chown -R <ssh-user-for-CHAI™-host>\: /home/<ssh-user-for-CHAI™-host>/chcmd, /bin/chown -R <ssh-user-for-CHAI™-host>\: /opt/.ch-tools, /bin/chown -R <ssh-user-for-CHAI™-host>\: /home/<ssh-user-for-CHAI™-host>/.ch-tools, /usr/bin/python3
Windows Source Servers:
- Verify prerequisites mentioned on this page are met
- TLS 1.2 enabled
- Use command
[Net.ServicePointManager]::SecurityProtocolto know which TLS is enabled
- Use command
- DotNet 4.5 or above
NOTE: For more prerequisites information visit the link
AWS Requirements
Important network settings are needed to be done on source servers (and at firewall level in case source server is running in air-gapped environment). This mainly includes:
- Access to various AWS services on port TCP/443
- Access to AWS MGN service on port TCP/1500 for data sync
This AWS documentation page describes all required network settings need to be done on source servers.
Limitations
- AWS MGN is regional service. It is available in regions described in this official document
- AWS MGN service has quota limits as described in this official document
Workflow
Step 1: Add VM in CHAI™ Platform
To add source VM in the CHAI™ platform, login to CHAI™.
Click on Add Project. Add Name of the project (e.g. RehostVMs) of your choice, and choose preferred cloud AWS.
In hosts section:
- Choose the OS (Linux or Windows) type of source VM. [AIX is not supported]
- Enter Alias of your choice (e.g. on-premise-ubuntu1)
- Select the connection type. This could be SSH or Basic in case of Linux & Basic and Kerberos in case of Windows
- Choose an already added vault or create a new one by clicking on
+ **Create** new vaultbutton inChoose Credentialsdropdown. This page explains how to add different types of vaults - The username of the source VM will be auto-populated after selecting the vault. This user is used to connect to VM
- Enter the hostname or IP address of the source VM. Make sure, this IP/Hostname should be accessible from CHAI™
- Enter the Port number on which CHAI™ can connect to source VM
- Add more VMs by clicking on + Host button
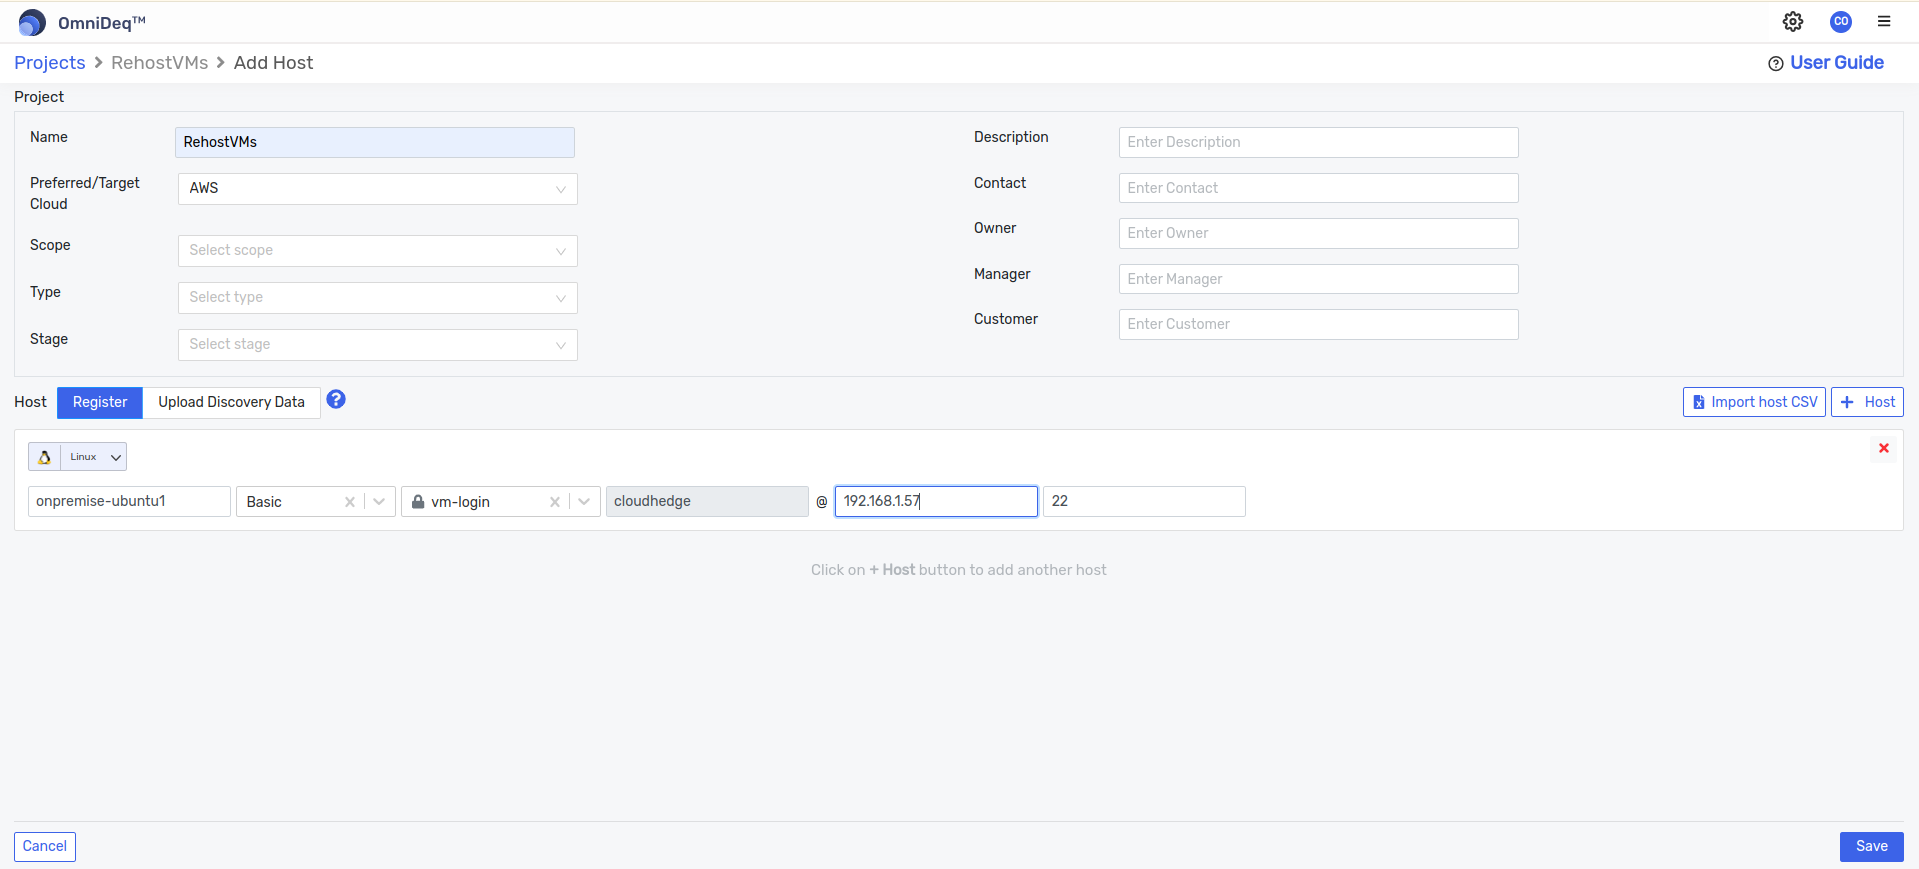
Finally click on Save button. This action will add a project in CHAI™.
Step 2: Make Sure CHAI™ Can Connect to VMs
To make sure that CHAI™ is able to connect to source VM:
- Select the project → Click on Discover
- Click on the kebab menu icon of respective added host
- Select
Check Connection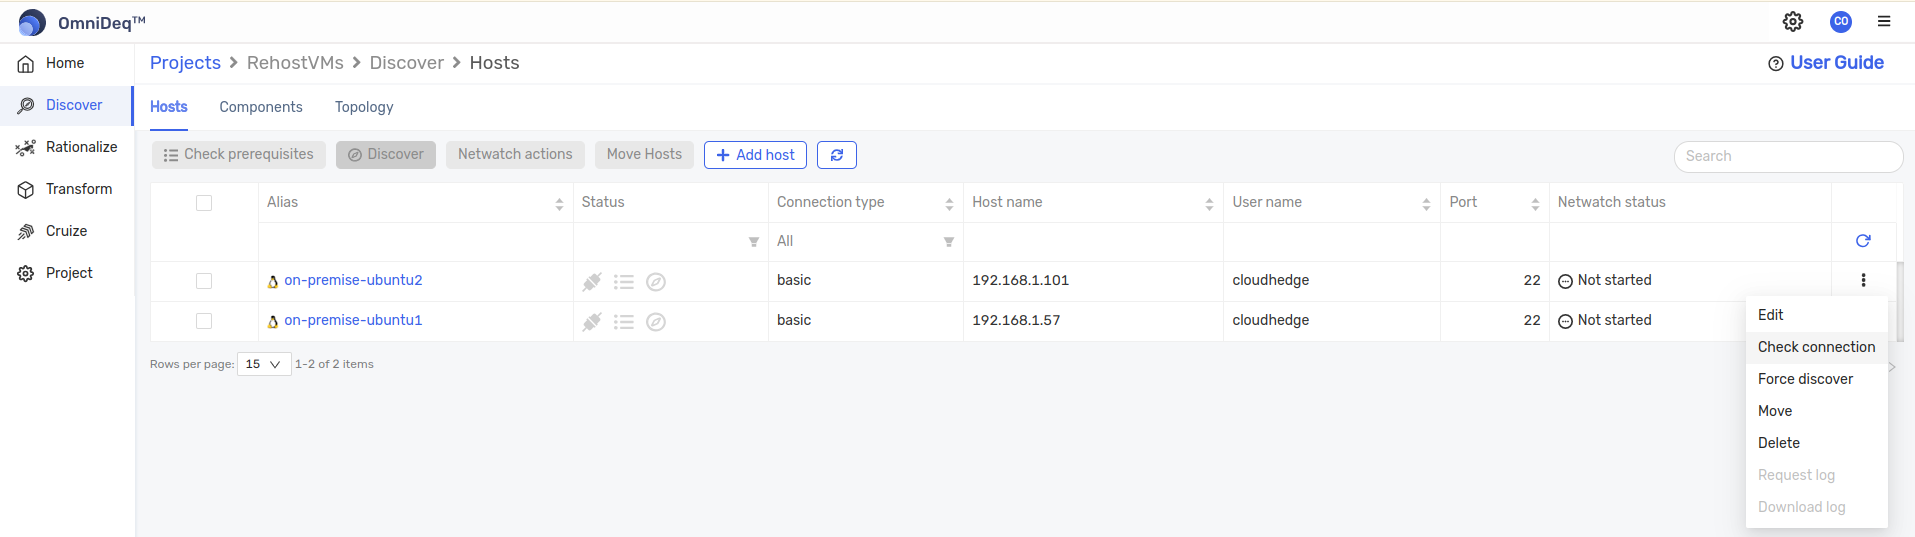
- Click on
Discover logspane for more information while checking connection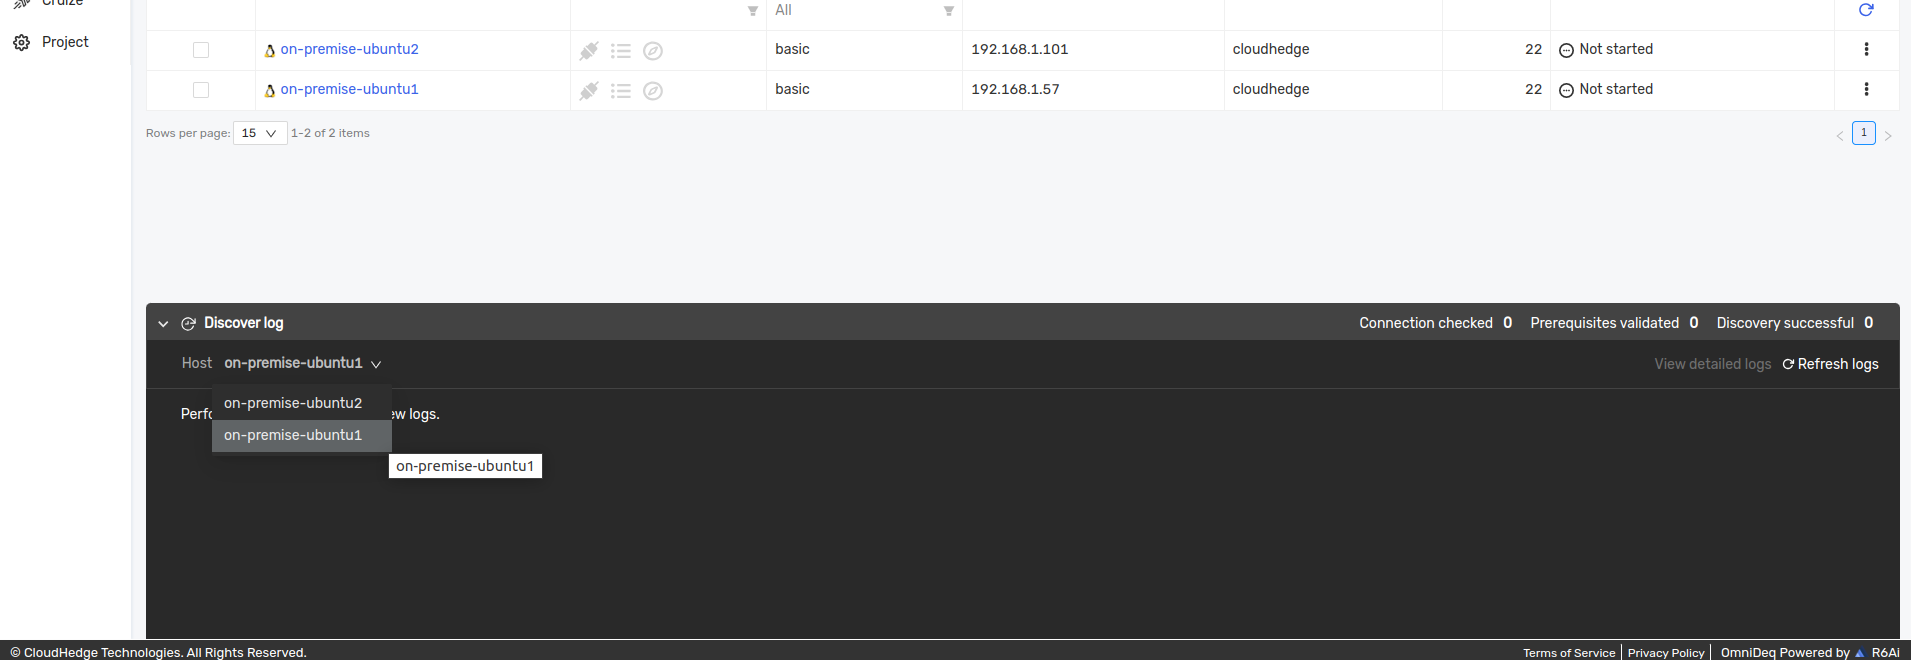
- Once check connection is successful, the window will look as expected

Step 3: Check Prerequisites and Discover the Hosts
Once connection to VM is completed, proceed to Check prerequisites process.
- Select the VMs (if required all), and click on
Check prerequisitesbutton - This will make sure that the VMs are compatible for rehosting
- If any VM fails for prerequisites, check for logs at the bottom of the screen

- It is recommended to perform discovery of the VMs added for extra information of VMs
- Select the VMs and click on
Discoverbutton
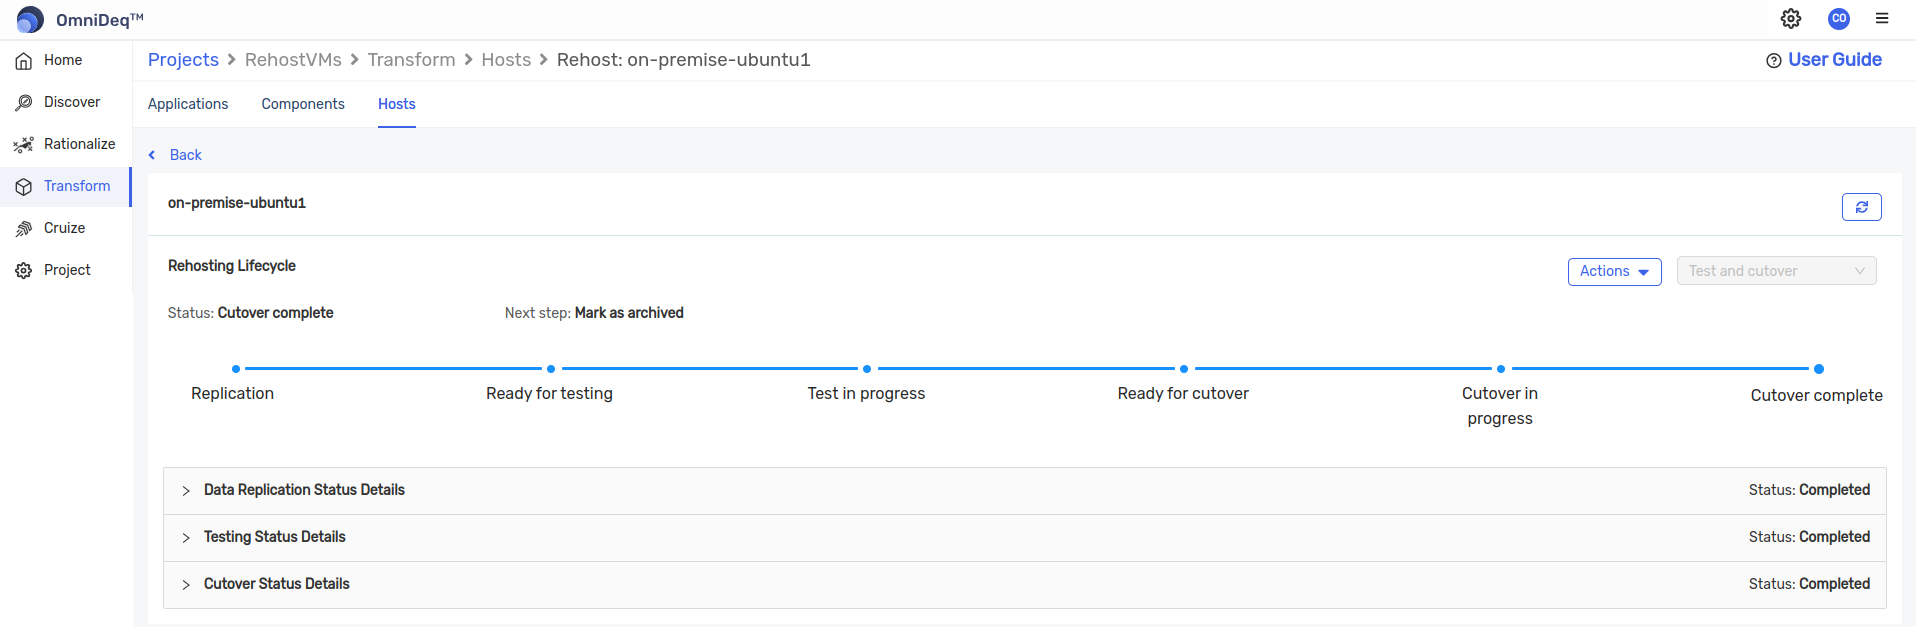
Step 4: Start Rehost Process
After successful discovery of VMs, let's start the rehost process.
- Click on
Transformoption in the left side menu - Click on
Hostsoption above - There will be the list of VMs. Select the required VM and click on
Start rehostingbutton above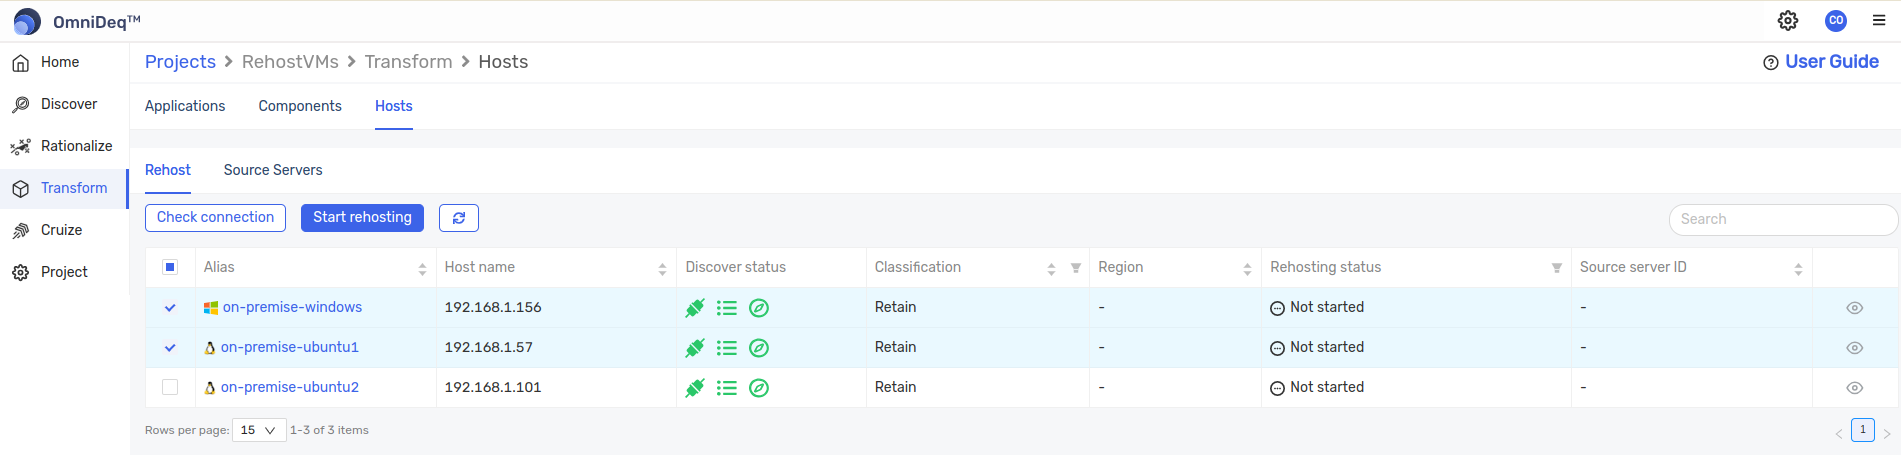
- There will be a screen to enter the target cloud details (e.g. AWS). Fill the cloud, vault and region correct and click on
Rehostbutton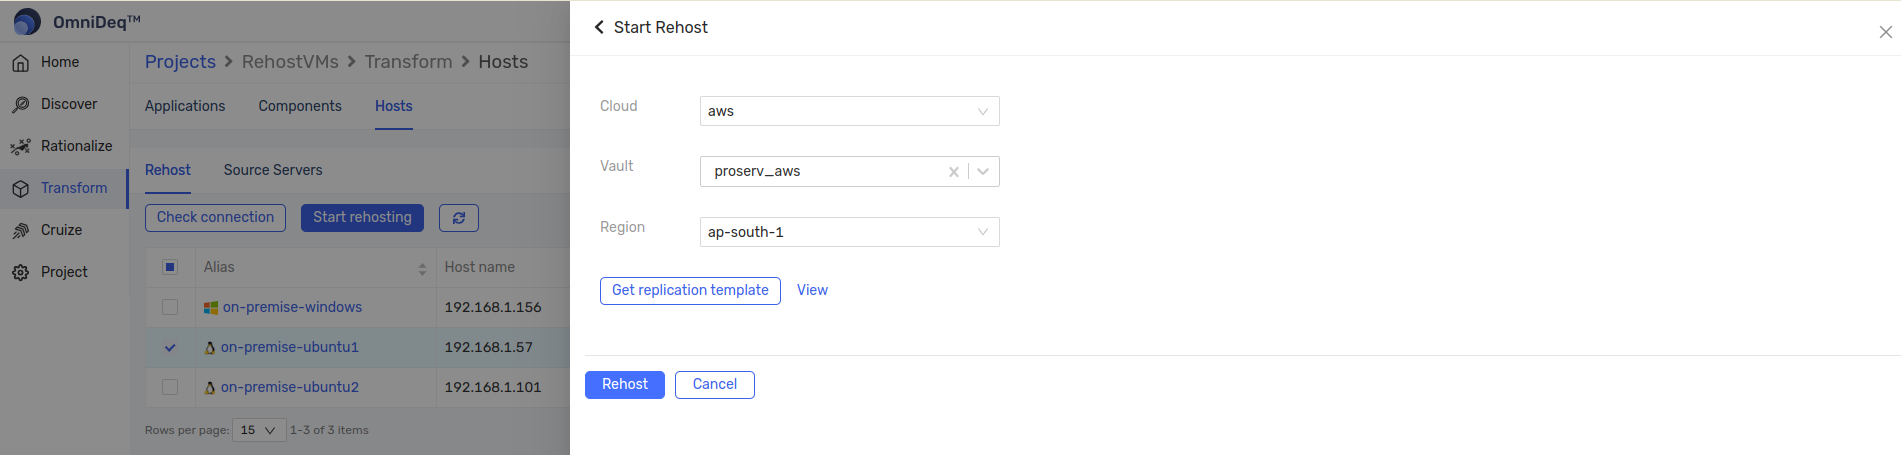
- It takes about 5-6 minutes to install the AWSReplicationInstaller agent. You can check the rehosting status column
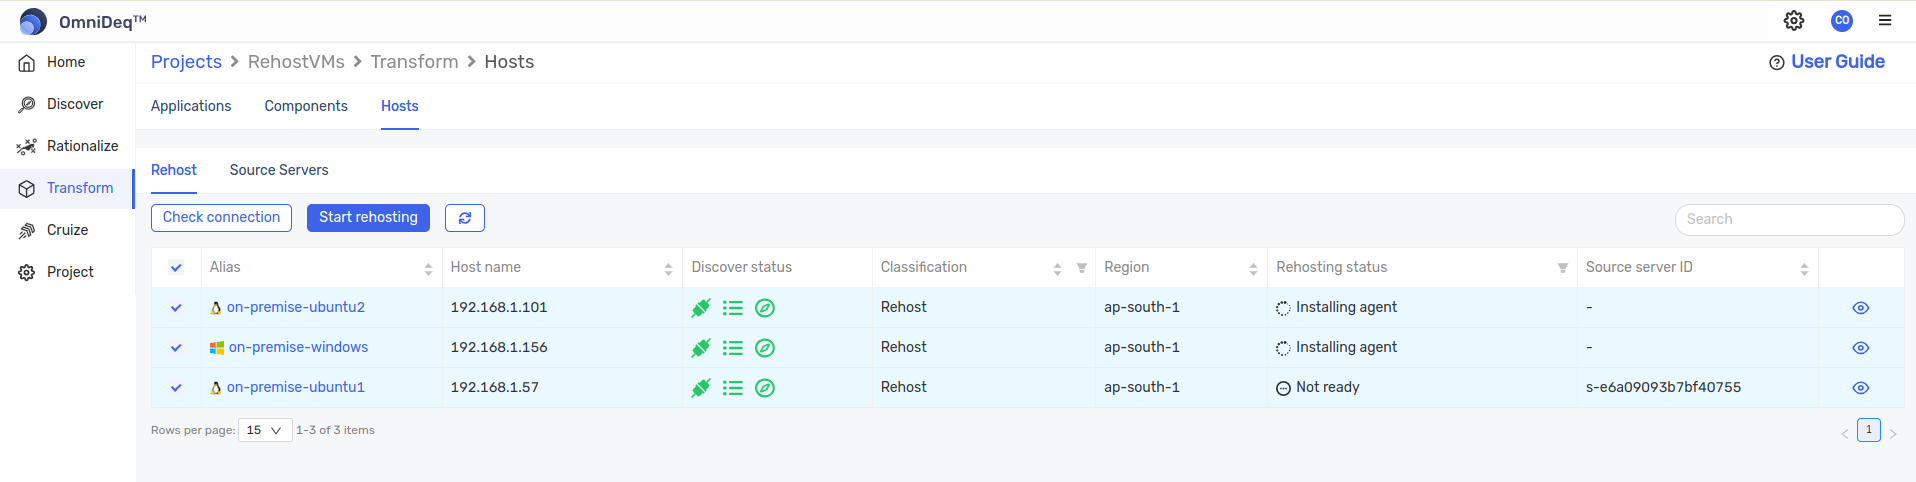
- You can view the respective status by clicking on view (eye) icon in the last column
- Once everything is in place, you will see the VM in
Ready for testingphase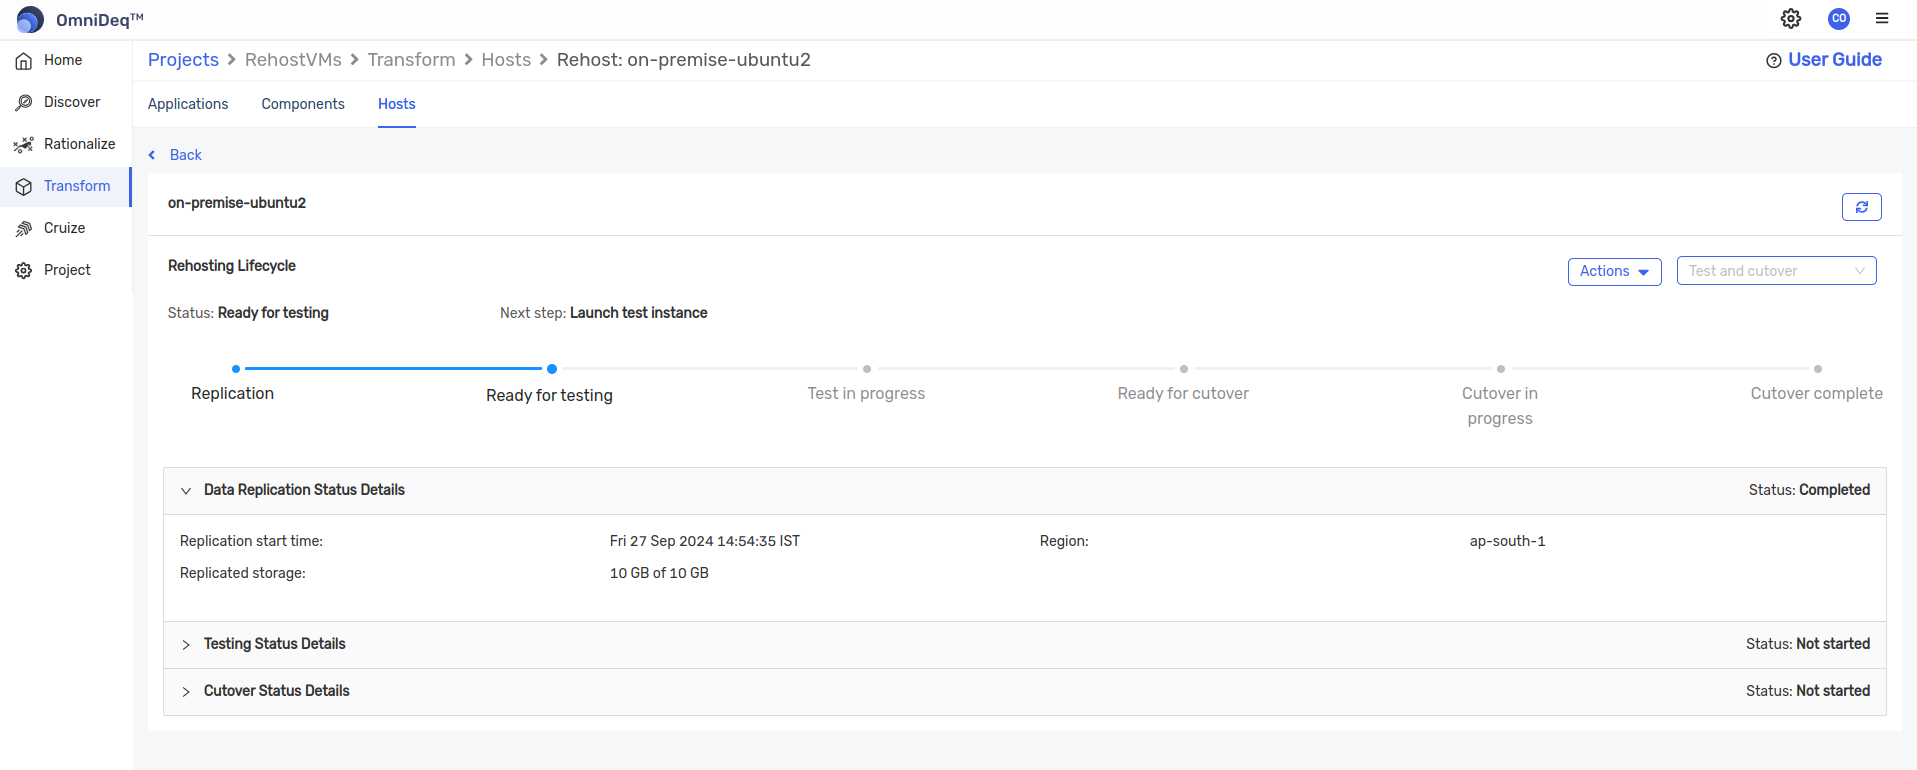
Step 5: AWS Launch Templates Modification
AWS by default creates the instances of below types: - c4 - c5 - d2 - i3 - m4 - m5 - r4 - r5
If you wish to change the instance type, login to AWS cloud and change the region accordingly.
- Search for AWS Application Migration Service. Click on Launch Template option in the left side column
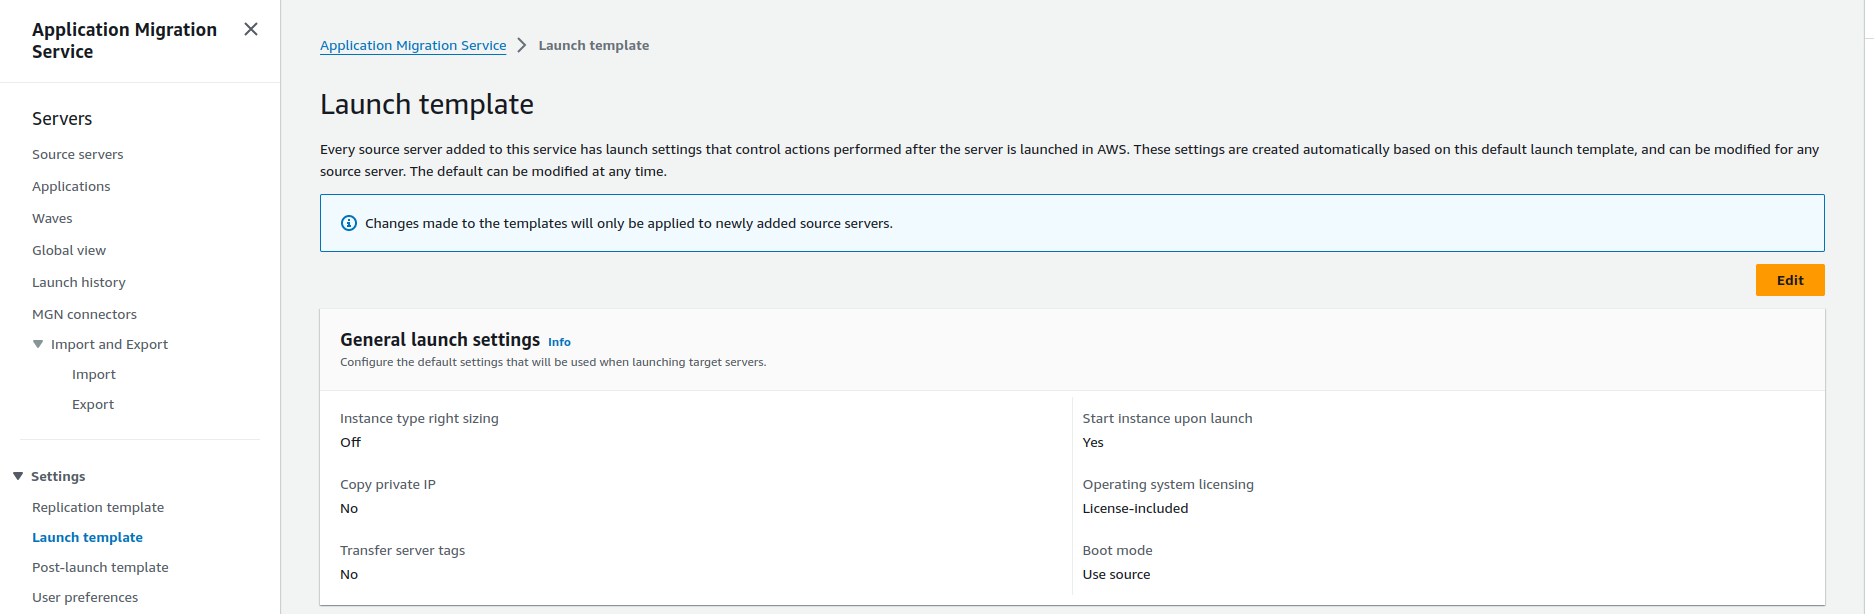
- Create a new template or modify existing one with unchecking the
Activate instance type right-sizingoption and Save - Go back to AWS application migration service page and click on
Source serversoption in the left side column - There will be list of servers which we selected for rehosting in CHAI™

- Select the required server. Click on
Launch settingstab. Note the 'Template ID' for further use. Scroll down toEC2 Launch Templatesection and click on Modify button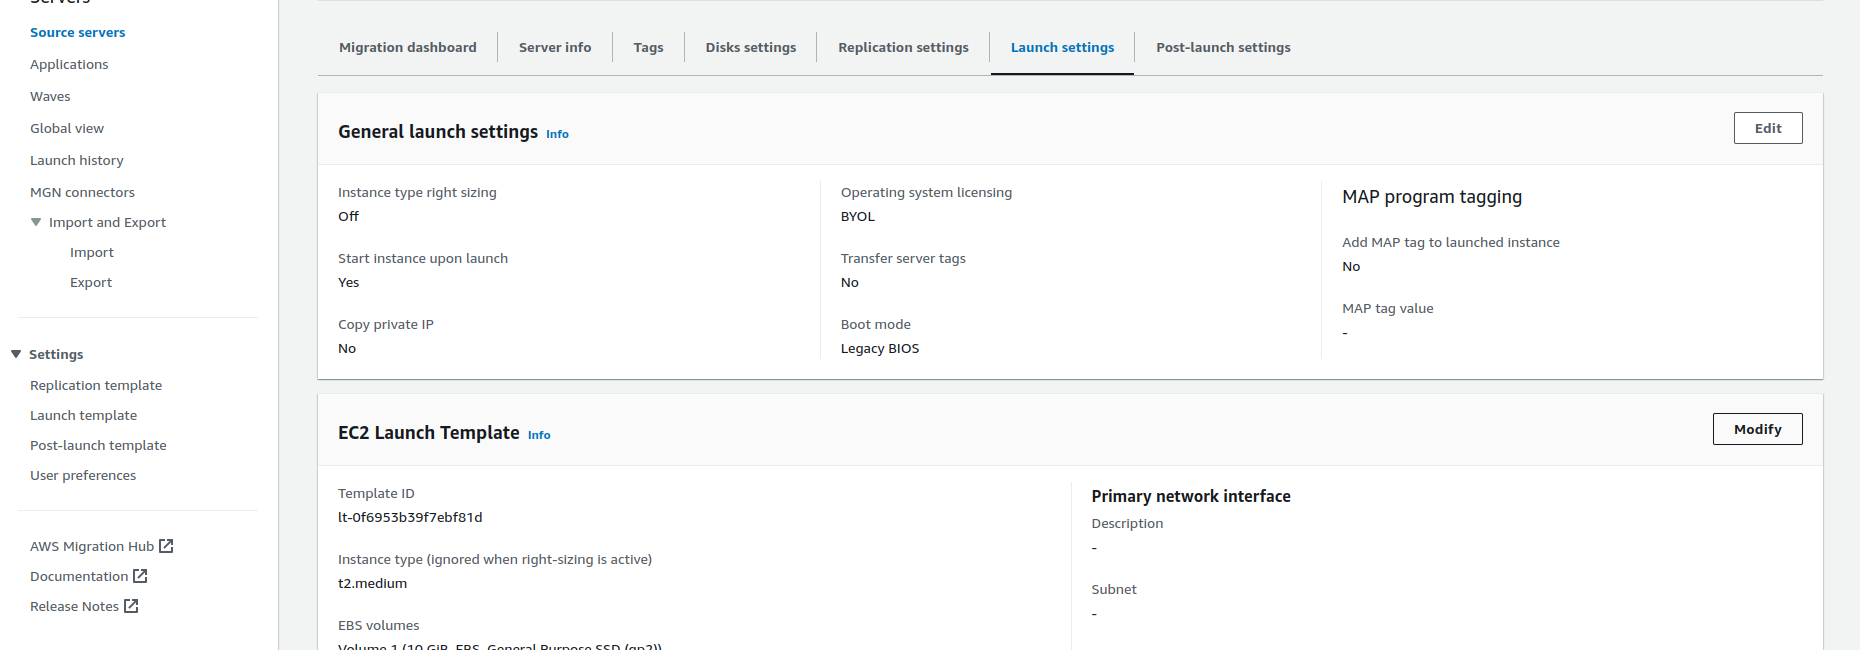
- Give the appropriate name (e.g. on-premise-ubuntu1) in 'Template version description'. Scroll down to 'Instance type' section and change the instance type as required
- Optional - Scroll down to 'Network settings' section, click on 'Advanced network configuration' and select
Enableoption in 'Auto-assign public IP' drop-down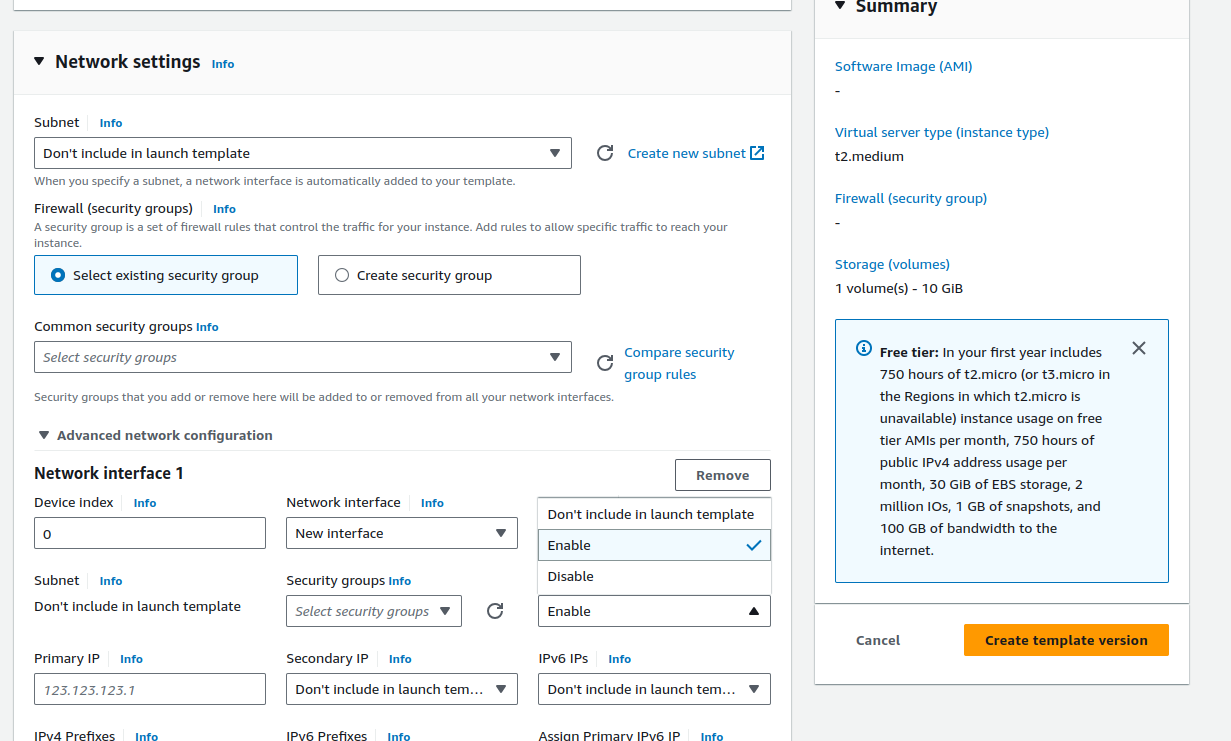
- Click on 'Create template version' button to the right
- Once completed, search for EC2 service and go to EC2 dashboard page
- Click on the 'Launch Templates' option on the left side column and click on the template id which we copied earlier. You can get that id again from source servers page
- Scroll down to 'Launch template version details' section and click on 'Actions' button to the right. Select
Set default versionoption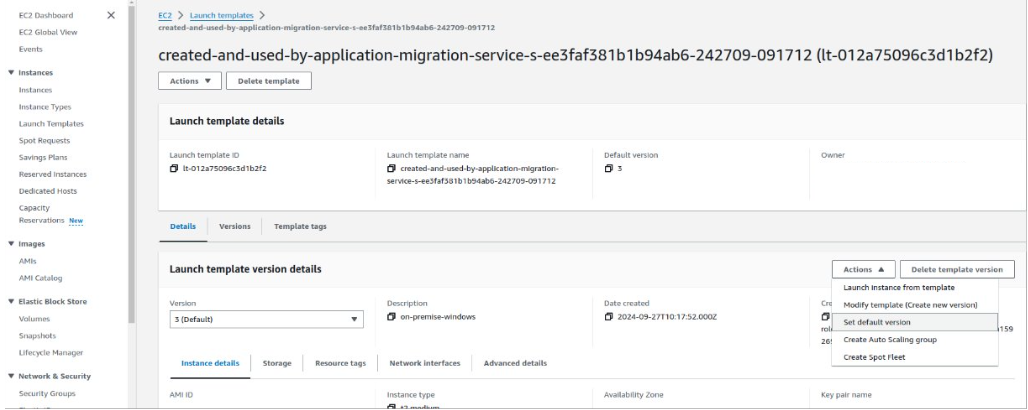
- Click on 'Template version' and select the newly created template version. You can see the name given earlier given while modifying launch template
Step 6: Launch Test Instance
- Go back to CHAI™, wait for the status to be
Ready for testing. It takes time depending upon the size of VM to be migrated - Once Replication stage is completed, click on the drop-down box beside 'Actions' button and select
Launch test instance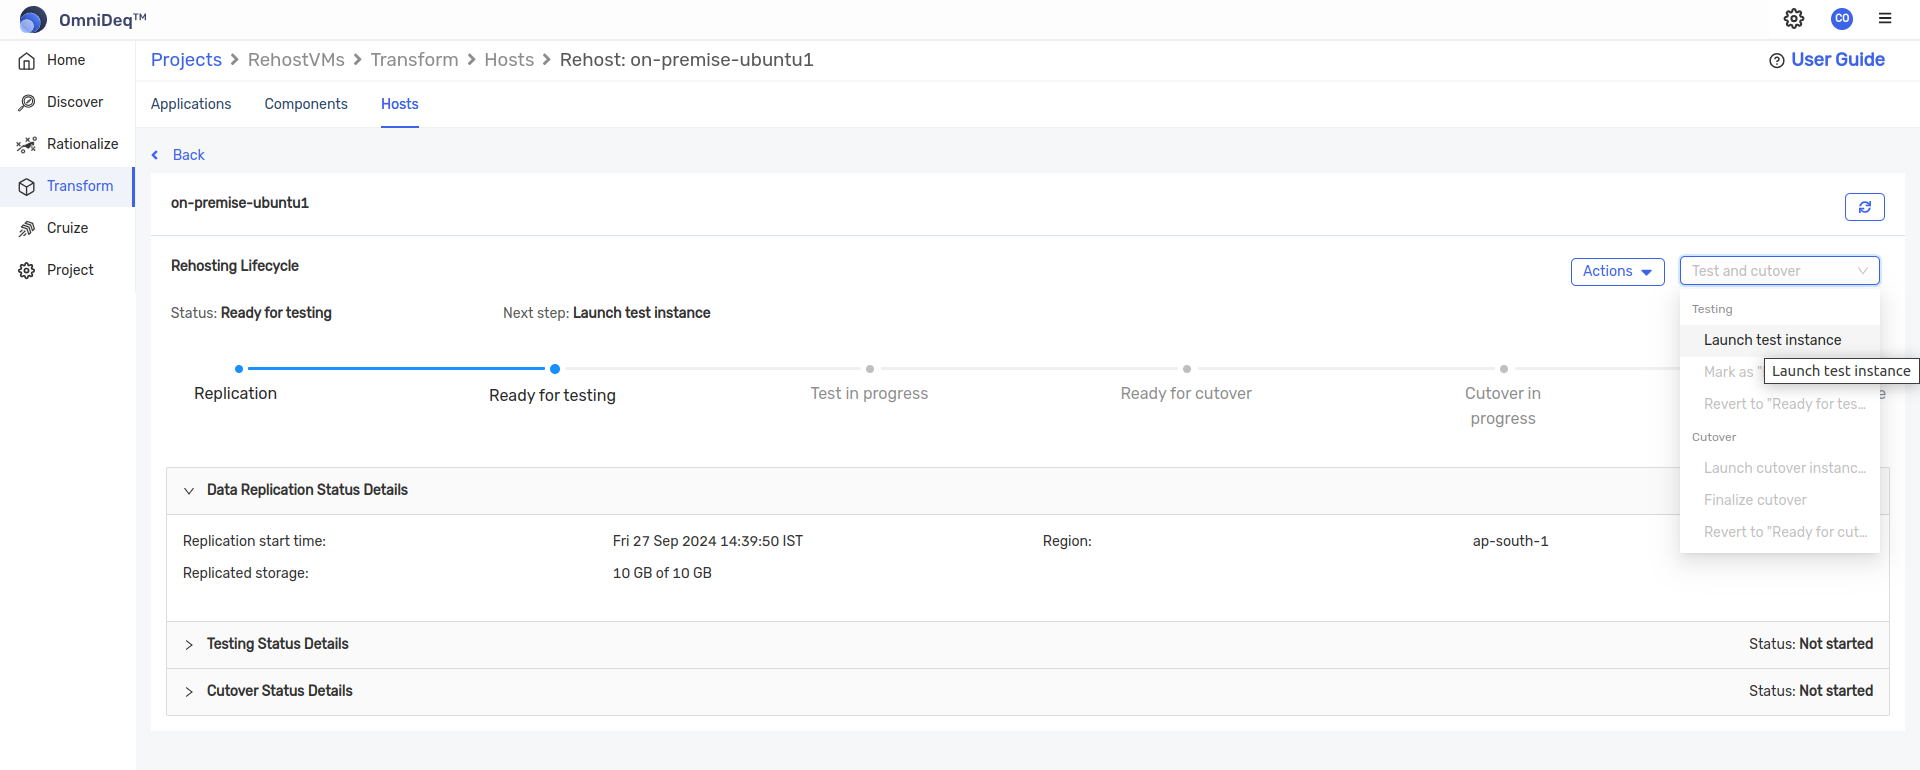
- The phase will change to
Test in progress - You can view on AWS → EC2 → Instances page that the replication server, conversion server are created which will make the test instance to be launched
- After the 'Ready for testing' phase is completed in CHAI™, you can see the details of newly created test instance with source VM name in 'Testing status details' section
- It can be also verified in AWS → EC2 → Instances
- Try connecting via ssh to the test instance and do testing
- In CHAI™, once testing is done and verified, click on
Mark as Ready for Cutoveroption in the drop-down box beside 'Actions' button - At this stage, the test instance will be terminated
- Once completed, select the
Launch cutover instancesoption in the drop-down box - At this stage, new instance will be created
- After all checks with newly created instance, click on
Finalize cutoveroption in the drop-down box - All the stages will be completed and the source VM is migrated and rehosted to AWS cloud