SAML Integration with CHAI™
NOTE: Azure Active Directory is now called Microsoft Entra ID.
Setup Process
Step 1: Create Microsoft Azure Account
Create an account at Microsoft Azure portal: https://portal.azure.com
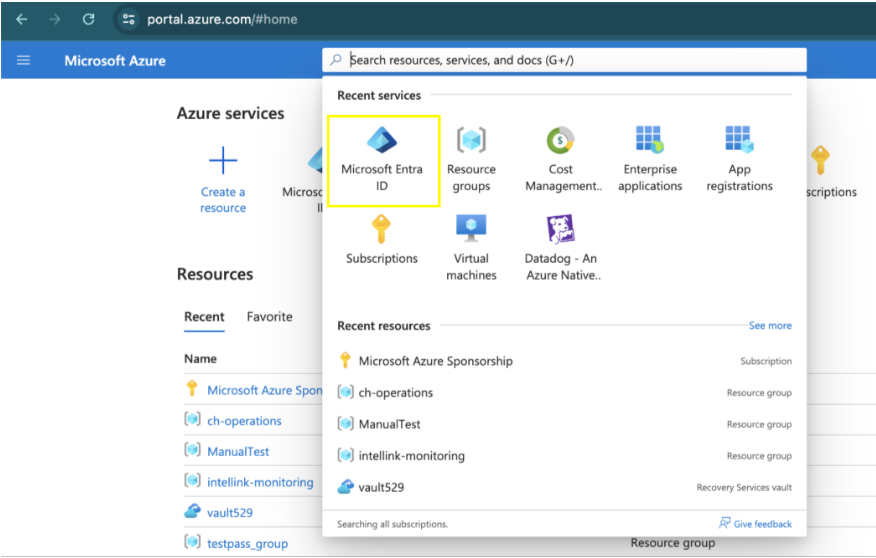
Step 2: Access Microsoft Entra ID
Once account is activated, login to the portal and search for "Microsoft Entra ID" in All services. Click on "Microsoft Entra ID".
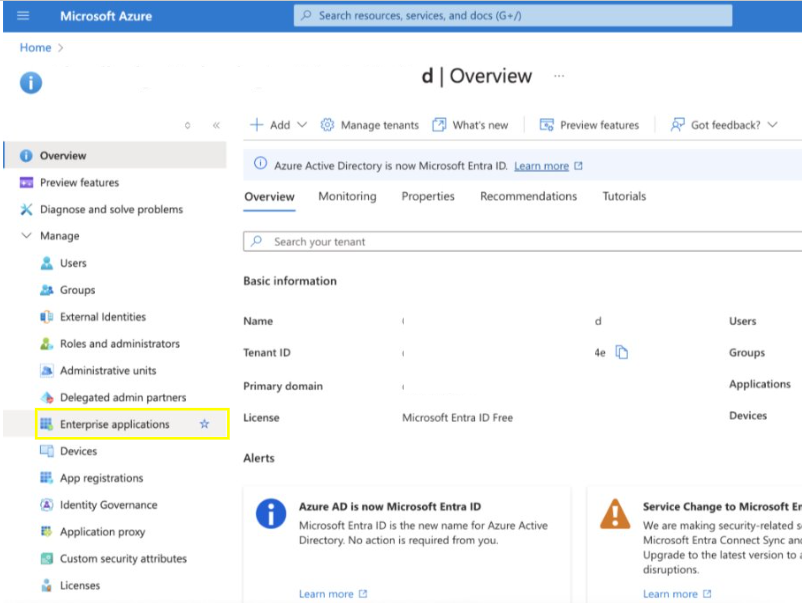
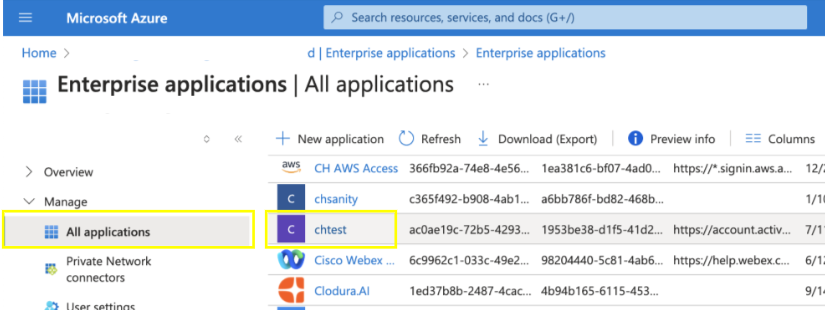
Step 3: Navigate to Enterprise Applications
In left hand navigation, click on "Enterprise applications".
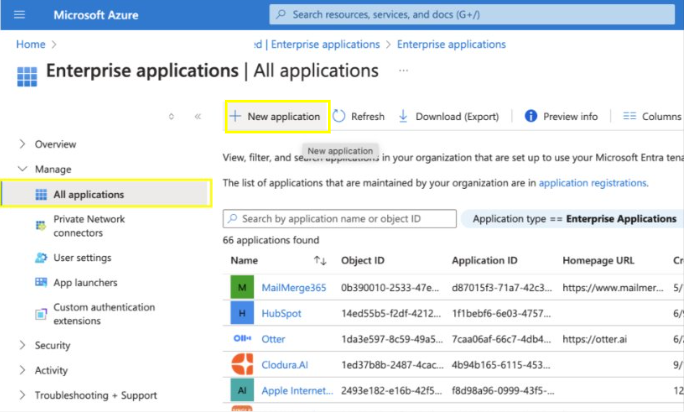
Step 4: Create New Application
Click on "New Application".
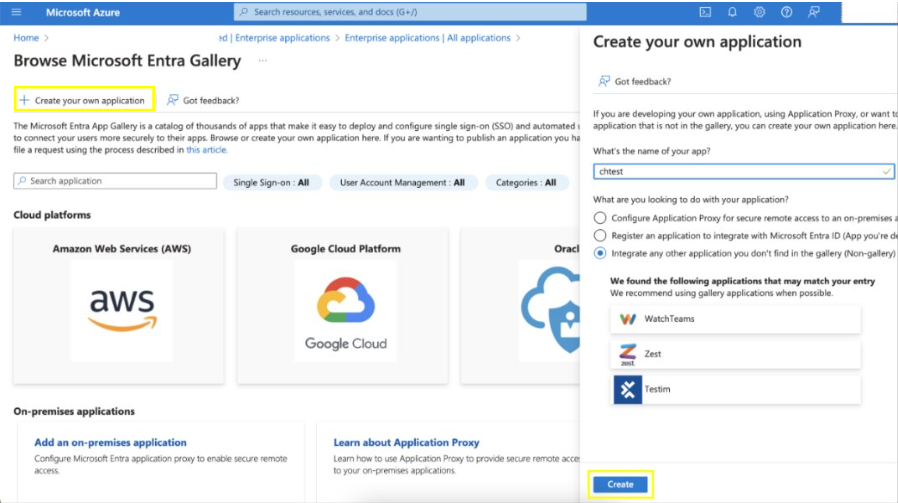
Step 5: Configure Application
- Click on "Create your own application"
- Enter the application name
- Click on "Create" button
Step 6: Verify Application Creation
Application will be listed under "All Application" of Enterprise applications.
Configure Single Sign-On
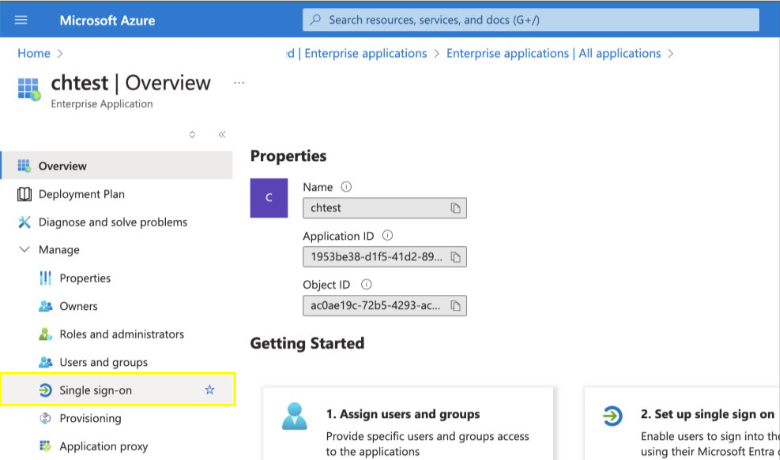
Step 7: Select Your Application
Click on the application that you just created (Example: "chtest"). Click on "Single Sign on".
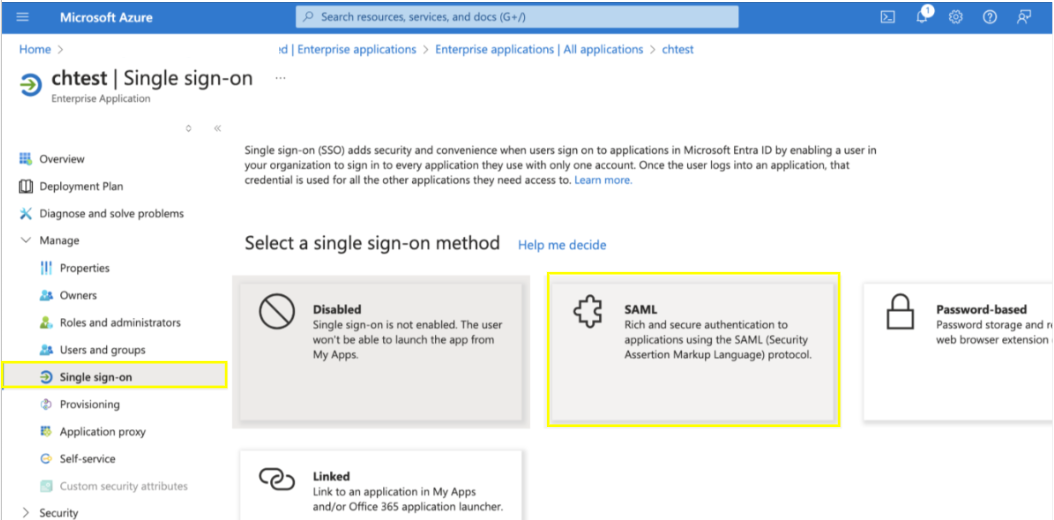
Step 8: Select SAML Option
Select the "SAML" option.
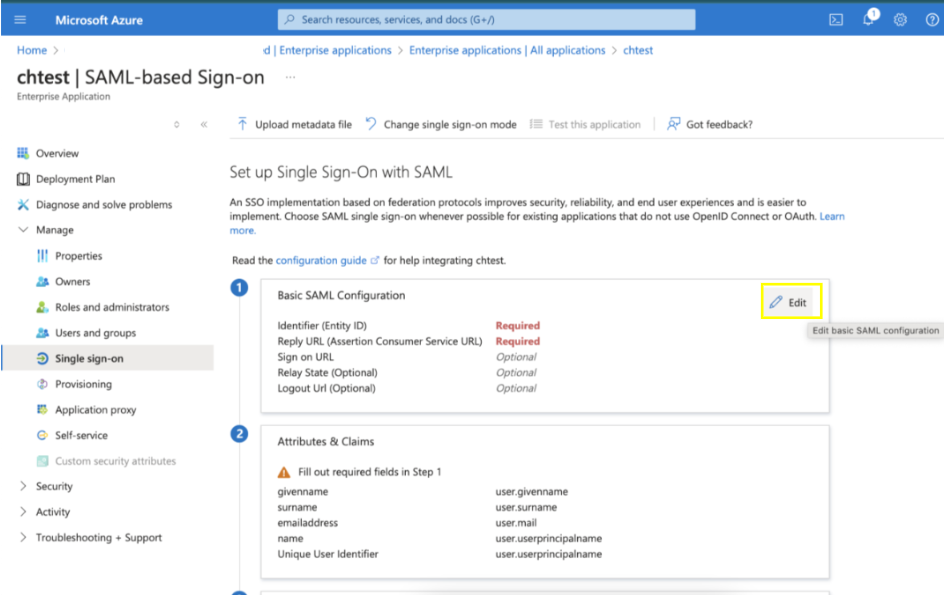
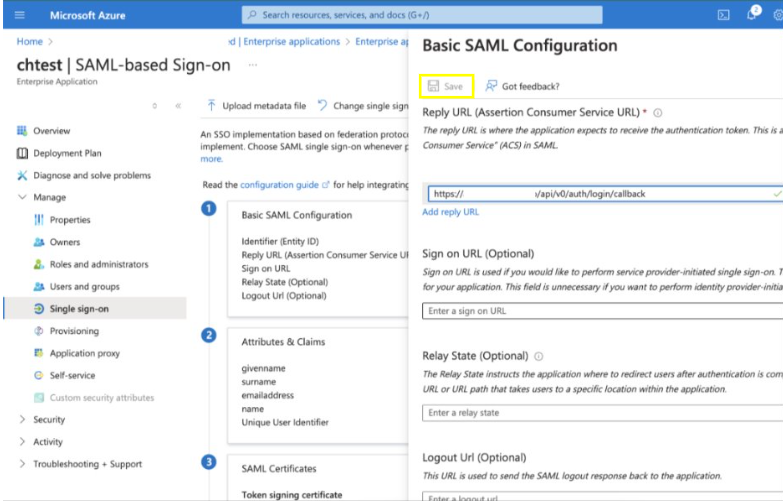
Step 9: Configure Basic SAML Settings
Click on Edit icon of "Basic SAML Configuration" and for Identifier (Entity ID) and Reply URL (Assertion Consumer Service URL) provide portal URL like:
https://CHAI™-portal's-DNS-or-ip-address/api/v0/auth/login/callback
Examples: - https://CHAI™-portal.io/api/v0/auth/login/callback - https://192.168.0.195/api/v0/auth/login/callback
Click on save button.
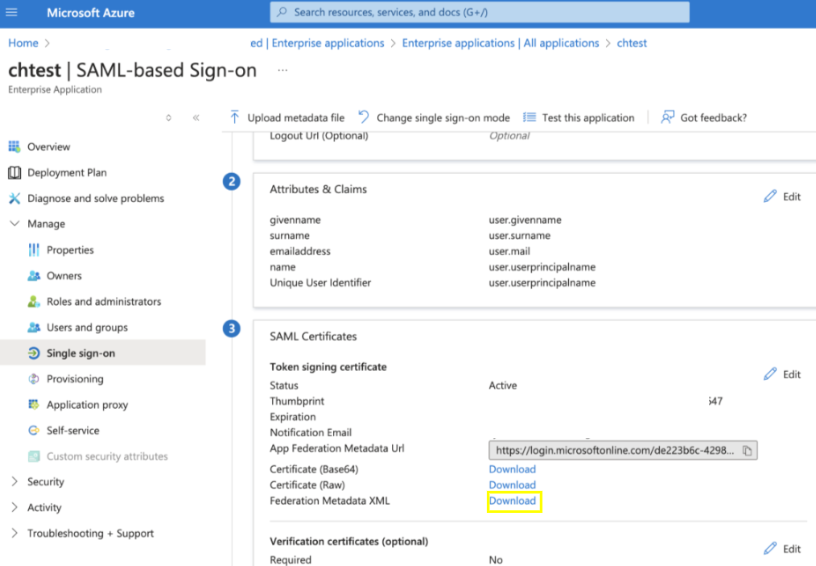
Step 10: Download Federation Metadata
Download the Federation Metadata XML.
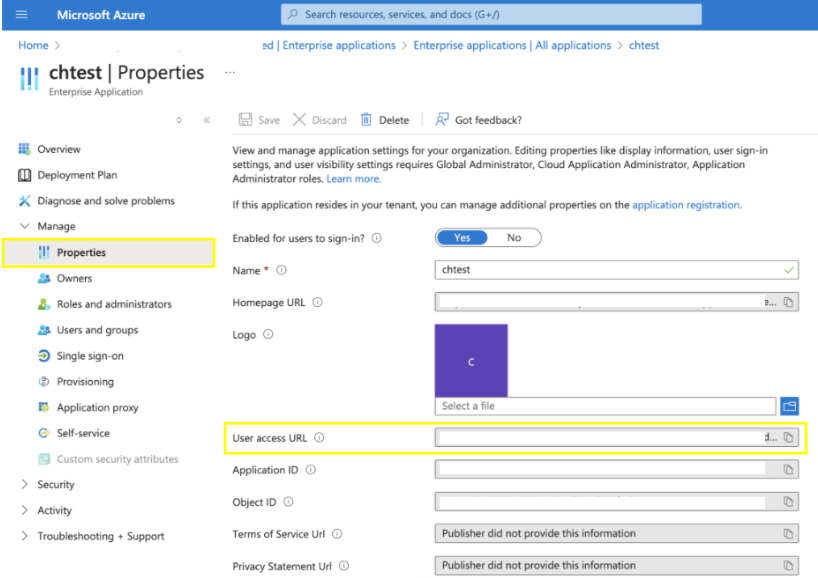
Step 11: Copy Access Information
Click on Properties from left navigation and copy user access URL and Application ID.
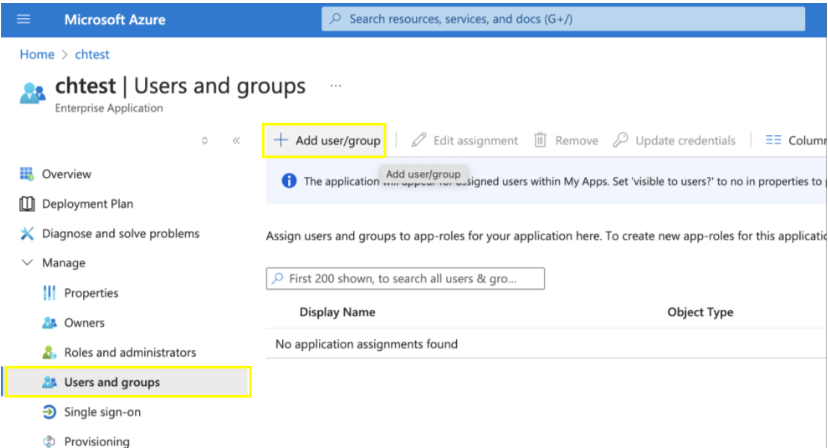
Add Users and Groups
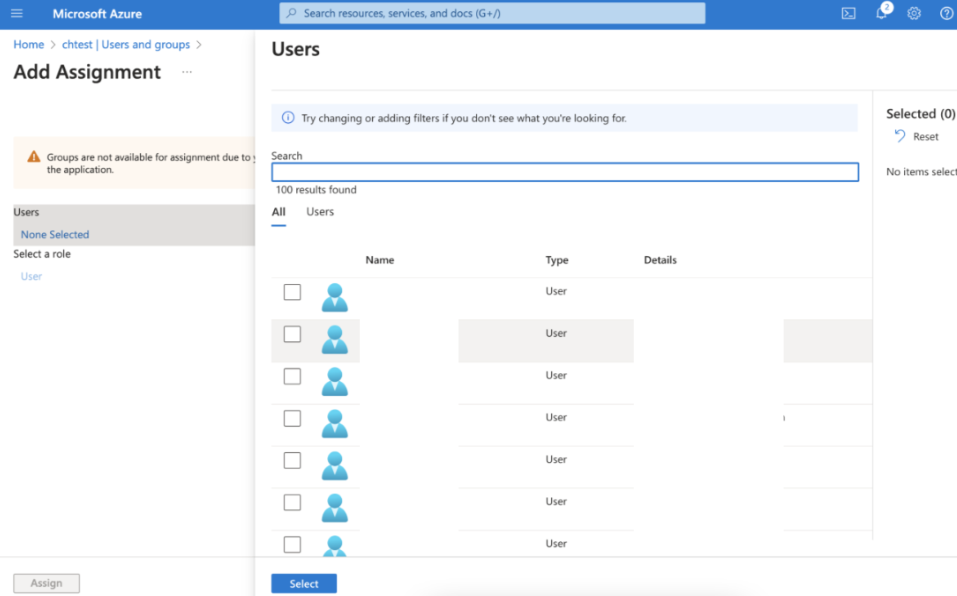
Step 12: Add Users or Groups
Click on "Users And Groups" from left navigation. Click on "Add user/group" to add the users or groups that you want to access the application.
Step 13: Assign Users
Select users and click on assign.
Step 14: Complete User Assignment
Do this for all the users you want to be able to authenticate to CHAI™.