Executing the X-Ray
Step 1: Open Project
Open the project that has the host which was previously discovered.
Step 2: Navigate to Components Tab
Go to the Components tab as shown in the image below.
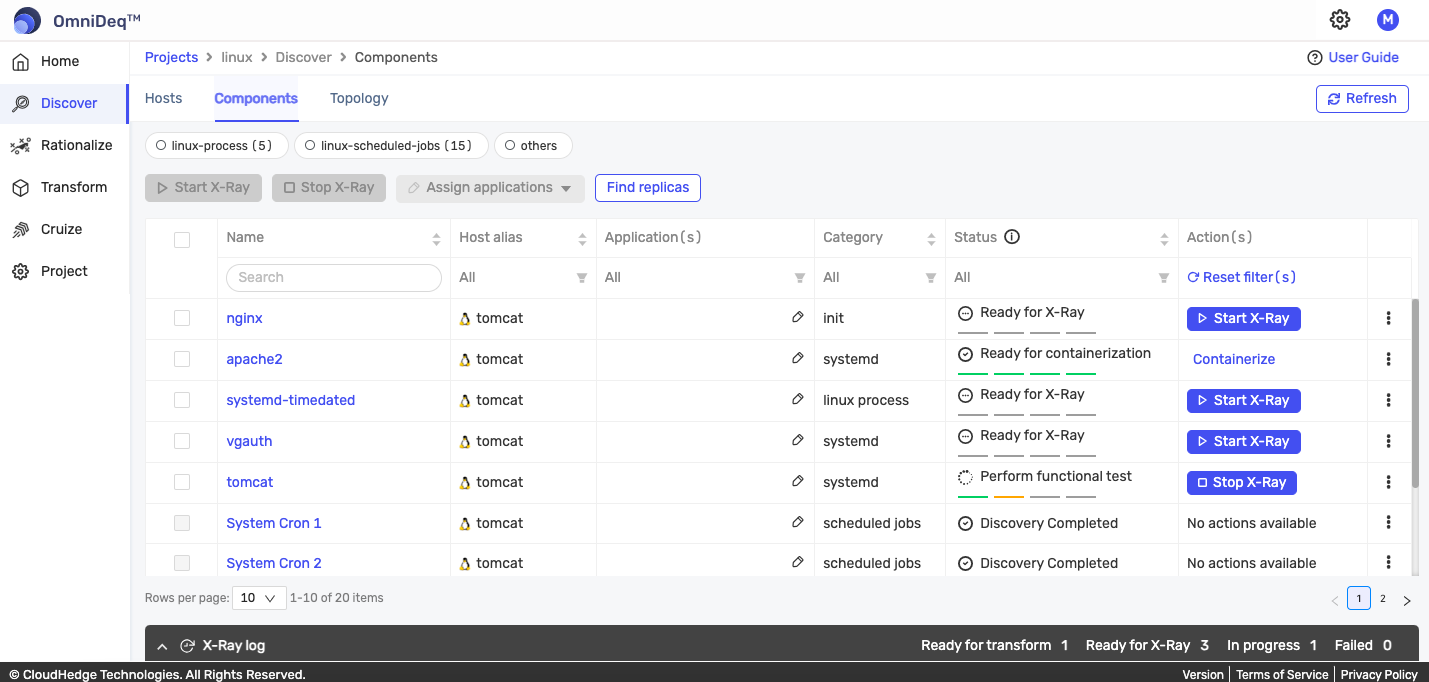
Step 3: Prepare for X-Ray
You can perform X-ray on process(es).
Step 4: Perform Start X-Ray on Individual Process
Option A: Using Selection and Button
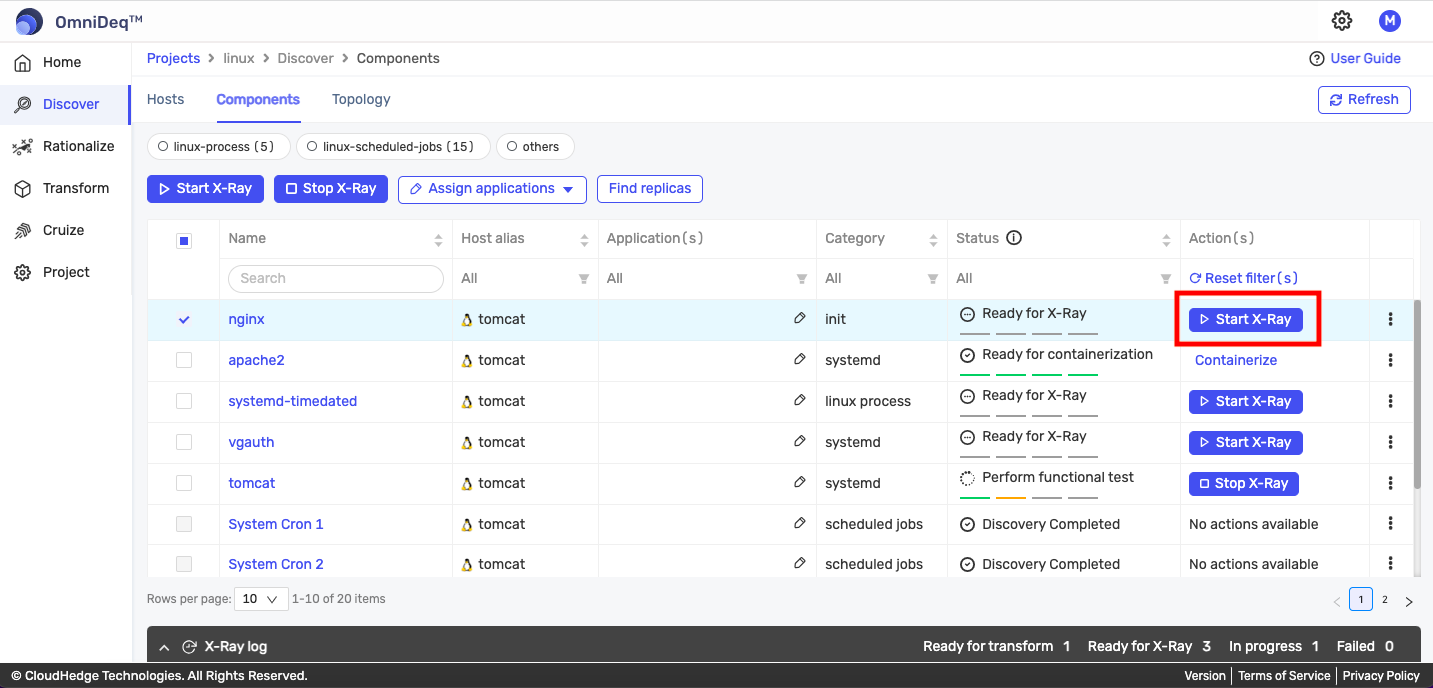
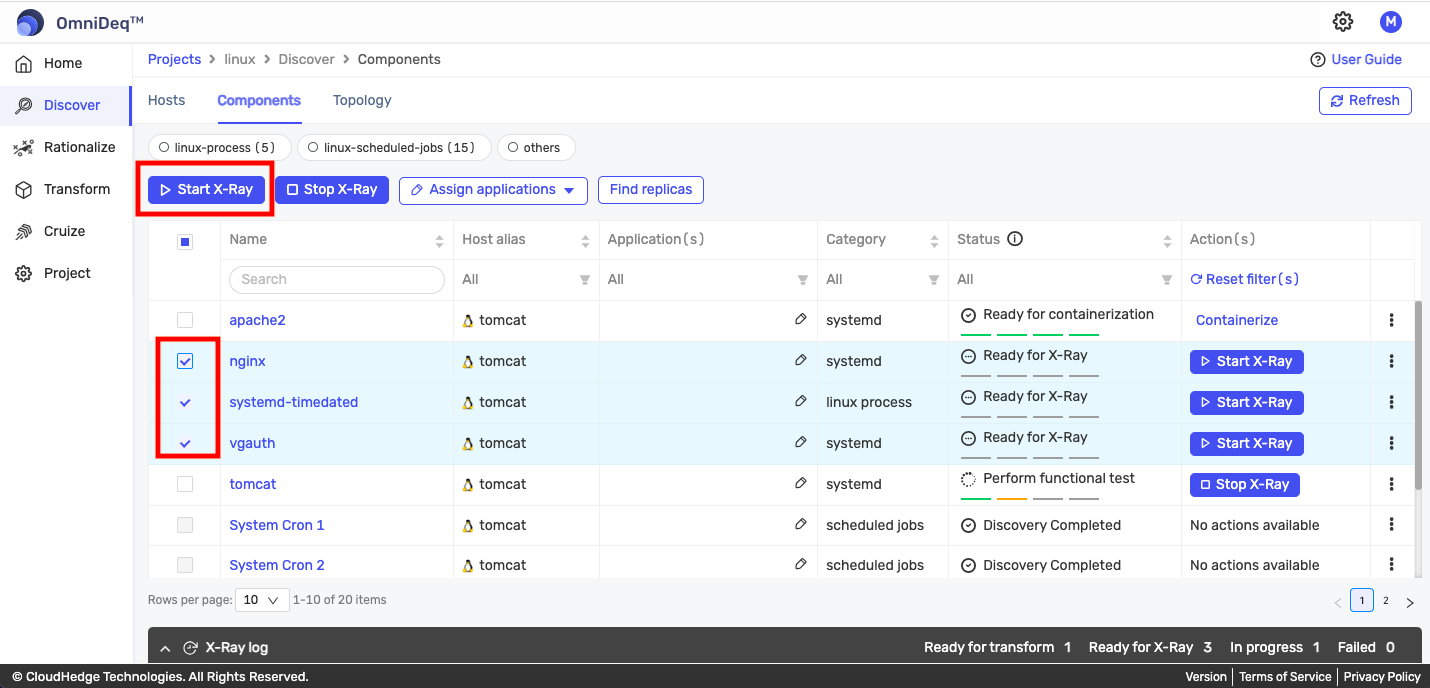
Select the process and click the Start X-Ray button as shown in the image below.

Option B: Using Action Button
You can also start X-ray using the individual Start X-Ray action button which will be shown under the Action column in the table if you are performing X-ray for the first time as shown in the image below.
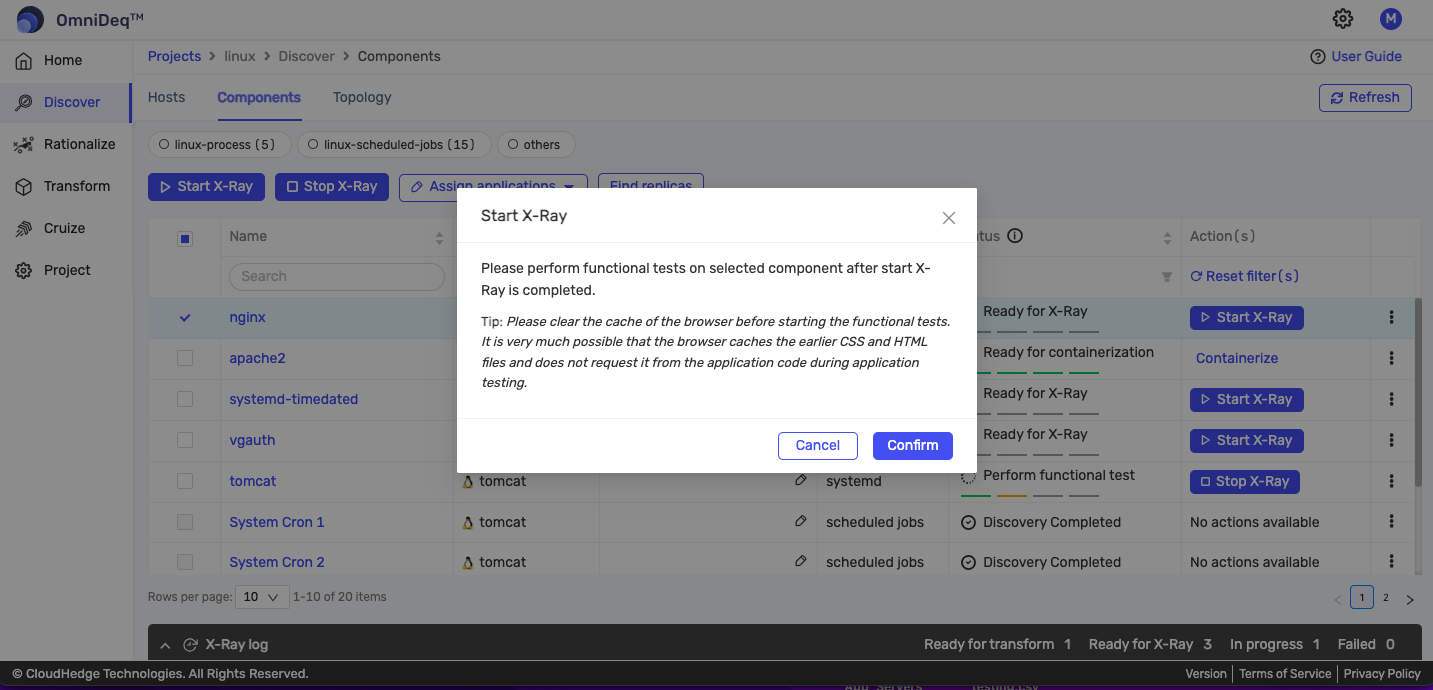
Confirm Start X-Ray
Once you click the Start X-Ray button, a confirmation popup will appear as shown in the image below. Read the information text carefully and confirm.
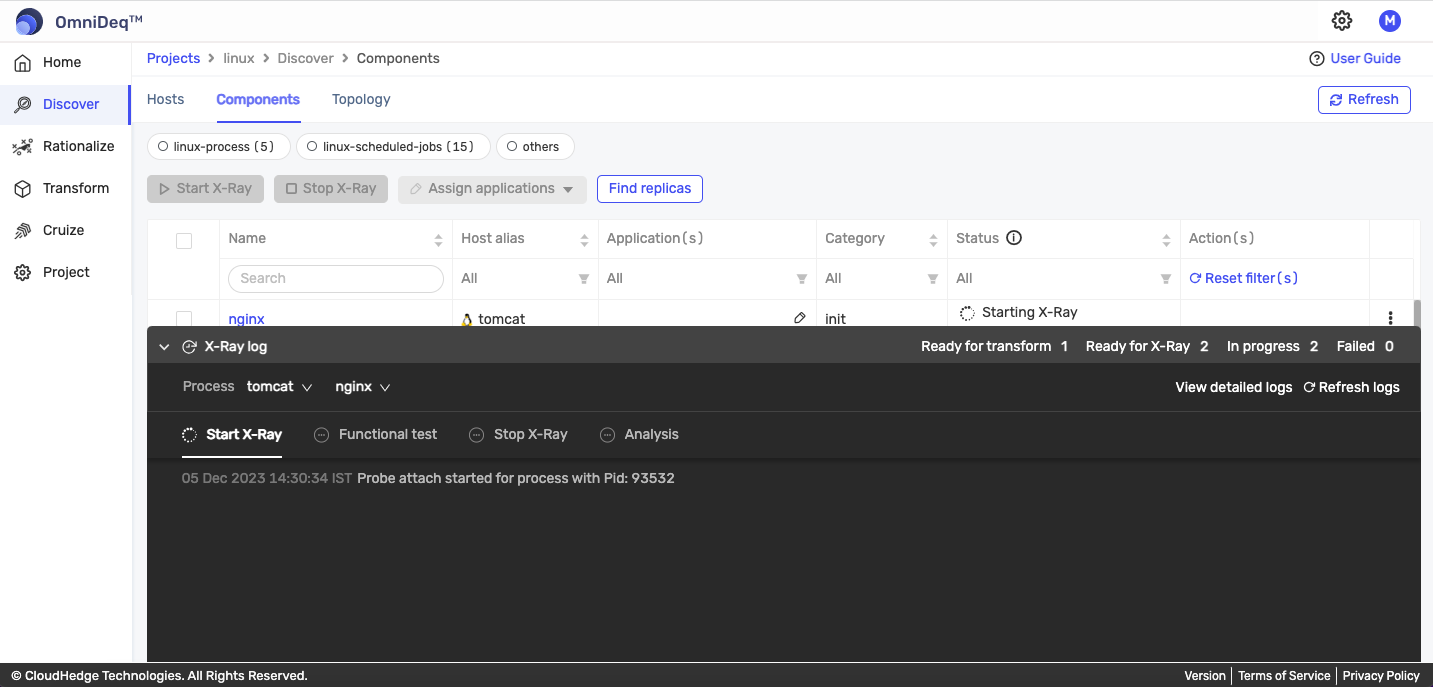
View X-Ray Status
Once you start the X-ray on the process(es), you will start getting the new X-ray status of the desired process(es) in the Status column as shown in the image below.
You can see the X-ray logs after the X-ray process is started, as shown in the image below.
Step 5: Perform Start X-Ray on Multiple Processes
You can select multiple processes to perform X-ray. There is a limit to select the number of processes per host at a time. You can change the selection limit through Settings → Configuration → User Preferences.
Step 6: Perform Functionality Testing on the Host
Perform the functionality testing on the host while X-ray probes are attached.
Step 7: Perform Stop X-Ray on Individual Process
Option A: Using Selection and Button
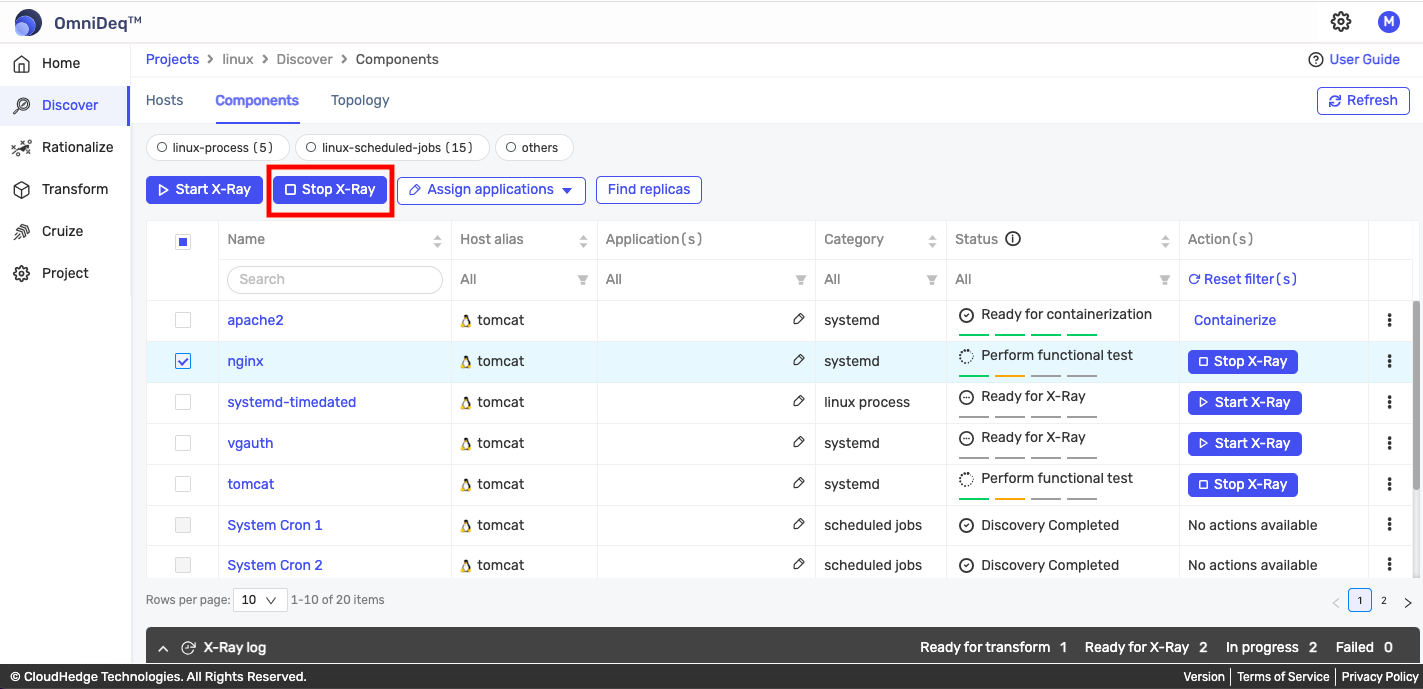
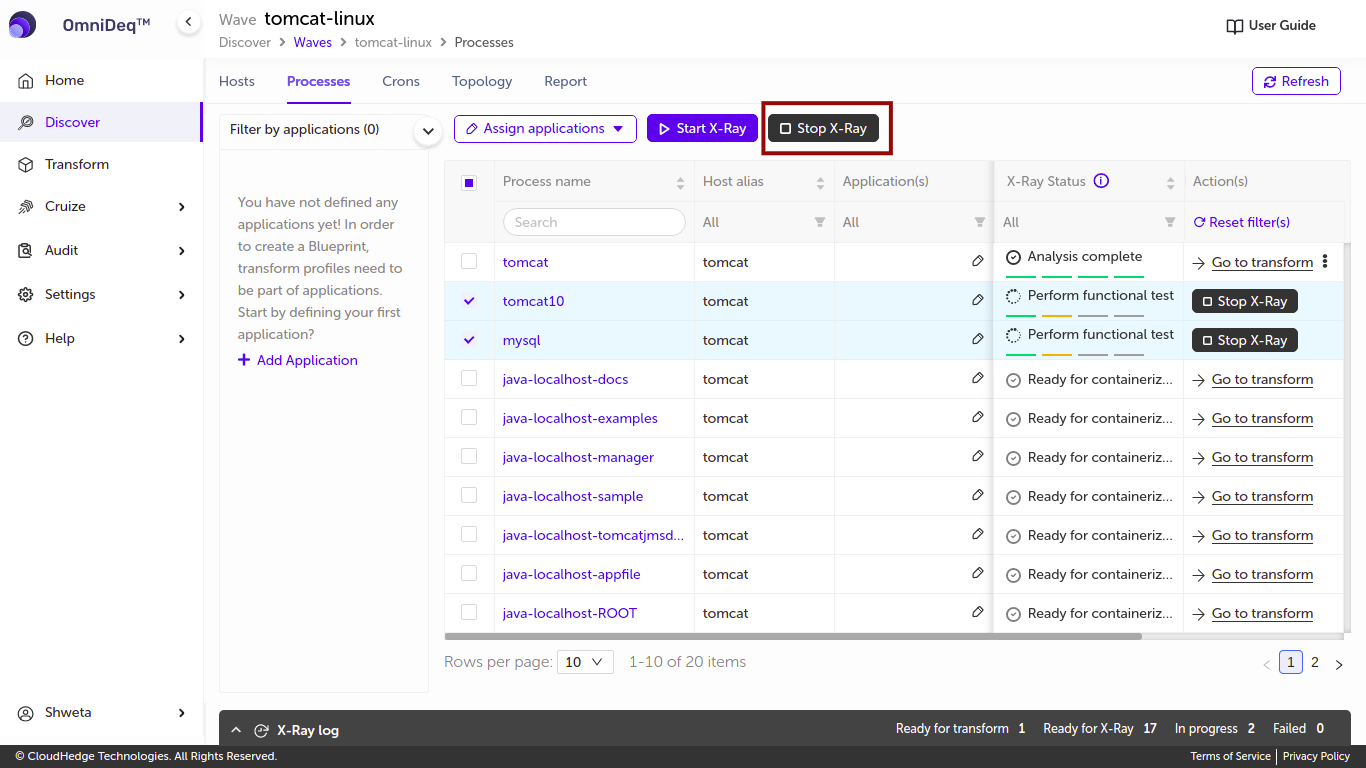
Once the functionality testing is complete, click the Stop X-Ray button as shown in the image below.
Option B: Using Action Button
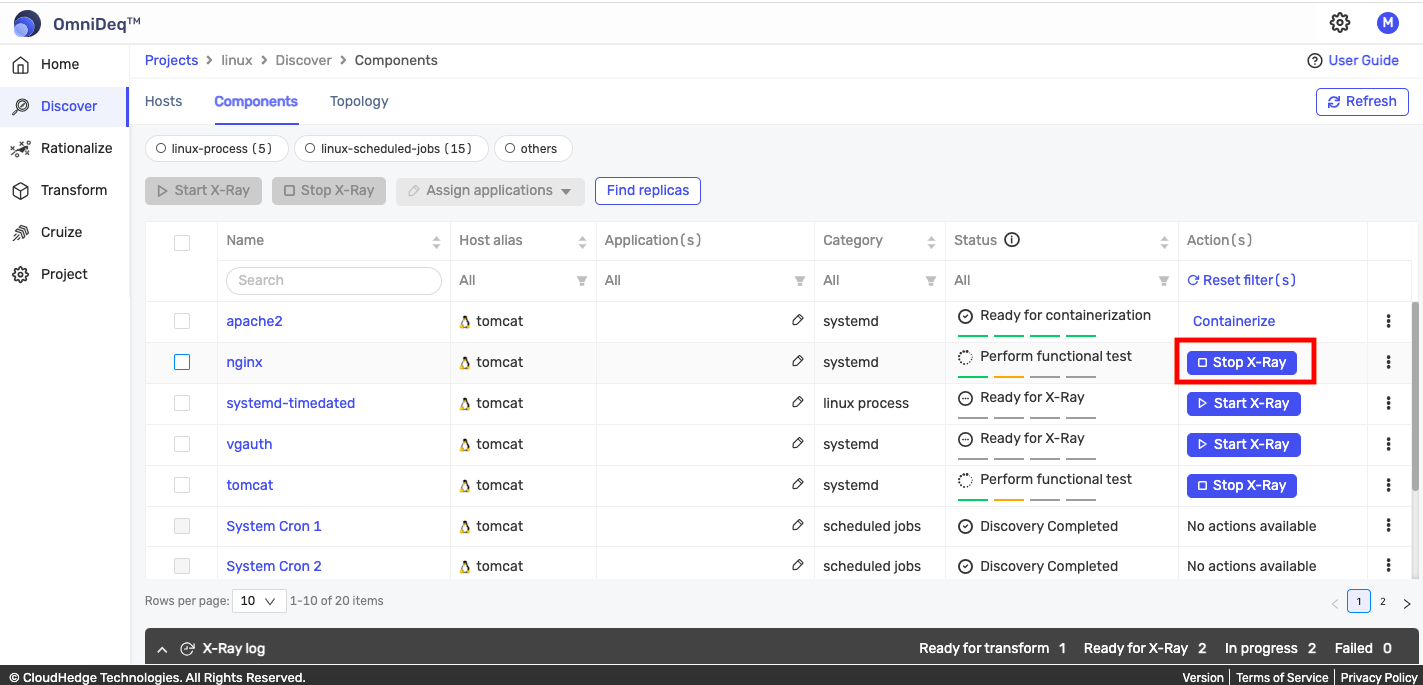
You can also stop X-ray using the individual Stop X-Ray action button which will be shown once X-ray is started successfully for the desired process under the Status column as shown in the image below.
Confirm Stop X-Ray
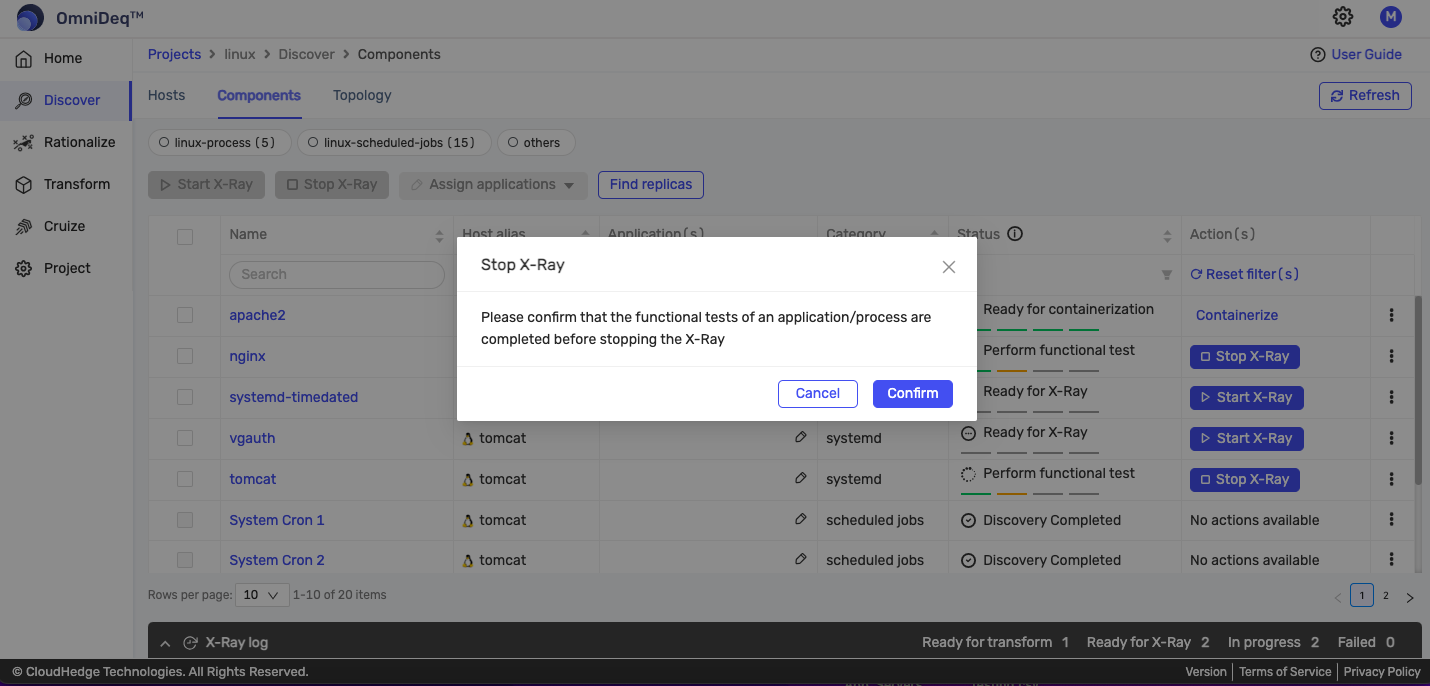
Once you click the Stop X-Ray button, a confirmation popup will appear as shown in the image below. Read the information text carefully and confirm.
View X-Ray Status
Once you stop the X-ray on the process(es), you will start getting the new X-ray status of the desired process(es) in the Status column as shown in the image below.
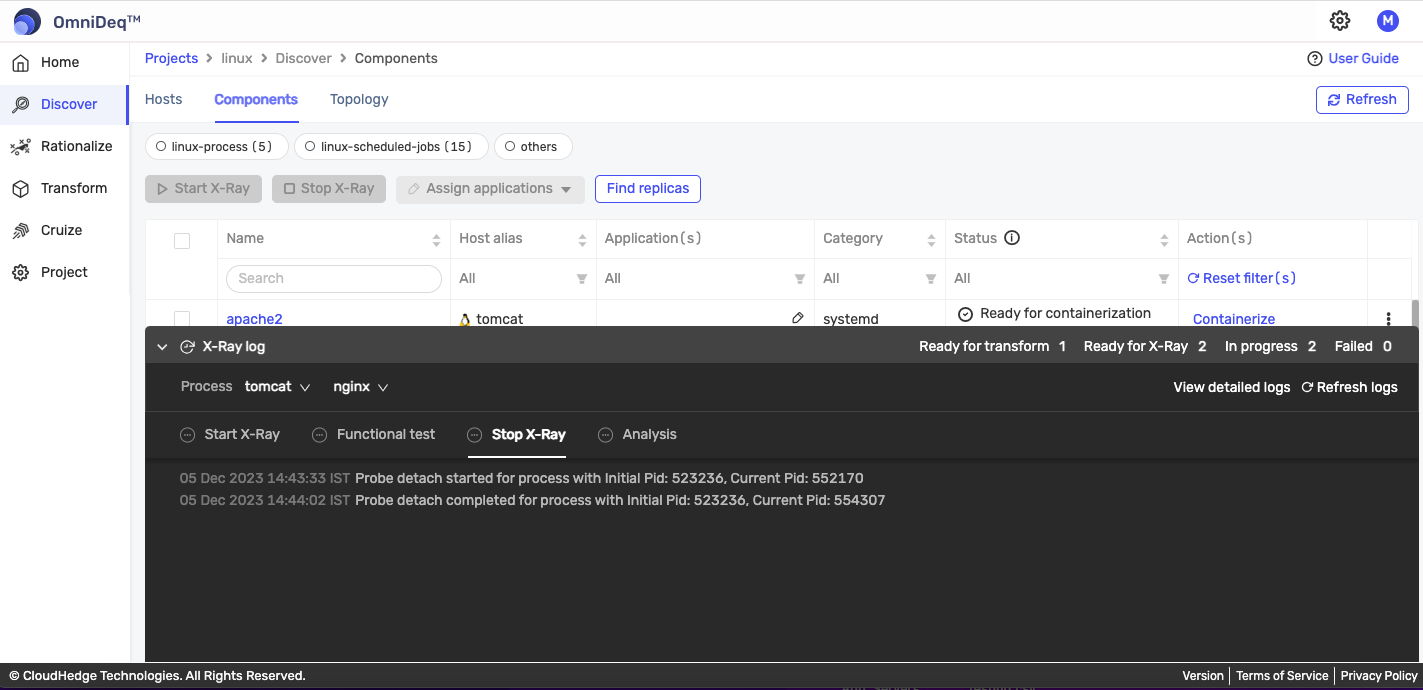
You can see the X-ray logs after the X-ray process is stopped, as shown in the image below.
Step 8: Perform Stop X-Ray on Multiple Processes
You can select multiple processes to perform stop X-ray. There is a limit to select the number of processes per host at a time. You can change the selection limit through Settings → Configuration → User Preferences.
Step 9: Restart Analysis (If Needed)
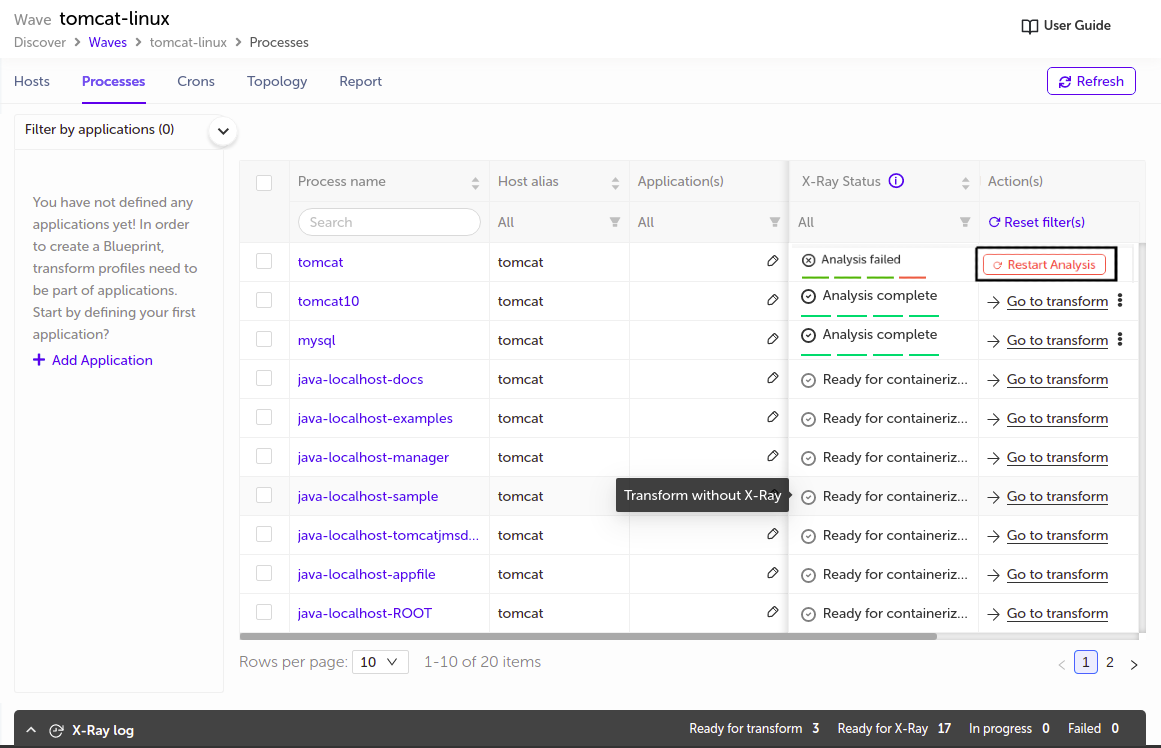
If analysis failed, click the Restart analysis button as shown in the image below. It will start a fresh analysis.
Step 10: Discovery Process Complete
The discovery process is complete now.
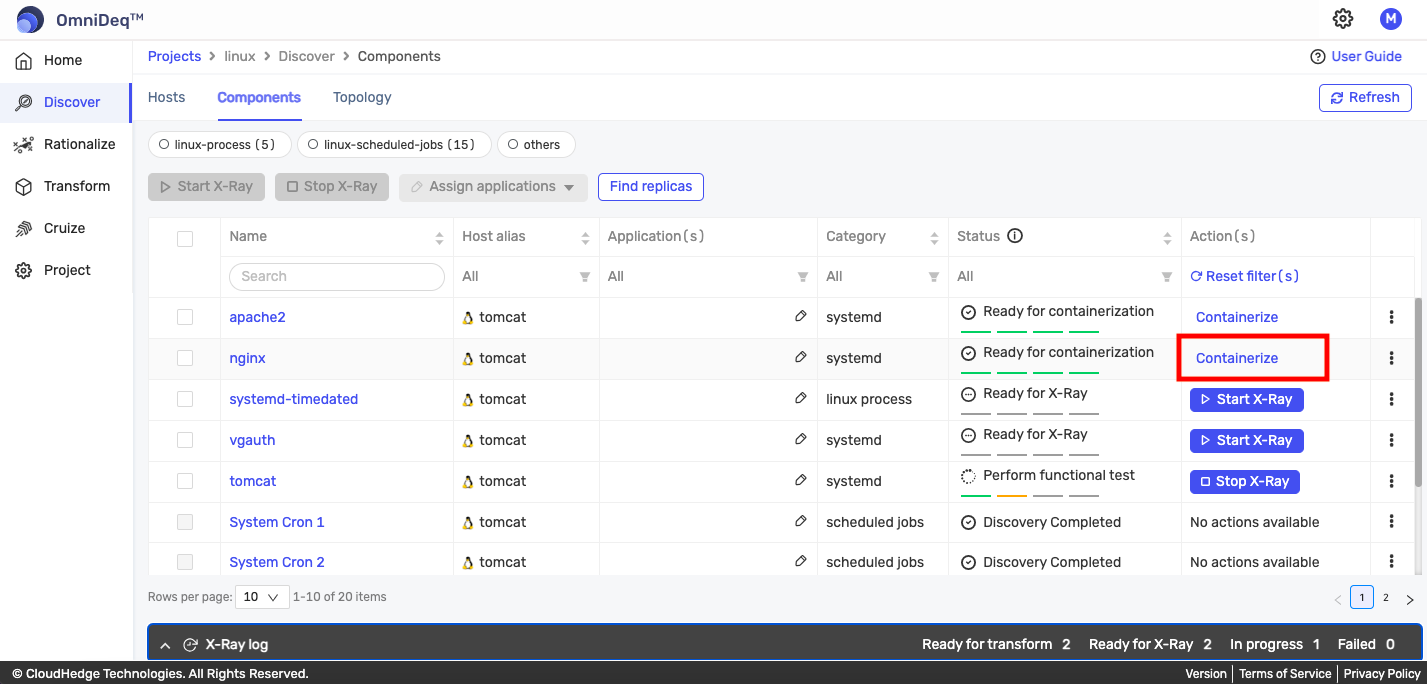
- After completing the X-ray process, you can see the status of every X-ray state in the Status column
- If the X-ray is completed successfully for the process(es), you will see the Containerize action in the Action column using which you can go to the Customize Build Option of the Transform page for further transform process
Example:
Step 11: View Process Network Info
You can view the process's network info after X-ray in the process's More Info tab. Click here to jump to the More Info tab.
Step 12: View Topology
You can view the topology after the discovery process. Click here to learn more about the topology.
Additional Features
Sort
You can sort data by sorting any attribute of process data. For sorting, click on the column name header of the column on which sorting is provided.
Filter
You can filter data by applying a filter on any attribute of process data on which a filter is provided.
Search
You can search for a specific process by process name using the search box displayed in the process name column header.